Mike Goetzke
Member
- Joined
- Jul 12, 2008
- Messages
- 1,208
rvieceli said:Mike I feel that in order to give you better advice, a quick run down on what you are actually considering constructing. A quick sketch on a piece of paper will be helpful. Perhaps an estimate on how often this thing would be assembled/disassembled as well
Ron
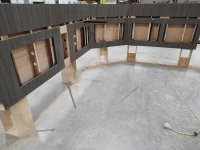
Ron - I'm building my second crib. On the first one I used EZ-Lok inserts. Just wondering if there is a better method 8 years later.
I just did an experiment using a 1/4-20 bolt as a tap and was amazed how strong the threads held. I drilled a blind hole about 1/2 way into a 1" piece of ash and used my impact driver. The screw never stopped so I thought the threads were stripping but to my surprise the end of the bolt broke through the board and the threads looked great!
Reason I thought of Domino connectors is that they would be MUCH easier to access to tighten. When bolts are used you need to fight with the maximum distance between slats to access the bolt head.