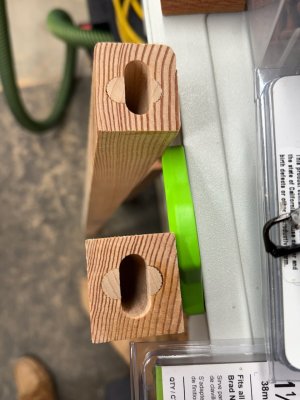
The Domino Cross Stop Minimizes Pencil Lines and Improves Precision

[member=15289]Birdhunter[/member] Fully agree.  Plus there are additional steps one can take to get that precision when needed.  You can have matching length stock, dead on mortise/domino alignment, but then the clamping pressure can throw something off.  So I now just build slack into my production process for things like door/cabinet panels or canvas stretchers, e.g., I initially build a planned 18" x 32" door frame at 18 1/8" x 32 1/8" or 18 3/16" x 32 3/16".  After glue up I square one corner with the track saw, then cut the rest to final size.  And it's not like you don't have to shave even more off in some cases to fit them to the specific cabinet carcasse.

Birdhunter said:
I use extremely tight tolerances where necessary but not when applications do not need tight tolerances. Very few of my woodworking applications require or benefit from using tight to tight mortises. Using tight to loose mortises requires just a couple of hammer taps to achieve perfect alignment. Less stress fewer bad words!
 
I know this is an older thread, but I thought I would add something that might be of interest.

I use the tight setting for all of my mortises but I shave off a little bit of the sides of each domino (not the top or bottom). Basically I flatten out the rib on each side.

This gives me something like 1/64 to 1/32 of movement side to side. This is usually more than enough to easily fit joints together and get the desired alignment. This also makes dry fitting much easier.

I don't know whether it provides any real mechanical advantage, but it makes me feel better. And since one of the posters here said they wished there was a setting that was tighter than wide but looser than tight, I thought I would mention this.
 
Another thing you can do is plunge in both sides of the line, on one of the parts. This gives you a tight and an "almost tight"  [big grin] That variance can be far less than the 3mm that the loose setting will give you.
 
First, you're right that there's little official info. on how to use it from Festool. None? The promo video looks simple and easy, but it's not really the case.

Before you try my procedures shared here, check that the paddles on your machine are properly set. If not, refer to the manual on how to tune it in alignment.

The big reason why your mortises didn't line up is two-folded: 1) Most likely, you used tight setting for all the cuts, and 2) When used in tight setting, if any one of the previous mortises was milled slightly off, the rest of them would be off in a compound manner.

Here's how I use the cross stop with success every time. Refer to the drawing as you read the steps:

1) Cut the first mortise on both mating pieces in the tight setting using the paddle to register (that's why I suggested that you check them for alignment first)
2) Set the width to the wide (middle) setting
3) Cut the last mortise on the other end of the two boards using the paddle again for registration
4) On the first board, use the right arm (R) of the cross stop to register against the first tight mortise, and mill the next mortise (wide)
5) Repeat step 4 but registering against the freshly milled wide mortise until all the mortises are milled
6) Proceed to the second mating board, and use the left arm (L) of the cross stop to register against the first tight mortise to mill the second mortise (wide).
7) Repeat step 6 registering against the just milled wide mortise to mill the rest of wide mortises.

In the end, only two tight mortises are cut (for alignment) and the rest wide. This allows you to put the two boards together with ease even if any or all of the mortises are milled slightly off.

Try this on scrap boards first!
I just came across this older post but I wanted to thank Chuck for taking the time to put it together.

It clarified several things for me and I found it very helpful!
 
I think I missed this part of your post.

You can easily fix the misalignment: locate the mortises that are misaligned, make pencil lines on one of the boards and mortise them again to widen them slightly (with the tight setting if appropriate). There's no need to make adjustments on both boards.
That is another nice thing about domino mortices, it usually possible to fix mistakes. You can made the mortices wider, or make the dominos narrower. Most of the glue strength is mostly across the narrow side, not the edges.

In a recent project I was making narrow stretchers where the height and depth were slightly different. I made a mistake milling the mortices (wrong orientation). The fix was to glue a domino in the mortice, let it dry, cut it off, and mill a new mortice in the right orientation. Worked great, and of course, no one can see it.

Bob

IMG_0915.jpeg
 
Back
Top