tjbnwi
Member
- Joined
- May 12, 2008
- Messages
- 7,384
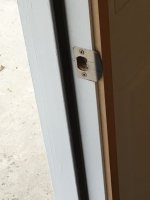
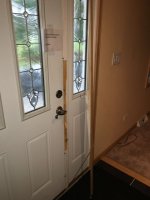
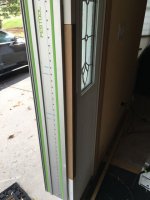
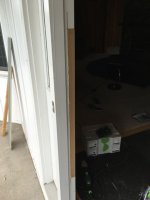
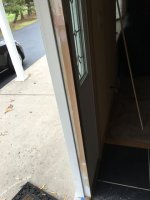
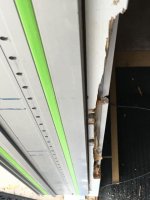
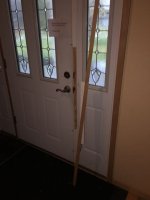
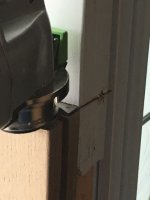
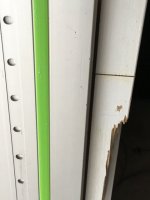
A break-in necessitated the repair of this door jamb.
[attachthumb=1]
[attachthumb=2]
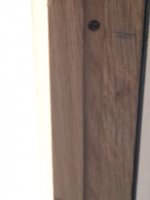
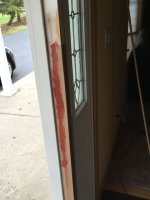
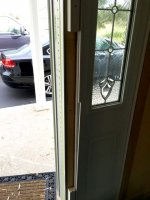
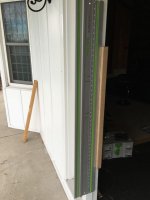
Quater sawn white oak glue up dutchmen. Hot melt glue used to hold it to the jamb.
[attachthumb=3]
[attachthumb=4]
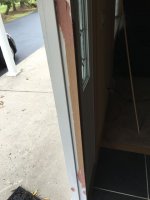
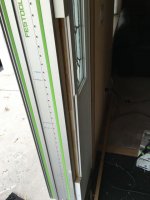
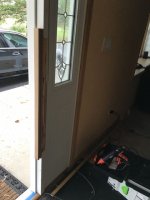
Vectoro used to cut the horizontal joints. Having the dutchmen glue in place made for accurate cuts.
[attachthumb=5]
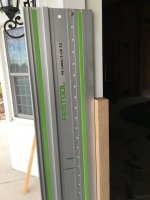
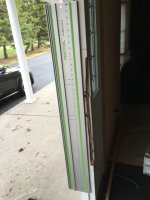
Aligning the guide rail to the dutchmen was a simple matter of placing the anti splinter strip against the dutchmen. Using the hollie rail made it easy to mount the rail with screws.
[attachthumb=6]
[attachthumb=7]
[attachthumb=8]
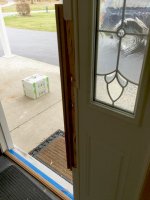
I purposely over cut, made it easy to remove the damaged piece.
[attachthumb=9]
[attachthumb=10]
[attachthumb=11]
[attachthumb=12]
Test fit.
[attachthumb=13]
Installed with glue and GRK trim screws.
[attachthumb=14]
[attachthumb=15]
[attachthumb=16]
A little bondo to fill the horizontal joints.
[attachthumb=17]
[attachthumb=18]
A touch of glazing.
[attachthumb=19]
Sanded and primed.
[attachthumb=20]
[attachthumb=21]
Paint and strike.
[attachthumb=22]
Mullion installed.
[attachthumb=23]
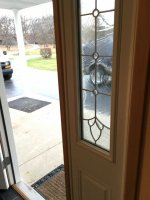
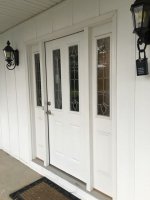
Done
[attachthumb=24]
Tom
[attachthumb=1]
[attachthumb=2]
Quater sawn white oak glue up dutchmen. Hot melt glue used to hold it to the jamb.
[attachthumb=3]
[attachthumb=4]
Vectoro used to cut the horizontal joints. Having the dutchmen glue in place made for accurate cuts.
[attachthumb=5]
Aligning the guide rail to the dutchmen was a simple matter of placing the anti splinter strip against the dutchmen. Using the hollie rail made it easy to mount the rail with screws.
[attachthumb=6]
[attachthumb=7]
[attachthumb=8]
I purposely over cut, made it easy to remove the damaged piece.
[attachthumb=9]
[attachthumb=10]
[attachthumb=11]
[attachthumb=12]
Test fit.
[attachthumb=13]
Installed with glue and GRK trim screws.
[attachthumb=14]
[attachthumb=15]
[attachthumb=16]
A little bondo to fill the horizontal joints.
[attachthumb=17]
[attachthumb=18]
A touch of glazing.
[attachthumb=19]
Sanded and primed.
[attachthumb=20]
[attachthumb=21]
Paint and strike.
[attachthumb=22]
Mullion installed.
[attachthumb=23]
Done
[attachthumb=24]
Tom
Attachments
-
 IMG_0109.jpg36.2 KB · Views: 472
 -
 IMG_0163.jpg43.7 KB · Views: 343
 -
 IMG_0166.jpg29.8 KB · Views: 307
 -
 IMG_0167.jpg43.5 KB · Views: 304
 -
 IMG_0168.jpg23.5 KB · Views: 317
 -
 IMG_0170.jpg34.7 KB · Views: 290
 -
 IMG_0171.jpg37.5 KB · Views: 293
 -
 IMG_0172.jpg37 KB · Views: 323
 -
 IMG_0175.jpg28.2 KB · Views: 314
 -
 IMG_0162.jpg48 KB · Views: 289
 -
 IMG_0161.jpg42.3 KB · Views: 287
 -
 IMG_0160.jpg37.9 KB · Views: 284
 -
 IMG_0110.jpg28.3 KB · Views: 459
 -
 IMG_0150.jpg36.9 KB · Views: 351
 -
 IMG_0151.jpg44.9 KB · Views: 305
 -
 IMG_0155.jpg26.8 KB · Views: 348
 -
 IMG_0156.jpg35 KB · Views: 341
 -
 IMG_0157.jpg36.8 KB · Views: 336
 -
 IMG_0158.jpg42.9 KB · Views: 297
 -
 IMG_0159.jpg27.9 KB · Views: 288