4nthony
Member
I finally finished the credenza I'd been working on for several months.
From SketchUp...

... to finished piece. In the end, I reconfigured the drawers from 3 to 2, swapped out the middle cabinet doors with a drawer and fold-down door, and went from vertical to horizontal pulls (while considering other designs, as noted).

This little door mockup with hinges gave me an idea of how I'd inset my doors.

My first dry fit

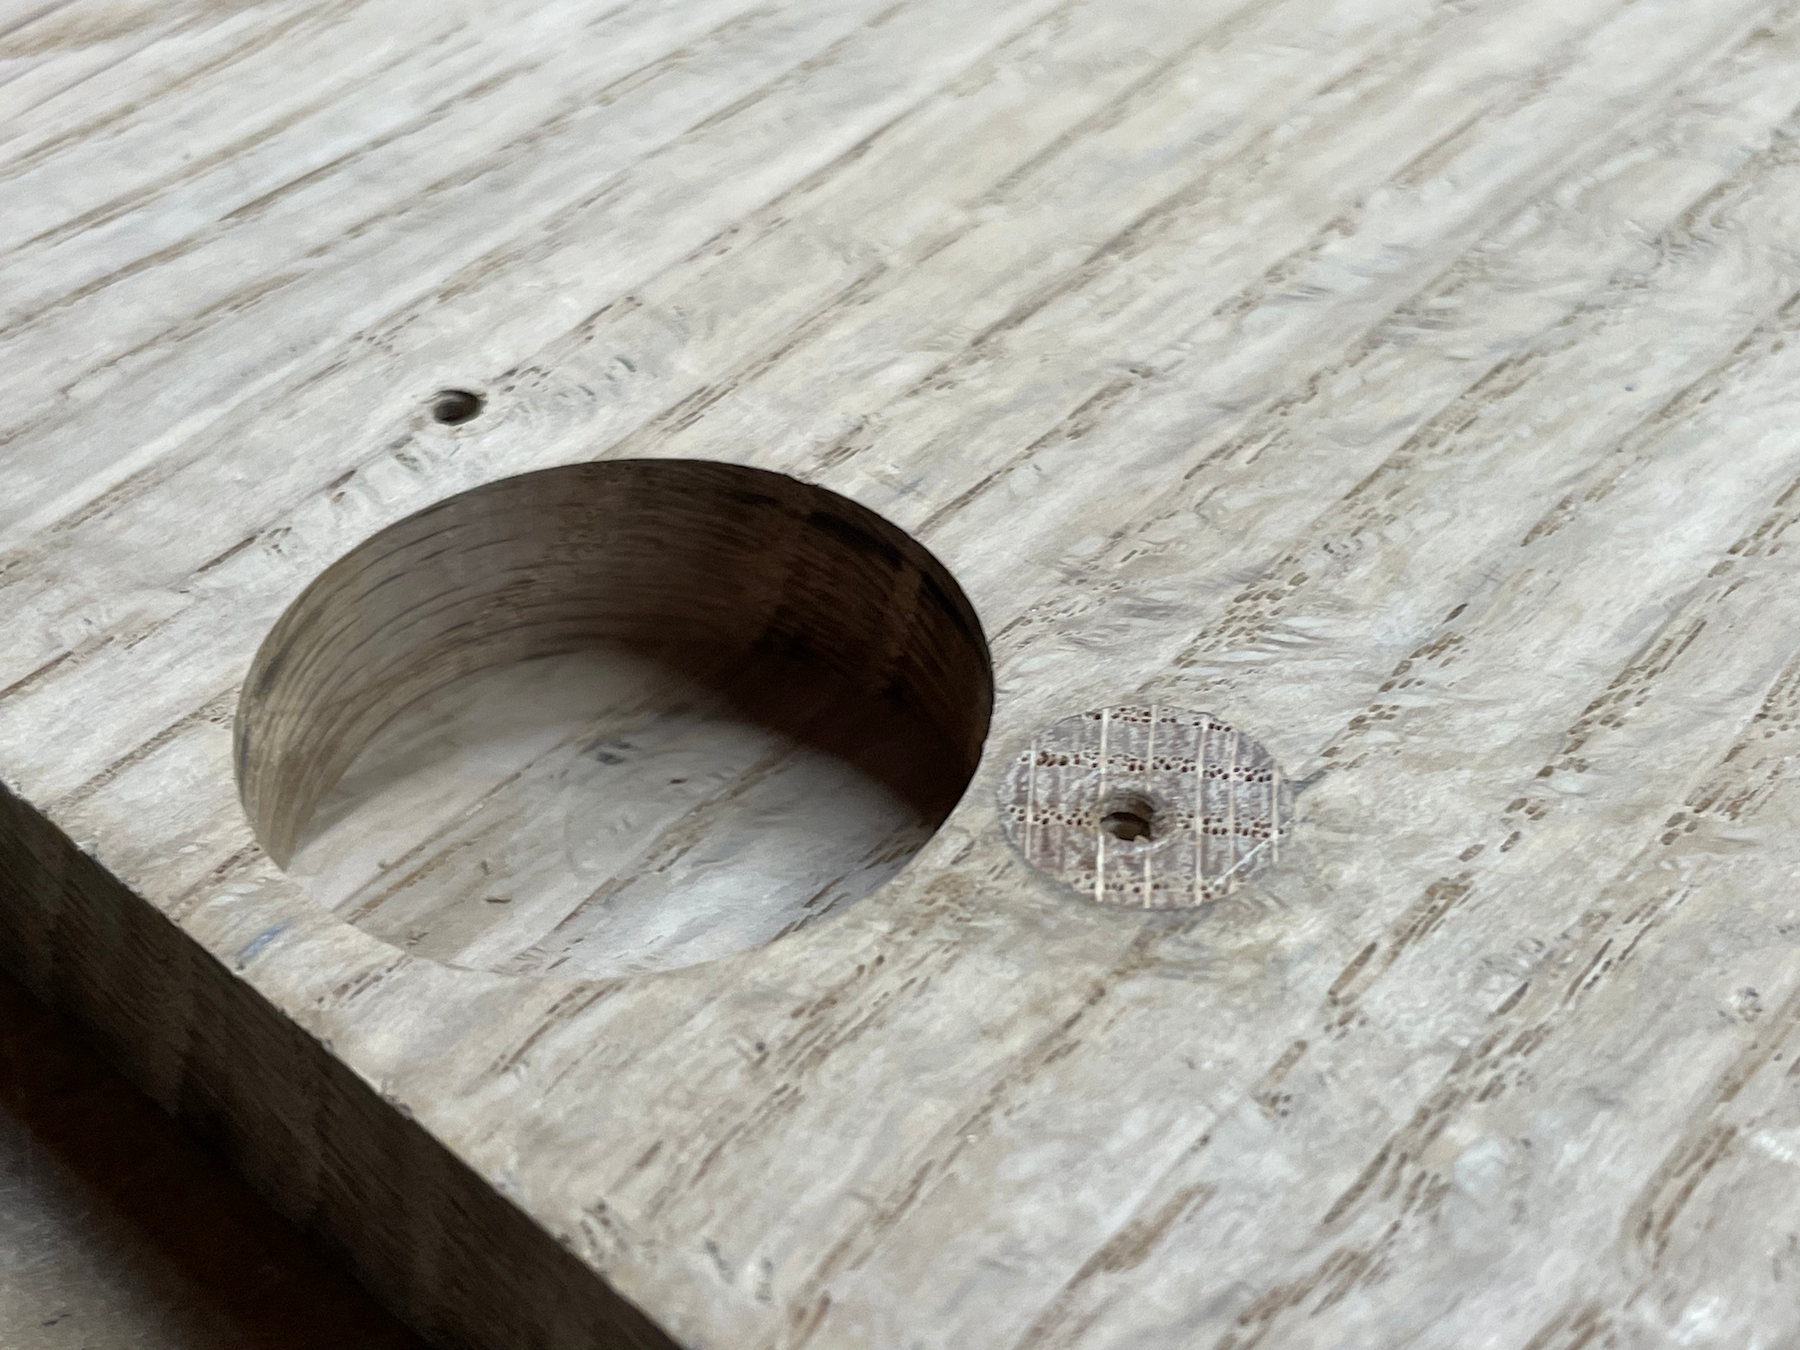
Throughout the project, I had some misplaced dominos that needed to be plugged and recut...

...or just plugged.


The clamping squares helped keep the carcass square, however the vertical dividers ended up being slightly out of square. This became obvious when it came time to fit the door/drawer panels.

Tetris blocks in the garage. My garage is pretty small and these took up most of the space.

Fitted with French cleats and ready for installation.

The $10 Stud Buddy I picked up at Lowe's worked amazingly well finding the wall studs.

Also, I'm not a fan of red lasers. The red laser just seemed blurry to me when up close and was hard to focus on. Maybe a green laser is easier to see and more crisp?
I got lucky in that there were studs on both sides of the outlet. At some point in time, a section of pickwick was replaced with plywood. Had that not happened, I would've only had one stud to mount the middle cleat. Though, the paneling is 3/4" thick so might've worked ok to help support the cleat if necessary.

Boxes on the wall. Phase one is complete.
Phase two, drawer boxes and shelves.

My local hardwood dealer had a few 14' quartersawn boards and of the ones I pulled off the rack, I liked the two on the right. Unfortunately, I couldn't find a third board to complement the grain wave. I ended up bringing the 3 on the right home, but in hindsight...I should've kept looking through the rack and found a better match. The straighter grain stands out to me in the finished panels. It was also lighter in color.

The boards were ~20-21mm and I milled them down to 18.5mm to be closer in thickness to the carcasses.

Copied these joint bridges from Woodpeckers. They were useful, but they also added to the stress of a glue-up, having to hold them in place while getting them clamped up. I also added notes to let me know which size Domino mortice to use for each panel.

I was able to get all 5 panels clamped up.

The initial panel fit.

Once I got the hinges mounted on the doors, I snuck up on the fit then used a 2mm setup block to scribe the final gap

I was using a square to square up the hinges but it slipped and I ended up placing one of the mounting holes incorrectly. I was able to drill it out, fill it with a dowel, and try again. Fortunately, the hinge covers it up.
The 2.2mm kerf on the TS55 was perfect for cutting the drawer panels in half.

The initial plan was to use vertical pulls on the doors and I received some great advice on how to go about attaching the pulls and dealing with grain orientation and movement...

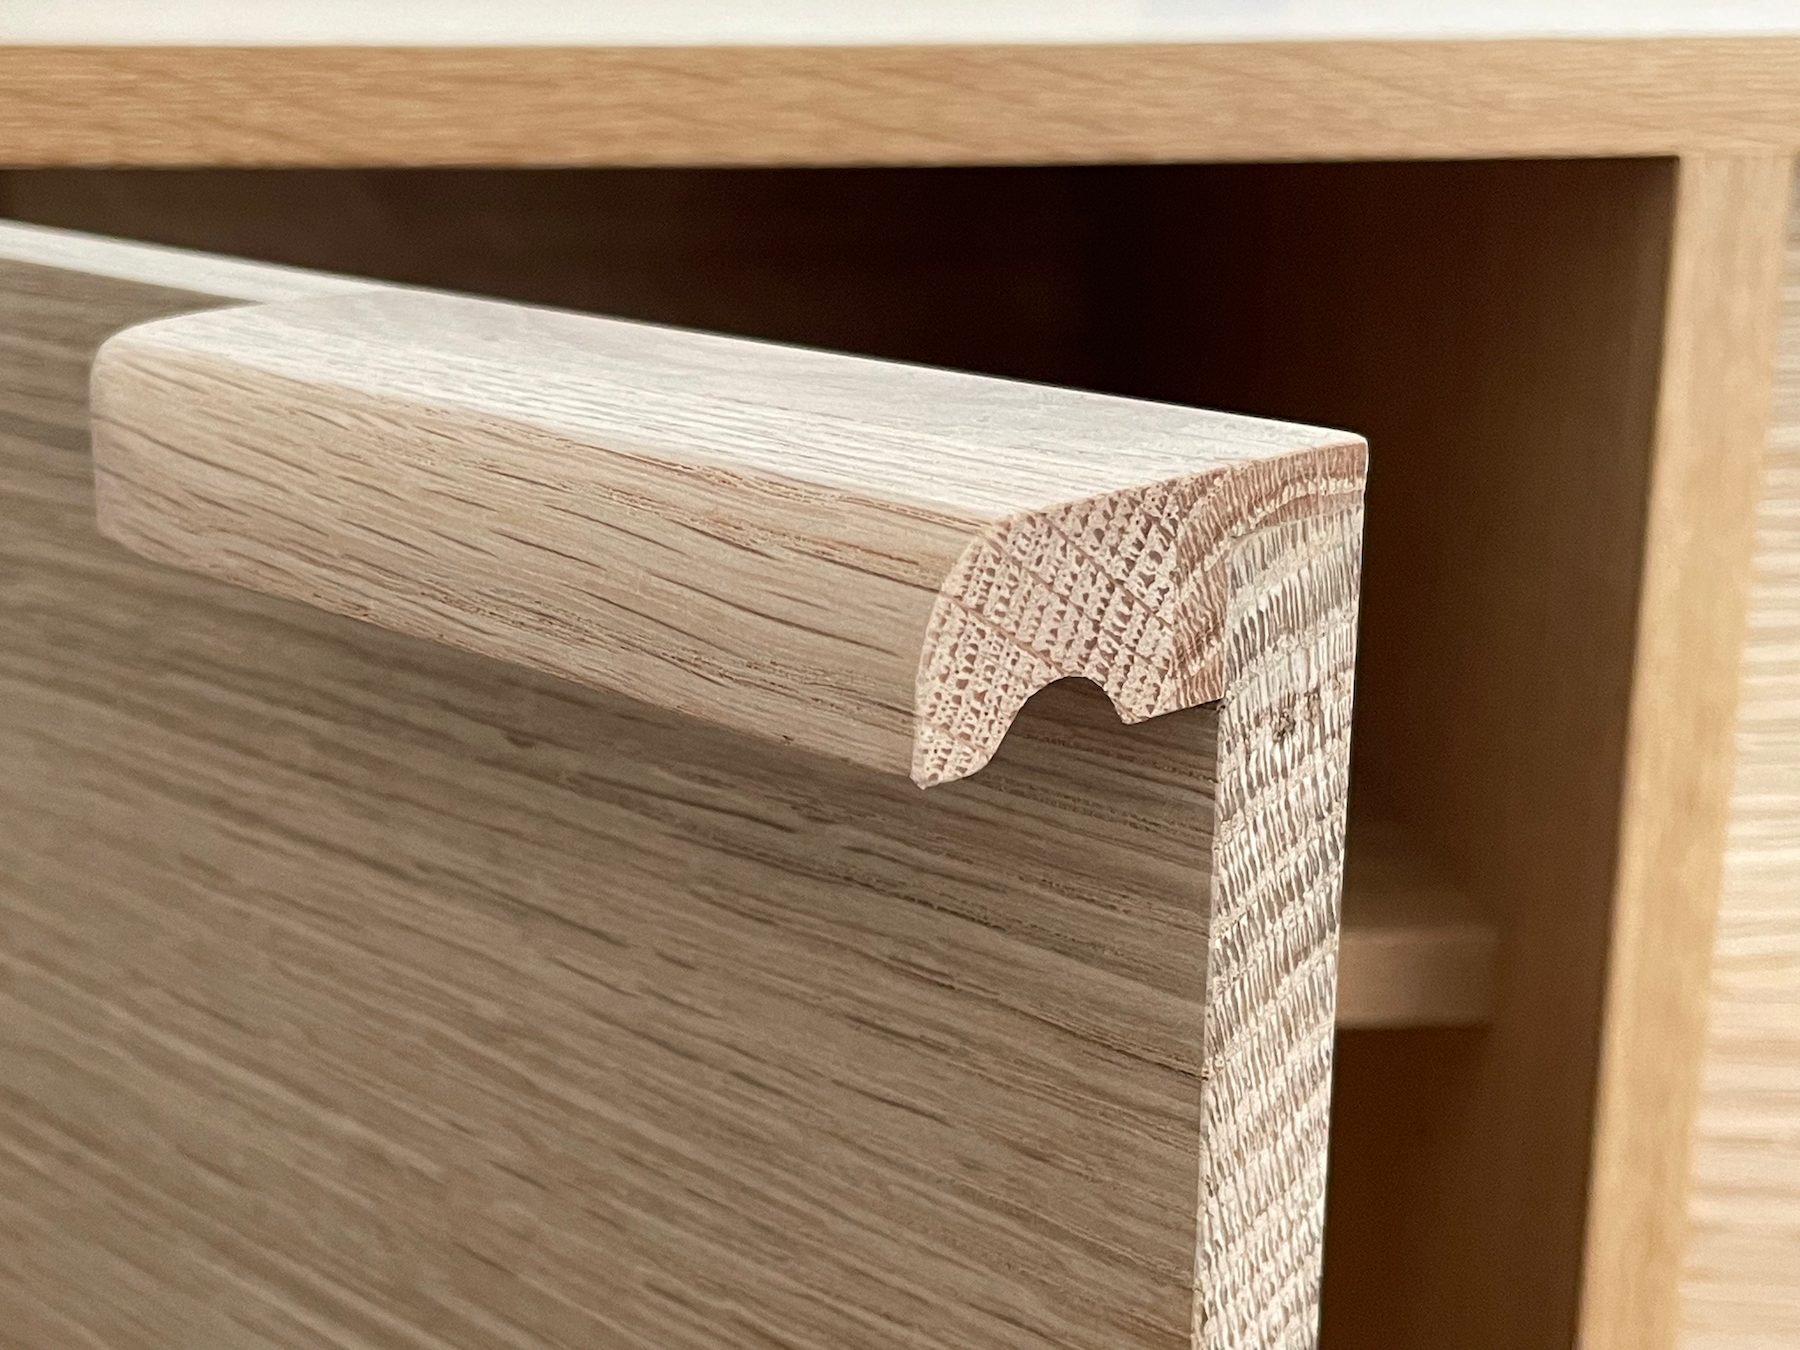
...but I scrapped the vertical pull idea and opted for smaller pulls at the top of the door.

...for a smaller pull.


I wish I'd had the foresight to make all the pulls (at least the ones on top) with continuous grain. It could've been a nice, but rarely noticed, design detail.


I love these little drawer front mounts. On the kitchen refacing project I did last year, my fronts were inset and it was difficult using clamps to line up the fronts. These little guys solved the problem. Very useful.

I'm getting quite a bit of use out of my Doscornio vacuum clamp. One thing about the Doscornio is you can't manually clamp the base to your bench like you can with the Vac-Sys. You could clamp a piece of plywood and suction the base to the plywood, but I ended up making a quick mount that is screwed to the front of my bench. This puts the clamp in a slightly more convenient spot and at a friendlier height than if it was on top of my bench.


The curve on this test board was another design thought I had. I bought some bits to make the curved finger pull and tried a few test cuts. It felt a bit sketchy and I wasn't comfortable making the cuts so I went back to the pull idea.
This piece also has my test batten. I had asked FOG about whether or not battens were required and initially, I was not going to put them in. I noticed my panels had started to develop a slight curve so I went for it.

I screwed some temporary fences and stops into my bench and cut my dovetails.

My stack-o-battens

Fitted to the panels. I wasn't paying attention and was following instructions from a different project and secured these at the top of the door, rather than in the middle. We'll see what happens with seasonal movement and how much of my reveal is lost at the bottom. [doh]

Finished battens with plugs, and screws in elongated holes holding the batten but hopefully not impeding wood movement.


Ouch. I got some tearout on a few of the dovetails. I'll go back and patch these (or not?) but fortunately, they are not visible from the front.

I used Osmo Raw matte on these and have been very happy with Osmo. Easy to apply and easy to buff out.

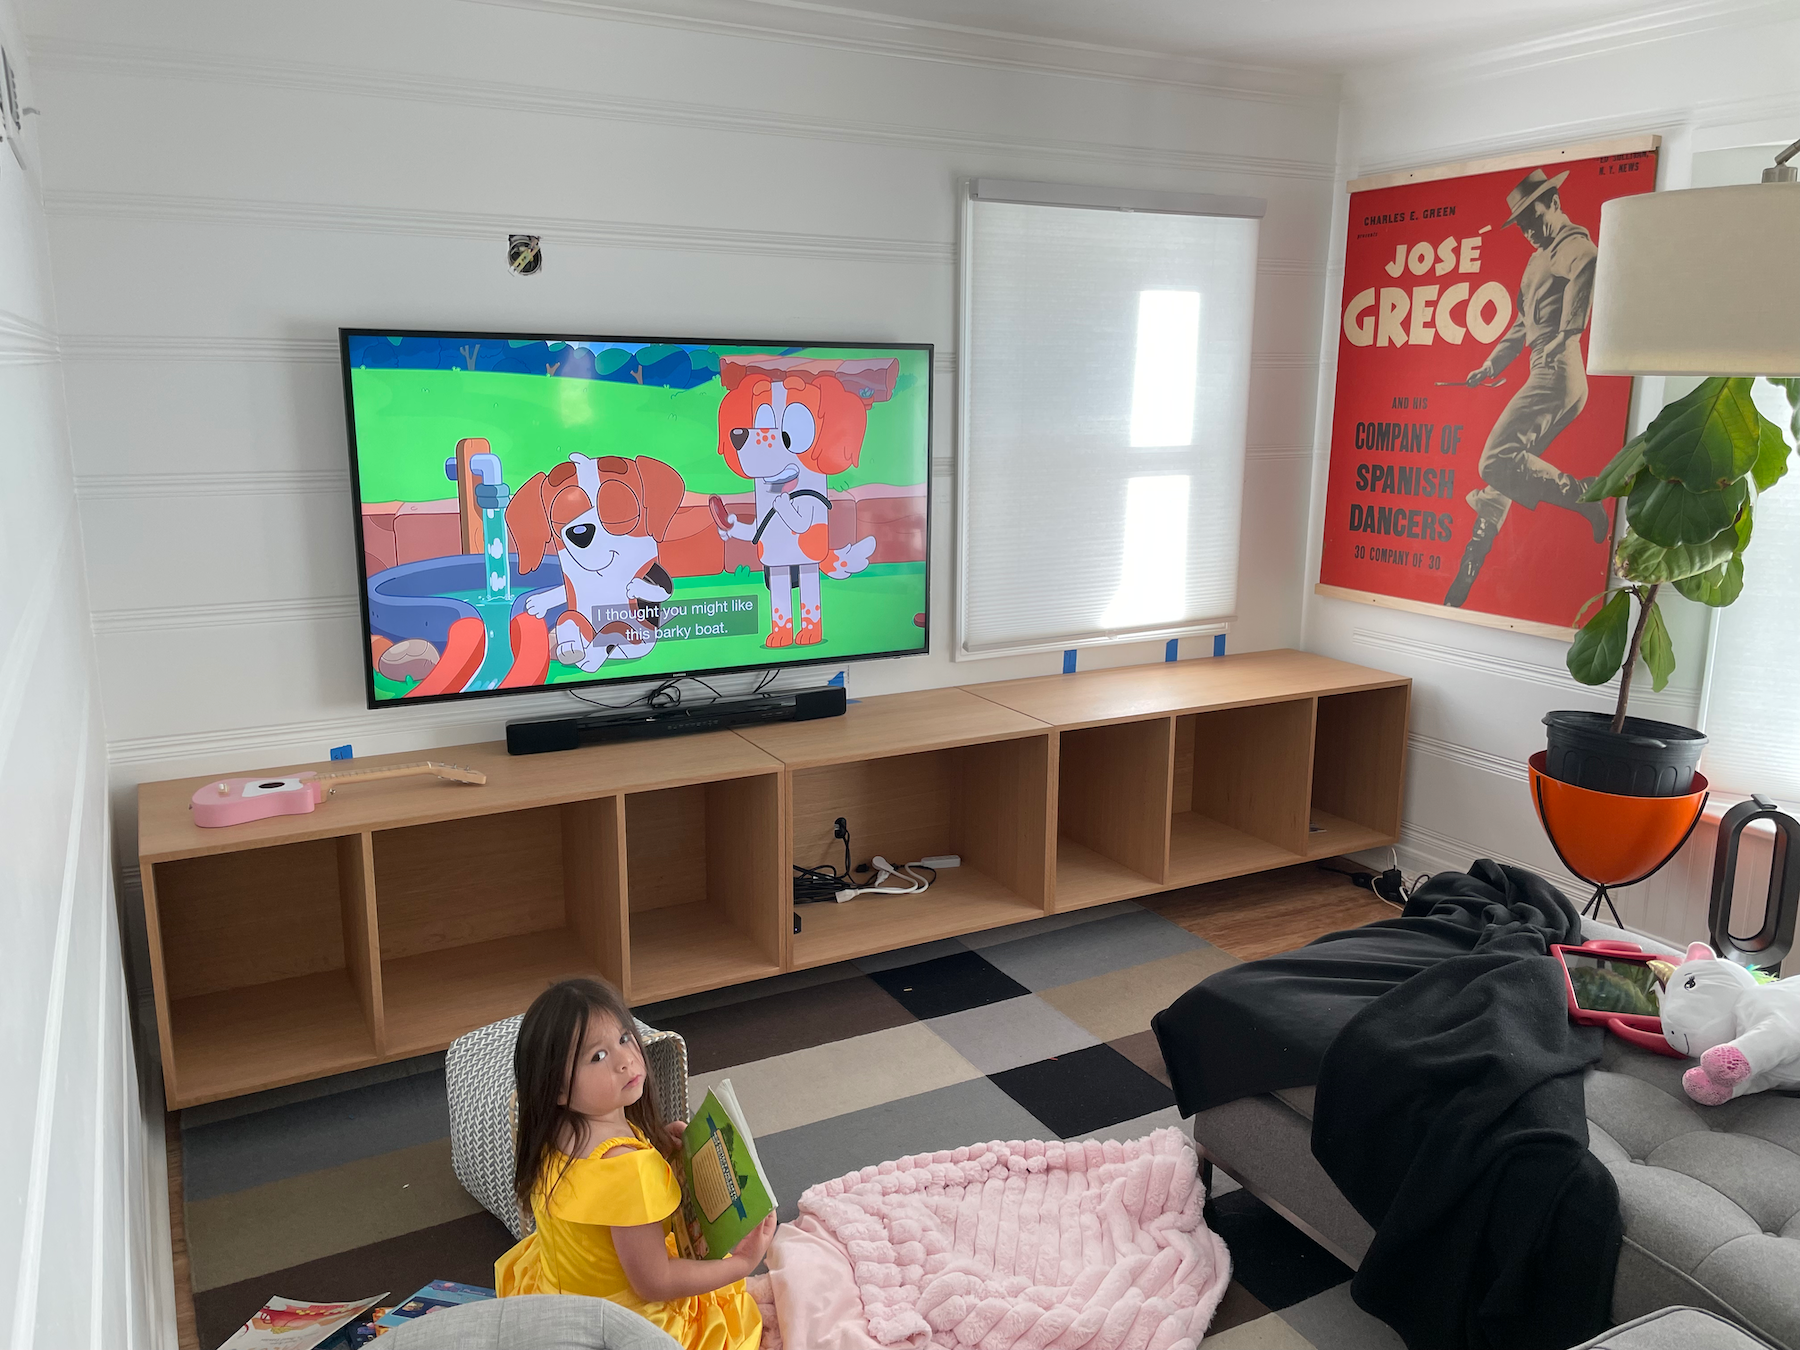
All done.
Lots of space for my daughter to stash her toys.

One thing I noticed about the "3rd board" (on top) was it had this darker section. I thought it was tape residue or something but it never sanded out.

Another one of my dovetail tear-outs at the bottom (and some screwy elongated holes).

The next plan is to make a smaller cabinet that will go above the TV.
Anyway, I've said this before in other threads but this is such a great community and I'm happy to be a part of it. Thanks to everyone who has commented on my posts when I've asked for assistance and for helping this hobbyist woodworker improve.
Cheers!
Anthony
edit for typos
From SketchUp...
... to finished piece. In the end, I reconfigured the drawers from 3 to 2, swapped out the middle cabinet doors with a drawer and fold-down door, and went from vertical to horizontal pulls (while considering other designs, as noted).
This little door mockup with hinges gave me an idea of how I'd inset my doors.
My first dry fit
Throughout the project, I had some misplaced dominos that needed to be plugged and recut...
...or just plugged.
The clamping squares helped keep the carcass square, however the vertical dividers ended up being slightly out of square. This became obvious when it came time to fit the door/drawer panels.
Tetris blocks in the garage. My garage is pretty small and these took up most of the space.
Fitted with French cleats and ready for installation.
The $10 Stud Buddy I picked up at Lowe's worked amazingly well finding the wall studs.
Also, I'm not a fan of red lasers. The red laser just seemed blurry to me when up close and was hard to focus on. Maybe a green laser is easier to see and more crisp?
I got lucky in that there were studs on both sides of the outlet. At some point in time, a section of pickwick was replaced with plywood. Had that not happened, I would've only had one stud to mount the middle cleat. Though, the paneling is 3/4" thick so might've worked ok to help support the cleat if necessary.
Boxes on the wall. Phase one is complete.
Phase two, drawer boxes and shelves.
My local hardwood dealer had a few 14' quartersawn boards and of the ones I pulled off the rack, I liked the two on the right. Unfortunately, I couldn't find a third board to complement the grain wave. I ended up bringing the 3 on the right home, but in hindsight...I should've kept looking through the rack and found a better match. The straighter grain stands out to me in the finished panels. It was also lighter in color.
The boards were ~20-21mm and I milled them down to 18.5mm to be closer in thickness to the carcasses.
Copied these joint bridges from Woodpeckers. They were useful, but they also added to the stress of a glue-up, having to hold them in place while getting them clamped up. I also added notes to let me know which size Domino mortice to use for each panel.
I was able to get all 5 panels clamped up.
The initial panel fit.
Once I got the hinges mounted on the doors, I snuck up on the fit then used a 2mm setup block to scribe the final gap
I was using a square to square up the hinges but it slipped and I ended up placing one of the mounting holes incorrectly. I was able to drill it out, fill it with a dowel, and try again. Fortunately, the hinge covers it up.
The 2.2mm kerf on the TS55 was perfect for cutting the drawer panels in half.
The initial plan was to use vertical pulls on the doors and I received some great advice on how to go about attaching the pulls and dealing with grain orientation and movement...
...but I scrapped the vertical pull idea and opted for smaller pulls at the top of the door.
...for a smaller pull.
I wish I'd had the foresight to make all the pulls (at least the ones on top) with continuous grain. It could've been a nice, but rarely noticed, design detail.
I love these little drawer front mounts. On the kitchen refacing project I did last year, my fronts were inset and it was difficult using clamps to line up the fronts. These little guys solved the problem. Very useful.
I'm getting quite a bit of use out of my Doscornio vacuum clamp. One thing about the Doscornio is you can't manually clamp the base to your bench like you can with the Vac-Sys. You could clamp a piece of plywood and suction the base to the plywood, but I ended up making a quick mount that is screwed to the front of my bench. This puts the clamp in a slightly more convenient spot and at a friendlier height than if it was on top of my bench.
The curve on this test board was another design thought I had. I bought some bits to make the curved finger pull and tried a few test cuts. It felt a bit sketchy and I wasn't comfortable making the cuts so I went back to the pull idea.
This piece also has my test batten. I had asked FOG about whether or not battens were required and initially, I was not going to put them in. I noticed my panels had started to develop a slight curve so I went for it.
I screwed some temporary fences and stops into my bench and cut my dovetails.
My stack-o-battens
Fitted to the panels. I wasn't paying attention and was following instructions from a different project and secured these at the top of the door, rather than in the middle. We'll see what happens with seasonal movement and how much of my reveal is lost at the bottom. [doh]
Finished battens with plugs, and screws in elongated holes holding the batten but hopefully not impeding wood movement.
Ouch. I got some tearout on a few of the dovetails. I'll go back and patch these (or not?) but fortunately, they are not visible from the front.
I used Osmo Raw matte on these and have been very happy with Osmo. Easy to apply and easy to buff out.
All done.
Lots of space for my daughter to stash her toys.
One thing I noticed about the "3rd board" (on top) was it had this darker section. I thought it was tape residue or something but it never sanded out.
Another one of my dovetail tear-outs at the bottom (and some screwy elongated holes).
The next plan is to make a smaller cabinet that will go above the TV.
Anyway, I've said this before in other threads but this is such a great community and I'm happy to be a part of it. Thanks to everyone who has commented on my posts when I've asked for assistance and for helping this hobbyist woodworker improve.
Cheers!
Anthony
edit for typos

