Too smooth for gluing?

Packard said:
Picture framers use miter joints with (usually) V-nails to hold the miter in position while the glue is drying.  Its only reason for existing it to eliminate the need to clamp.  While clamps work well, 20 picture frames would require a lot of space if you had to clamp them.

Also with the fast setting Corner Weld glue and the v-nails you could handle the frame in 5 minutes and continue to assemble the work. 

But remember this is a "non-load" joint.  Only seasonal movement is an issue with picture frames and usually only if the frame is more than 2" wide.  I only had season movement issues on 3-1/2" wide molding, and that was after several years.

As a trim, I think we can call it a "joint".  And with good gluing protocols, it is surprisingly strong.

ah miters arent really pure endgrain and they are still weak. never thought about them like this, but they have side grain kind of no?
 
usernumber1 said:
ah miters arent really pure endgrain and they are still weak. never thought about them like this, but they have side grain kind of no?

Why (45*) miters are not endgrain to endgrain joints? All contact surfaces between two miters are endgrain. Miters are one of the common endgrain to endgrain joints.
 
Pure mitres are pretty weak. For larger picture frames I cut in a fillet to increase the strength. Using a contrasting timber looks pretty nice too.

b395f0caa5ec38ead122a6cfdf0643e3.jpg


Sent from my iPhone using Tapatalk
 
ChuckM said:
usernumber1 said:
ah miters arent really pure endgrain and they are still weak. never thought about them like this, but they have side grain kind of no?

Why (45*) miters are not endgrain to endgrain joints? All contact surfaces between two miters are endgrain. Miters are one of the common endgrain to endgrain joints.

they are endgrain at 45 which means there's another 45 which is side grain, so like a little triangle. tiny little sidegrains
https://imgur.com/jnDuk5e

jnDuk5e.png
 
That's hair-splitting, sir! All reputable published materials including Fine Woodworking, Woodsmith or the like and books on my bookshelf...and even the Festool manual (domino joiner) classify a miter joint as an endgrain to endgrain joint. This classification was also what Tage Frid and James Krenov used in their lectures.
 
Every real piece of wood you work with has faces that are somewhat skewed to the long grain axis, it's inevitable since trees taper as they grow.  Yet those faces are long grain.  The poster is technically correct that a miter cut presents a blend of end grain and long grain.  The problem is that when you mate two 45 degree miters the probability that the long grain snippets in one line up with those in the other is relatively low, so it is appropriate to treat it as an end grain joint and use tactics like splines, dominos or biscuits to provide some long grain to long grain mating surfaces.
 
Well, as promised I did the testing over the weekend.  For those who don't want to wade through the particulars, the regular sawn miter performed significantly better than the ultra-smooth miter.

Test description:

Comparing a sawn miter glued joint with a mitered joint that had been made glass-smooth by using a guillotine blade on a Lion Miter Trimmer.

Sample preparation:


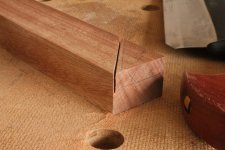
I had a 4 foot length of 3" nominal (2.5" actual) by  0.75" thick poplar which I chopped into four (4) 12-inch pieces.  I then cut a 45 degree miter on one end of each piece using a Dewalt 12" compound miter saw with a 100 tooth blade. (Freud D12100X 100 Tooth Diablo Ultra Fine Circular Saw Blade for Wood and Wood Composites, 12-Inch ).  This resulted in accurate and relatively smooth surfaces.

I then applied Woodworkers III (Titebond) to both surfaces of the sawn miters leaving a continuous "puddle" of glue.  I allowed it to stand for one minute and applied more glue where the puddle disappeared.  I then placed the pieces in a miter vise and applied sufficient pressure to obtain a tight fit.

For the second sample I used a Lion Miter Trimmer (guillotine cutter) to slice a very thin sliver of wood off the ends of the miters.  This resulted in a glass-smooth surface.

Knock-off of Lion Miter Trimmer:
shave-your-miters.jpg


I glued up the trimmed miters in the same fashion as the un-trimmed miters.  However in this case there was no need to add more glue to the "puddle" as none seemed to be absorbed.

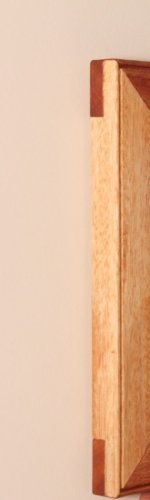
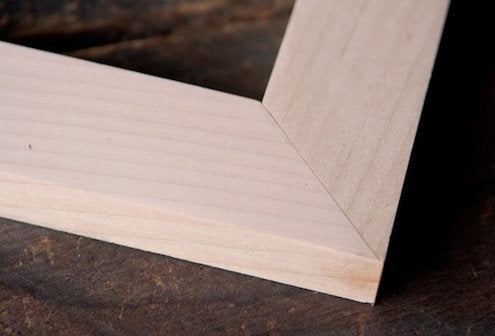
The miters were glued up in this orientation:

mitered-corner-feature-rev.jpg


There was generous squeeze-out for both samples.  I wiped the excess off on the exposed side. I left the squeeze out alone of the reverse side.

I let the parts sit in the vises over night.  Although Titebond claims that the glue is fully dried in 6 hours, they specify not to stress the joint until it had cured for 24 hours, so I waited until 2:00 p.m. to test the results.

The test:


I clamped the L-shaped pieces to a column in my basement about 2 feet off the ground with the pieces oriented like the letter "L". 

I attached a chain to the free end of the 'L' about 1" from the end, effectively making the lever arm about 11".  I used my barbell weights to stress the joint.  My smallest weight is 5 pounds so I went up in 5 pound increments.

Results: 

Both the joints surprised me with their strength. 

The ultra-smooth guillotined miter failed at 65 pounds after about 30 seconds.

I allowed one minute of stress for each weight test.  I watched the joint and fully expected to see some indications of failure just prior to the catastrophic failure.  That was not the case.  It let go without any warning.

The regular sawn miter let go at 100 pounds after about 30 seconds and also without any warning.


Examining the failed joints:


I examined the ultra-smooth miters and they remained ultra-smooth with just an appearance of a clear finish which was the glue residue.  It was uninterrupted and perfectly even.

I examined the conventional sawn miter and it had a white-ish residue that looked like wood putty which I assumed was the mixing of the glue with any residual saw dust left in the pores of the wood. 

I had tapped off the joints but did not use any compressed air to remove the residual sawdust.  I followed that procedure because it is my standard one and I have never seen a magazine article recommending compressed air on the joints prior to joining.

Observations:

I was amazed on how strong the joints were, considering that miters are supposed to be among the weakest of all glued joints. 

If they had been joined into a rectangle, there would have been no "lever arm" and the joints would have performed even better.

Many picture framers prided themselves on their ability to know exactly how much glue was required for a joint and still not have any squeeze-out.  It is my opinion that in almost all those cases the joints were glue-starved to some extent.  When plenty of glue was applied, the joints are stronger than expected.

Miter joints are uniquely subject to seasonal movement and after several seasons the joints will weaken.  That is probably where the reputation for poor performance had grown. 

I would also note that a single example of each joint is not sufficient for scientifically sound results.  However, the differential was so large that I am confident that the standard sawn miter will prove stronger even with better testing.

I did try to do a test with a fine sanded miter, however, I found that I could not maintain the geometry sufficient for a tight miter when I tried using sanding blocks.  So I abandoned that test.

As an aside, I did not expect the joints to go to that poundage and it turned out to be a more physical effort than I anticipated.  I found myself hoping for a failure as I did not look forward to lifting more than 100 pounds with one arm while looping the chain with the other.

Someone else will have to do the future testing.

 
Interesting take on the miter tests.

For what it's worth, FW's test (done in 2009) did confirm that the miter joint was pretty strong by itself (ranked 6 out of the 18 joints tested; the dominoes ranked 5 -- from the bottom).

Wood movement could weaken the miter joint over time, the article warned.
 

Attachments

  • FW - miter.JPG
    FW - miter.JPG
    61.3 KB · Views: 272
ChuckM said:
Interesting take on the miter tests.

For what's worth, FW's test (done in 2009) did confirm that the miter joint was pretty strong by itself (ranked 6 out of the 18 joints tested; the dominoes ranked 5 -- from the bottom).

Wood movement could weaken the miter joint over time, the article warned.

I am not sure at all that the image properly illustrates the problem with wood movement. 

Let us say you are making a rectangular frame with 3" wide material, that means the inside dimension is 6" shorter than the outside dimension.  So with 6" more material to expand and contract that is what causes the problem with the joint. 

The image seems to be pointing to the wood movement being across the grain.  I could be interpreting the image wrong as I don't have access to the actual article.
 
Packard said:
The image seems to be pointing to the wood movement being across the grain.
Yes, wood movement occurs only (or mostly) across the grain.
 
Packard - great tests and thanks for sharing. Super useful.

Sent from my iPhone using Tapatalk
 
About 30 years ago Framica came out with  "Cornerweld" glue.  It was supposedly specifically designed for picture frame work.  Up to that time framers always used white glue (Elmers). 

Cornerweld was a new-fangled PVA glue.  I did a similar test back then comparing Elmers with Cornerweld and Cornerweld was vastly stronger. 

For the past 29 years I assumed it was the last word on end grain gluing.  About a year ago I compared Cornerweld vs Titebond III on the very same test I ran here.  I don't remember the size of the joined pieces or the failure weight, but I do remember that they were a virtual tie in strength.

The big difference was the open time. 

Titebond III lists an open time of 10 minutes and it is probably longer.  I don't know how long it takes to "tack", but probably closer to 15 minutes.  This is a good thing.  I allows time for complicated glue-ups.

On the other hand, Cornerweld, tacked after 30 seconds to a minute.  That is fine because the glue up consisted of adding the glue and then putting the pieces in a V-nailer to join the two pieces.  It literally takes seconds to do. 

So is Cornerweld better for picture frames?  I would definitely say yes.  After glue and v-nails and 10 minutes waiting it was suitable for handling and you could continue to fit the art to the frame. 

Is it a good glue for general woodwork?  I would say no. 

I like testing.  It really sets straight in my mind what is true and what is not true.  I especially like testing that independent labs do (so I don't have to).

Both the kitchen cabinet manufacturer's association and the flat pack manufacturers association have sponsored joinery tests and the results are available online.  Their findings were similar, though the flat pack people were more interested in racking side to side than the cabinet people were (most cabinets get attached to a wall and that supplies the racking structure).
 
There is a big difference between a properly prepared edge and a smooth one.  For glue to work properly the grain is to be exposed or open so it can take the glue into the pores.  A sharp blade does this.  A dull one burnishes the wood and fills in the pores.  Sanding also fills in the pores of the wood.  This is what matters, not how smooth you make it.
 
What Svar said: wood movement occurs mostly across the grain. Here's the reason for that. Wood has small tubes in it to transport water and the nutritional substances a plant or tree needs to grow. The direction of these tubes is "upward" along the trunk all the way to the end of the branches. When wood dries these tubes shrink and thus the wood shrinks. When dry wood absorbs moisture from its environment their diameter increases and with this the wood expands again. This is what causes seasonal wood movement. In reality there is some movement along their length of the tubes as well, but for all intents and purposes you can ignore this movement when designing workpieces. I have never encountered a situation where longitudinal movement by itself was a factor to reckon with in woodworking.  Maybe it would be if you were making something really long.
 
hdv said:
Snip. I have never encountered a situation where longitudinal movement by itself was a factor to reckon with in woodworking.  Maybe it would be if you were making something really long.

Yes, as woodworkers, we ignore any longitudinal movement when planning our work. There're all together three types of wood movement. If the stock is very thick and in a tight fitting situation (rare for furniture makers), we may also consider the radial movement.

I use this to work out the allowances needed:https://www.leevalley.com/en-ca/sho...ey-wood-movement-reference-guide?item=50K2401 I have never had a split top, jammed drawer, or cracked door despite the huge humidity swings in my province between seasons. I did fix a top for a neighbor whose coffee table came from Britain (made in the 1950s).
 

Attachments

  • wood movement.JPG
    wood movement.JPG
    19.7 KB · Views: 219
  • split (Large).jpg
    split (Large).jpg
    247.1 KB · Views: 227
To flesh out Chuck’s post, if you built a conference table with plain sawn red oak in August that was 100 inches long and 50 inches wide, in February it would be 99.99 inches long but only 46 inches wide.
 
Michael Kellough said:
To flesh out Chuck’s post, if you built a conference table with plain sawn red oak in August that was 100 inches long and 50 inches wide, in February it would be 99.99 inches long but only 46 inches wide.
I understand that the maths supports this, however in practice I don’t think your table top is going to shrink 4 inches.

My experience with a few different timber’s is that you can expect 1-3% movement seasonally.

My workbench is 750mm wide laminated Beech and is flush with the legs at the front. Its pinned at the front and can move at the back. I get about 8mm max movement.

Some doors made from Brushbox 600mm wide - about 6mm movement.

A friend made a ‘seasonal movement gauge’ from a bunch of end grain off cuts of white oak glued up into a 2.5m length, free hanging on his workshop wall. That moves about 35mm max to min.

Sent from my iPhone using Tapatalk
 
1 - 3% works for me; 2% is the average MC change in my city. For Iraq, it's 8%+! [eek]

Allowing for wood movement is my standard practice. Sometimes, to the untrained eye, a wider gap (when the object is built in a dry season) is mistaken as poor work.

Here, the gap on the door is shown wider than that for the drawer (side). At times, the inset door gap can be close to the thickness of two or three sheets of paper.
 

Attachments

  • gap (Large).JPG
    gap (Large).JPG
    126.4 KB · Views: 216
Back
Top