Toy Box for Dog Toys

GoingMyWay

Member
Joined
Oct 11, 2017
Messages
3,788
Wow, I can't believe this project has been in the planning stage for over 1 year:https://www.festoolownersgroup.com/...int-positioning-question/msg568334/#msg568334!

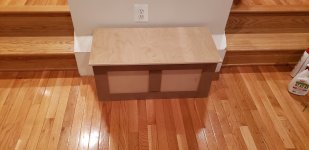
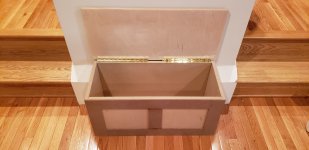
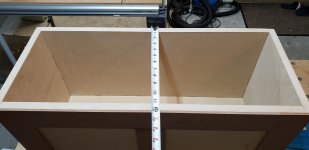
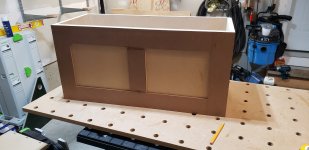
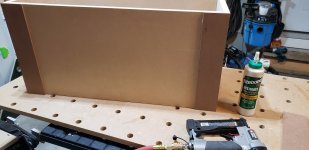
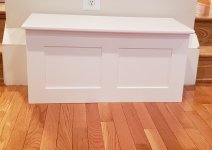
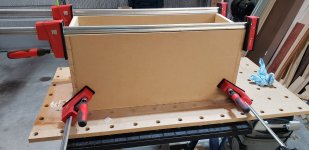
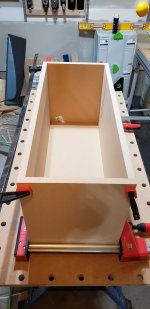
I'm happy to report that I've torn myself away from the kitchen again and got the materials to make and build this toy chest. 

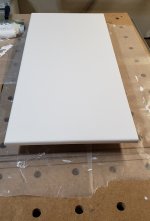
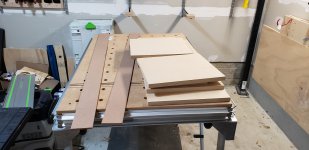
I used the GRS-16 to cut down each piece of 3/4" MDF.

[attachimg=1]

[attachimg=2]

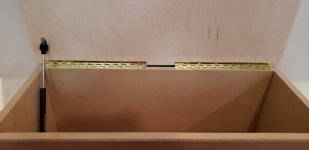
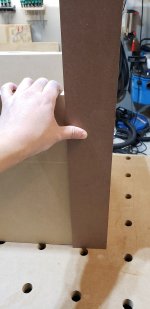
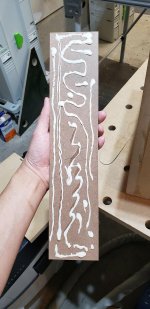
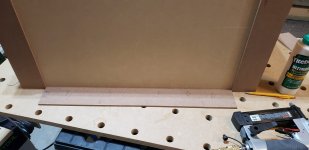
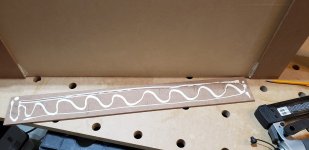
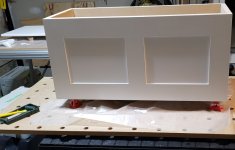
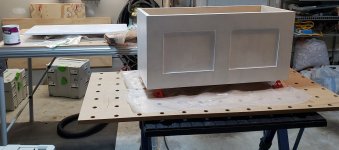
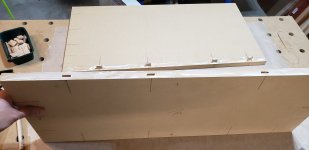
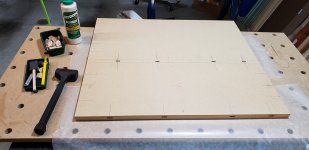
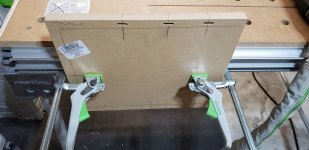
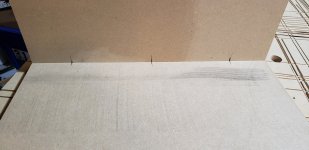
I used the Domiplate on my DF500 to make the mortises for 5mm dominos.  This was my first real use of the Domino.  Prior to this I had just made some test mortises just to play around with it.  I was careful to plunge slowly, but somehow the joints didn't quite come out perfectly flush.  I'm not quite sure where I went wrong, but it's most likely operator error.

[attachimg=3]

[attachimg=4]

[attachimg=5]

[attachimg=6]

[attachimg=7]

[attachimg=8]

[attachimg=9]

[attachimg=10]
 

Attachments

  • 20200311_120322.jpg
    20200311_120322.jpg
    232.6 KB · Views: 446
  • 20200312_152152.jpg
    20200312_152152.jpg
    310.8 KB · Views: 436
  • 20200312_145935.jpg
    20200312_145935.jpg
    255.2 KB · Views: 443
  • 20200312_145610.jpg
    20200312_145610.jpg
    189.2 KB · Views: 461
  • 20200312_145253.jpg
    20200312_145253.jpg
    275 KB · Views: 465
  • 20200312_134351.jpg
    20200312_134351.jpg
    295.5 KB · Views: 460
  • 20200311_202723.jpg
    20200311_202723.jpg
    252.8 KB · Views: 448
  • 20200311_174830.jpg
    20200311_174830.jpg
    237.9 KB · Views: 463
  • 20200311_174043.jpg
    20200311_174043.jpg
    334.3 KB · Views: 468
  • 20200311_173658.jpg
    20200311_173658.jpg
    259.2 KB · Views: 446
[attachimg=1]

[attachimg=2]

[attachimg=3]

[attachimg=4]

[attachimg=5]

[attachimg=6]

[attachimg=7]

[attachimg=8]

I made the top out of 3/4" Baltic Birch that I already had.  I went out and bought a 1/2" Whiteside roundover bit thinking that was what I needed, but I didn't like how the profile came out on a test piece.  I found it a little awkward using the OF1400 with the chip collection cup at the bottom.  Instead I ended up using a 1/4" (I'm pretty sure it's 1/4") Freud roundover bit that I already had in my Makita cordless router.  I rounded over the top and bottom on 3 sides.  This is pretty much the look that I was looking for.  I said it before, but I really like how the Makita router feels in the hand.  Thanks again [member=69479]Jiggy Joiner[/member] for the router recommendation.  I just need to buy the dust port accessory to help with dust extraction. 

[attachimg=9]

I used my DTS400 and ETS-EC 150 to sand everything to 240 grit using Granat.

I used 2 sections of piano hinge and a soft close strut so the lid won't slam down.  Figuring out the exact placement of the strut was a little challenging.  The instructions weren't super clear (at least to me).

[attachimg=10]

[attachimg=11]

[attachimg=12]

I still need to sand the 1/4" MDF trim on the front and then paint with this all in one eggshell paint that I got.  I'm hoping this paint is gonna be good enough to use as is.  I didn't bother to ask anyone if any dye or anything needed to be added.  I assumed it should be good to go since I want it to be white anyway.

[attachimg=13]

[attachimg=14]
 

Attachments

  • 20200314_162228.jpg
    20200314_162228.jpg
    313.8 KB · Views: 422
  • 20200314_192731.jpg
    20200314_192731.jpg
    244.5 KB · Views: 441
  • 20200314_192744.jpg
    20200314_192744.jpg
    262.1 KB · Views: 427
  • 20200315_170431.jpg
    20200315_170431.jpg
    147.2 KB · Views: 468
  • 20200315_182833.jpg
    20200315_182833.jpg
    325.4 KB · Views: 436
  • 20200315_182846.jpg
    20200315_182846.jpg
    250.1 KB · Views: 440
  • 20200313_193015.jpg
    20200313_193015.jpg
    232.4 KB · Views: 423
  • 20200313_183556.jpg
    20200313_183556.jpg
    256.8 KB · Views: 412
  • 20200313_174952.jpg
    20200313_174952.jpg
    234.5 KB · Views: 449
  • 20200313_175841.jpg
    20200313_175841.jpg
    138.7 KB · Views: 439
  • 20200313_180242.jpg
    20200313_180242.jpg
    252.4 KB · Views: 427
  • 20200313_180809.jpg
    20200313_180809.jpg
    252.4 KB · Views: 448
  • 20200313_180944.jpg
    20200313_180944.jpg
    282.1 KB · Views: 449
  • 20200313_182341.jpg
    20200313_182341.jpg
    174.1 KB · Views: 432
I’m glad you like the router, it’s always a bit nerve racking recommending something.
We’ve bought a second one now as it’s so popular.
Lovely job on the box too, looks strong and durable  [thumbs up]
 
Nice job on the toy box, just remember those mutts can at anytime devour anything and everything.

Just make sure that the paint that the pooch will probably injest is not toxic.

On another note, I see you’ve added considerably to your tool stash since the original “What’s  Cooking” thread. Dun dun dun dun dun...you are now one of us...dun dun dun dun dun...  [big grin]
 
I think I like all the pictures as much as the finished product.  We all love our pooches.  Thanks for posting.
 
Jiggy Joiner said:
I’m glad you like the router, it’s always a bit nerve racking recommending something.
We’ve bought a second one now as it’s so popular.
Lovely job on the box too, looks strong and durable  [thumbs up]

Thanks!  Probably way overbuilt considering it's just sitting here holding dog toys.

Cheese said:
Nice job on the toy box, just remember those mutts can at anytime devour anything and everything.

Just make sure that the paint that the pooch will probably injest is not toxic.

On another note, I see you’ve added considerably to your tool stash since the original “What’s  Cooking” thread. Dun dun dun dun dun...you are now one of us...dun dun dun dun dun...  [big grin]

Very true.  He's a monster/killer.  He chewed on so many corners of the trim in the house when he was much younger.  He seems to have stopped doing that.

The paint says 100% acrylic - whatever that means?  I must say that the paint really had no odor at all.  I know in the past that even the so called low VOC paint would usually have a noticeable smell.

Good observation!  I mostly blame the recon site!!!  Luckily my wife hasn't seemed to have noticed the growing number of Systainers.  She did ask where "the machine that makes the holes" (DF500) came from...

Rick Herrick said:
I think I like all the pictures as much as the finished product.  We all love our pooches.  Thanks for posting.

Thanks!  We sure do love our dog!  As much as I complain about him sometimes, he is just so cute and funny.

I think it turned out pretty good.  We put on 3 coats of paint.  I actually kinda prefer how it looked unpainted.  I thought the color contrast was sort of nice.  Now it's all monotone.  I am happy that we painted it right away so it didn't just sit here unfinished forever like the little simple shoe rack I made in 2016.

[attachimg=1]

[attachimg=2]

[attachimg=3]

[attachimg=4]

[attachimg=5]

[attachimg=6]

[attachimg=7]
 

Attachments

  • 20200317_181822.jpg
    20200317_181822.jpg
    284.6 KB · Views: 269
  • 20200317_181211.jpg
    20200317_181211.jpg
    87.8 KB · Views: 276
  • 20200317_175949.jpg
    20200317_175949.jpg
    144.4 KB · Views: 263
  • 20200317_175936.jpg
    20200317_175936.jpg
    112.7 KB · Views: 265
  • 20200316_175005.jpg
    20200316_175005.jpg
    188.7 KB · Views: 253
  • 20200316_170244.jpg
    20200316_170244.jpg
    130.7 KB · Views: 271
  • 20200317_181826.jpg
    20200317_181826.jpg
    294 KB · Views: 268
[member=66216]GoingMyWay[/member]  Looks really good after being painted.  That frame and panel look to the front adds some extra class!  [thumbs up]

Now, how long before that little guy starts scratching at it trying to get you to retrieve a toy?  [eek]

Thanks for sharing!

Mike A.
 
Thanks Mike!

I should have noted earlier that the design was based off of Peter Millard's video:


Hopefully he doesn't scratch it up too much, but no big deal if he does.  I know in the back of mind - I can always make a new one (but the reality is it's doubtful that will ever happen).
 
Back
Top