rinconmike
Member
- Joined
- Mar 24, 2020
- Messages
- 17
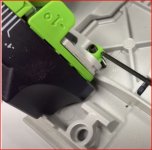
My TS 55 (575387) I got a few months ago blade is not square to the plate. Using a machinist square, I checked it when I first got it and thought it was square. I plunged the saw all the way down and checked the blade with the square.
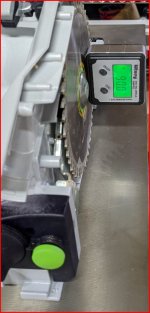
However, I am noticing on larger plywood cuts for some cubbies we are doing when connecting with pocket screws one piece to the other it is not square. I then put the TS55 on my table saw and locked the blade all the way down. Using a Wixey Digital Angle Gauge is it is 89.5 degrees. I also closely checked the 3/4" plywood cut with a square and can see that it is out.
I searched the web and the group and I found information on squaring an older model with two screws. This is seen in this video at around 5:47.
=519s
There is also a link to this manual that shows the technique with cutting two pieces to see if it is square and I will try.
https://service.festoolusa.com/media/pdf/TS_55_EQ_US.pdf
However, I do not see anything in the US Service manual that shows how to adjust my saw. I also found a supplemental manual on the US Site
https://www.festoolusa.com/-/media/...nuals/festool-ts55req-supplemental-manual.pdf
This also does not comment on squaring up the blade.
I did find this video. Is it just a matter of turning the screw shown at 6:26 (clip below)?
thanks,
Mike