UJK Parf Guide System - Videos

Hi Bob

That is great news - well done Lee Valley.

Please do show some pictures of your finished cutting station. Yours sounds similar to mine.

Peter
 
Yes, yours is the inspiration that got me thinking the PGS purchase was worthwhile.

It gives me the ability to make this slab work surface similar to yours and to make a
replacement top for the MFT. And should I ever need to add a precisely spaced grid
of 20mm holes to bench tops or other work surfaces I already have.
 
I've just noticed the discussion here on the PGS, which I was planning on buying to make my own MFT style workbench.

If the PGS now comes with a Centrotec style forstner bit, does this mean those of us with non-Festool equipment (yet) will need to source a replacement forstner bit from external sources?
 
Midnight Man said:
I've just noticed the discussion here on the PGS, which I was planning on buying to make my own MFT style workbench.

If the PGS now comes with a Centrotec style forstner bit, does this mean those of us with non-Festool equipment (yet) will need to source a replacement forstner bit from external sources?

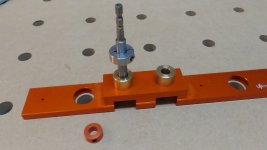
No, the fitting is hex and Centrotec and so it works perfectly well with legacy hex holders and can be held in a normal chuck - which I would recommend for anyone without a Centrotec bit holding chuck.

There is no other Forstner bit on the market with the precise requirements for the PGS.

Peter
 
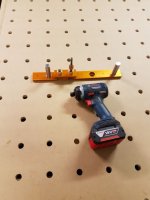
I've been slowly boring my holes when it hasn't been too cold in the shed the past few nights. I'm using the Bosch flexiclick drill sans chuck with the bit straight into the hex and it's working fine.
 
Well it was above 5C in the shed tonight so I got the rest of my holes bored out. Very happy with the system, I've done a few quick tests and all seems very square.
 

Attachments

  • IMG_20170707_23957.jpg
    IMG_20170707_23957.jpg
    59.8 KB · Views: 776
LooseSox said:
Well it was above 5C in the shed tonight so I got the rest of my holes bored out. Very happy with the system, I've done a few quick tests and all seems very square.
It may be an age thing but I do not work below 10 deg C and if I am gluing it goes up to 12 deg C. It is also safer to be a bit warmer.

Well done for getting the job done.

Peter
 
for all you Parf Guide users:
the Centrotec 20mm Forstner bit from UJK is in stock as a spare part at TSO Products - and we include a US made Stainless Steel 10mm Clamping Collar to take the place of the original Collar with plastic or steel set screw until such time as Axminster has changed over production to an aluminum clamping collar early next year.

All customer who have or are purchasing a Parf Guide System from TSO Products will receive this SS 10mm Clamping Collar at no additional charge.

We know this will solve the collar issue completely.

Hans and Eric
 

Attachments

  • Clamping Collar from TSO for ParfGuide bit.jpg
    Clamping Collar from TSO for ParfGuide bit.jpg
    84.6 KB · Views: 819
Ordered from TSO.  And delivered within 24hrs!!!!  Super fast shipping!!

I can't find any links to the 3d printed dust shoes.  Does anybody have any links?  The ones posted before are now not active......

Bob
 
Nice stainless clamping collar!  Makes me wish I'd ordered from TSO.
The original collar with the non Centro bit chewed up the shaft of the bit.  The replacement, centro style bit came with a worthless plastic collar that doesn't stay on.
Definitely the weak link in what's an otherwise strong system.

On another, Parf Guide related, note - be sure to check your guide rules when doing the pythagorean layout for the second leg of your holes.
I believe that's where I goofed up on my 1st and 2nd attempts at making a square grid.  I had creep in both attempts that were off as much as 2mm over 6ft.  I made my 3rd, and hopefully final, grid while checking 6/8/10 and 3/4/5 in both directions.  And I also used parallel clamps to ensure I wasn't pulling the ruler offline when clamping.

The system works really well now with the replacement Centro style bit and now that I have learned the hard way.  I know the instructions say what I just wrote but sometimes we read instructions and go 'yeah, pffft'.  Seriously, follow the instructions exactly.
 
jarbroen said:
Nice stainless clamping collar!  Makes me wish I'd ordered from TSO.
The original collar with the non Centro bit chewed up the shaft of the bit.  The replacement, centro style bit came with a worthless plastic collar that doesn't stay on.
You can probably order one for a few bucks from McMaster-Carr.
 
Links are dead.  Does anyone have any current links to any 3d printed dust shoes for the PARF guide??

ben_r_ said:
clark_fork said:
There is a new world out there with ingenious inventors working on inexpensive tool solutions centered around 3-D printing. If you Google "Festool 3-D Printing, you will be introduced to almost 100 gadgets, gizmos and devices that enter the world of Festool. Ordering is simple and items average typically less than $15.00 with an average set up cost of $9.00. I bought a hose clamp recently for $4.88 plus $9.00 set up.

Well, 3-D printing has come to Peter Parfitt's Parf Guide system with a handy-dandy vacuum hose attachment. (This after Peter spent time developing his wood version.) The link below even has a link to Peter's video

Check Out:
http://www.thingiverse.com/thing:2221538

[attachimg=1]

[attachimg=2]
http://www.thingiverse.com/thing:2221538
Nice. Yea its easy to create these files once you have the dimensions of the part you want to build. If you know a good 3D modeling software thats all it takes.
 
The story of the 3D printed dust show is sad really. I cannot find any of the emails as they were on my old computer but...

A really nice guy took my dust attachment design and converted it for 3D printing. I was happy with that and he sent a copy to me. Unfortunately he put the "Parf" name on the design which I asked him to remove as it is not a "Parf" product. I told him that I was happy for him to market/sell/give away his design or the product itself as long as the "Parf" name was removed.

It seems that he has taken the simple route and just removed it altogether.

If anyone would like the original plans then they are available from me free of charge but I need an email address in order to send them out. The woodwork is trivial and it would only take an average person about 45 minutes to make one from plywood.

Work continues to produce a commercial product that provides an elegant solution but it is not easy setting up production line injection moulding stuff.

Peter
 
Speaking of dust extractor shoes for the PGS system, I have no doubt Peter's design is the most elegant one out there.  But I was taken by the simplicity of the one Dave Stanton demonstrated in the first of the YouTube series on his newly famous Stanton Work Bench.  Check it out at the 18:00 minute of this video:


Cheers - Gary

Full disclosure - I don't have, nor do I have access to, a compound miter saw.... ;-)
 
Hello, I'm new to the group and see many helpful questions and answers. I am looking to build a work bench and purchase the parf guide system. I see many users talking about mdf. Has anyone used plywood or another type of top?? I am looking for the least toxic/chemical exposure (recouping from cancer, so trying to avoid toxins). Also, here's a stupid question-- when cutting on the bench top with the dogs, do most of you guys have massive cuts on the table top itself? Or is everyone super meticulous about adjusting blade height etc when cutting?  Any help would be much appreciated.  Thank you! V.
 
vlong2643 said:
Hello, I'm new to the group and see many helpful questions and answers. I am looking to build a work bench and purchase the parf guide system. I see many users talking about mdf. Has anyone used plywood or another type of top?? I am looking for the least toxic/chemical exposure (recouping from cancer, so trying to avoid toxins). Also, here's a stupid question-- when cutting on the bench top with the dogs, do most of you guys have massive cuts on the table top itself? Or is everyone super meticulous about adjusting blade height etc when cutting?  Any help would be much appreciated.  Thank you! V.

The main culprit in MDF is Formaldehyde and only the really cheap stuff has high levels now but even so, I fully appreciate the care that you wish to take.

You can use plywood but the results are not as good as MDF. Many people on the FOG have made great tops using plywood and their success is down to taking extra care and also getting really good quality material.

It is a good idea to routinely adjust your saw blade depth to suit the cut being made as cutting into the top of the bench too deeply can shorten its life.

Peter
 
I would add that in the planning stage, consider the future utility of flipping top for bottom and end for end. The technical term is "planned obsolescence." Cutting into the surface is expected.  With the Parf Guide system, I made an axillary top from 1/4 inch MDF. A few dogs hold it in place. That becomes my "sacrificial" top when doing a small job. However, I fully understand your aversion to MDF so birch ply should serve your needs for this additional top.

Secondly, consider an alternative when cutting a volume of work. I get good results from using a sheet of 2" foam board, a sheet of plywood/MDF atop a folding serpentine table stand. I don't know the details of finding "safe" foam board. I work this outside so I consider what I am using safe to use.

When I got the Parf Guide System, I never expected it to receive the use I give it. I made sacrificial tops, and my latest project was a small table close to the ground I use for finishing. With the Parf holes, I can use it for easy saw projects and I made a sacrificial top that is just right when I have a messy finishing task. The down side is friends beat a path to my door to make their own tops with my Parf Guide.
 
Welcome to the FOG!

Blade Depth
Personally I took the habit to adjust the blade based on the stock. On any tool I can, like my table saw blade never exceed more the 1/4" from the stock thickness. For the TS 55 I adjust the depth to barely exceed the stock. As yourself I will be making my first custom MFT table this weekend. Base on FOG members tips, here the steps I will be using;

MFT Material
From top quality G2S Baltic Birch ply 18mm
1) Square one side of the board or cut it to the final size,
2) apply sealer on the board and allow enough time to dry, On BB I use Danish oil  from Lee Valley,
3) start boring 3mm holes from any squared side and follow Peter's video part 1. At this point it was suggested to bore all grid holes,
4) bore the 20mm holes half way to avoid tear out,
5) reverse the board and finish boring the 20mm holes.
6) test squareness
7) enjoy your new MFT top  [big grin]

Did I miss anything?
 
Hi Clark

I like the idea of your 1/4" thick sacrificial top, a brilliant idea.

Please could you post a picture of the setup.

Cheers.

Peter
 
[attachimg=1]

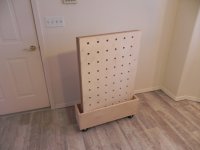
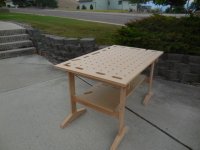
Finishing table without sacrificial top

[attachimg=2]

Finishing table with sacrificial top
[attachimg=3]

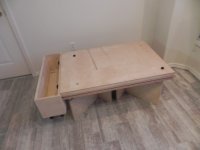
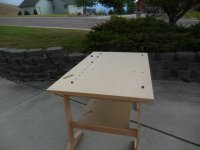
Table without top
[attachimg=4]

Table with sacrificial top

Sacrificial tops only need enough holes to be able to place the dogs to set the rails in place.

Peter Parfitt said:
Hi Clark

I like the idea of your 1/4" thick sacrificial top, a brilliant idea.

Please could you post a picture of the setup.

Cheers.

Peter
 

Attachments

  • final full.JPG
    final full.JPG
    224.2 KB · Views: 1,445
  • final top.JPG
    final top.JPG
    226.2 KB · Views: 1,407
  • 6.JPG
    6.JPG
    135.2 KB · Views: 1,369
  • 7.JPG
    7.JPG
    134.7 KB · Views: 1,350
Back
Top