(updated with new questions) How to cut narrow stock on MFT/3?

mattbyington

Member
Joined
Mar 11, 2018
Messages
797
Hey team,

I've done a few projects now and always seems to run into a problem when cutting small pieces, and/or narrow stock.

Obviously it becomes difficult to do that if it's not as wide as the track itself.

I also find that referencing the smaller side of a board against the protractor rail is error prone since there isn't that much surface area to reference off of.

What sorts of things have folks done to get really accurate cuts?

I've found my large cuts for larger sheets are usually pretty accurate but small pieces are never truly 90 degrees.

These are the things I've seen on this forum/Youtube/Pinterest:

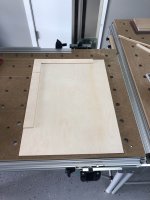
1) Make a medium size rectangular board and mount 2 cleats (perpendicular to each other) on top of it so that you can index the large board and put your stock into the area created by the cleats. This one seemed like a pretty good idea.

2) Cut a 12" square board the same thickness as your stock and use it against the protractor rail to reference your long and narrow piece's long side against. (this is what I've been doing...)

3) Parallel guides? What do folks use here?

4) Anything else?

Thanks so much for the help. I know it's a basic question. I just want to get some accurate cuts !

Matt

 
Everytime I delete the photo someone asks this :>D. I had a photo with this set up.

It depends how long a piece you need.  What I do is takeone of my protractors place it at the end of my MFT between the end and the rail. Then move the protractor aka angle stop as close to the rail as needed to get the thin piece.

You got 2 MFTs so if you bought the 2nd with the angle stop and rail then you should be ok wit this method. You can use the extra MFT fence ad go long ways on the MFT is you need longer lengths.

Filler pieces under the rail are another way.
 
Thanks man. The second one I just got the basic one.

I can see how the second rail would help though!
 
I don't have the MFT/3, but rather the older MFT1080 & 800s, so I haven't had the advantage of the /3's newer protractor. Here's the setup I use on my MFTs for small or narrow material:

View attachment 1

I also have an animation that shows my setup in action in the thread; MFT Zero-Clearance Fence & Fenced Sled  This setup works very well. Be sure to turn Closed Caption to ON while watching any of my YouTube animations.
 

Attachments

  • MFT_Fence_with_Sled.jpg
    MFT_Fence_with_Sled.jpg
    280.4 KB · Views: 1,335
Matt,

Before buying a “gray market--cms-mod-ts-75” to use my TS75 in my CMS I used
Paul Marcil mod. on mft 1080 see link for his blog (also on his youtube channel)http://www.halfinchshy.com/search/label/MFT

In part deux(2) he shows his set up to measure cuts on the “offcut” side .It worked very well and allowed use of an adjustable stop for repeat cuts
I discovered Corwin’s great idea after I’d set up Paul’s , it looks very interesting .

Jerry Work's Parallel Guide Tutorial has some great ideas for narrow cuts .
link :http://www.jerrywork.com look under “How to”

Marking “narrow cuts” to my mind is the 2nd weakness of the MFT.

The number one is going out of square when changing the rail height for different wood thickness. The slop stop -https://www.toolnut.com/tool-improvements-slop-stop-for-festool-mft-tables-and-rails.html?gclid=EAIaIQobChMIy4PUveq52wIVirbACh1zXgqWEAAYASAAEgLTzfD_BwE
and careful recheck minimize this .

Take care George
 
This post seems to encapsulate the essence of the method that others point to:http://festoolownersgroup.com/festo...-strips-with-a-track-saw/msg266535/#msg266535

An extra tip for those using parf dogs — especially those whose thin stock moves under the rail while cutting — you can use two Festool quick clamps from under the table (and then slide the rail onto them), to clamp the rail down to the table, sandwiching the stock between the rail and the table. This reduces any chance of movement in a piece that may be impossible to clamp down otherwise. The MFT’s ability to do this was one of the clinchers for me in buying it, as I simply couldn’t cut narrow stock with my previous setup.
 
Everyone - thanks so, so much for all the quick replies and useful information.

There's a lot to digest here - I will work through it over the next day or two and see if I can understand what everyone is saying.

Some of it is a little out of my league - some coffee and time spent reading is in order.

I will reply back when I figure out what I am going to do!

Matt
 
For years I had exactly the same problem and tried all of the above solutions. Then I bought this little attachment and it works like a charm.

[attachimg=1]
 

Attachments

  • zoom__hs_cs70ebset_561146_p_01a.jpg
    zoom__hs_cs70ebset_561146_p_01a.jpg
    56.7 KB · Views: 2,826
Update:

Okay folks, thanks so very much for all the replies here, it is MUCH appreciated.

[member=182]Corwin[/member] I watched your animation video - SUPER well done sir, you are awesome. Really appreciate it.

I also watched Half Inch Shy's video here:

(also awesome awesome information!)

I read through the links you guys put, and I have some questions here, as a result of all of that information.

Again, a lot of this is super basic so I am very sorry if it's covered elsewhere or common knowledge - I am still learning.

1) In Half Inch Shy's Video, when he's aligning the rail parallel to the dog holes, why does he use a thin (and parallel) piece of wood sandwiched between the dogs and the rail? Why not just push the rail up to the 2 dogs? (7:38 in the video so you don't have to watch all of it!)

2) Corwin - your design is awesome. I have a question. It feels like almost all of these "narrow stock" jigs revolve around helping someone cut stock *less* than the width of the guide rail. To that end, could one just make a piece of wood that was the exact width of the guide rail, and then use the normal MFT/3 fence and a stop, to get anything 0mm wide + ? Could it be that simple?

3) I have a question about wood that is *just* wider than the guide rail, but long (ish) like say 18 inches long. I've found trying to rip these pieces to width I just use the traditional MFT/3 fence, but the reference edge resting on the fence is narrow, like 8 inches (if the wood is 8x18) and really just never comes out square. I don't know if it's just me or not - feels hard to do that, too.

4) I was lurking some other topics on this side, the Seneca rip stops look AWESOME. not that I need another excuse to spend money but...would solve a lot of problems :)

5) Half Inch Shy opened my eyes to squaring the back rail AND the guide rail to the *dog holes* and NOT to each other. I had never thought of it like that before. I had always been squaring them to each other. The dog holes seem better. So my question really is similar to (1) - do I need parallel pieces of wood? Why can't I just slide the guide rail over to the nearest set of dog holes?

I bought another rail clamp down from my basically-kin-now friend [member=9993]marino[/member]  (or [member=49863]Marino83[/member] not sure).... so that I could do exactly what Half Inch Shy was doing in the video. Excited for that!

Thanks so much all!!

Matt
 
I'm thinking that the "parallel piece of wood" that HalfInchShy uses is to place the cutline somewhat centered between rows of dog holes. I've done this for this reason.

I'm not sure what you are asking of me. Using a "sled" as I do, you can cut most any width material -- narrower than the guide rail or wider, no difference. The sled simply slides (left/right) along your MFT's fence to position the sled's fence in relation to the fixed position of the guide rail. For narrower workpieces, you need to use material the same thickness as your workpiece to support the guide rail to the left of the fence.
 
mattbyington said:
2) Corwin - your design is awesome. I have a question. It feels like almost all of these "narrow stock" jigs revolve around helping someone cut stock *less* than the width of the guide rail. To that end, could one just make a piece of wood that was the exact width of the guide rail, and then use the normal MFT/3 fence and a stop, to get anything 0mm wide + ? Could it be that simple?

It can be that simple.

mattbyington said:
3) I have a question about wood that is *just* wider than the guide rail, but long (ish) like say 18 inches long. I've found trying to rip these pieces to width I just use the traditional MFT/3 fence, but the reference edge resting on the fence is narrow, like 8 inches (if the wood is 8x18) and really just never comes out square. I don't know if it's just me or not - feels hard to do that, too.

When you have a long, narrow workpiece it seems preferable to index off the longer side of your workpiece. I have the older MFT1080, but doesn't the MFT/3 allow you to mount your fence off the adjacent side of the table so the fence is parallel with the length of the guide rail? Or, if you wish to keep the MFT/3's fence square with the guide rail, you can use a square piece of material (as big or bigger than the length of the long edge of your workpiece) up against the MFT/3's fence to provide an edge to index from. Or just try making your own version of my fenced sled for your MFT.  [big grin]
 
mattbyington said:
Could one just make a piece of wood that was the exact width of the guide rail, and then use the normal MFT/3 fence and a stop, to get anything 0mm wide + ? Could it be that simple?
That's exactly what I do (as described above) and it doesn't even require an MFT (nor a fence for that matter).

The 'downside' is that this 'piece of wood' needs to be of the same thickness as the material you're cutting, so you need to build a jig for each thickness that you want to cut. For popular sizes (i.e. 18mm), I even have two jigs: one 120cm long for 'crosscutting' sheets, and one 240cm long for 'ripping'.

The upside is that I measure from the BACK of the rail. Failproof, perfect parallel alignment when using spacers between the rail and the jig, and no more endless butting up to -worn out- guide rail strips and/or parallax errors, even with new guide rail strips.

I ~really~ need to make those pictures.
 
[member=182]Corwin[/member] got it thank you sir! Makes perfect sense. The only issue with putting the fence on the left side of the MFT/3 is that it doesn't extend far enough out for ripping narrow stock (if you have the guide rail on the brackets).

I think creating a large (ish) rectangular (but 90 degree edges) piece of wood seems like the easiest and most fool proof.

Totally agree that we want to reference of the large side.

I was thinking maybe I could just use my Woodpeckers 1081 square or whatever it's called, against the guide rail and then on the left side of the narrow piece I want to cut.

That way I can slide the square left/right on the back fence of MFT/3 to rip any width.

Thanks for the reply [member=60292]Jimdude[/member] ! Pictures would indeed be awesome, whenever you get the time  but I think I know what you're saying.

Matt
 
I just use Woodpecker parallel guides but there are a few different brands to choose from. One "arm" can also be used as a fence with scales and stops with the ability to zero them fairly easily. I have used them on smaller widths than the guide rail using the mounted guide rail of the MFT, but they were affixed with rail dogs to the MFT not the guide rail. This time I was ripping longer pieces and cut across the MFT.

[attachimg=1]


Attachments

  • 8161.jpg
    8161.jpg
    141.6 KB · Views: 2,496
OK, found some old pics.

Here you see the "18mm jig" butted up against the sheet:
2yvt7ow.jpg


Now I've placed two spacers between the guard rail and the jig, ready to make a narrow parallel cut:
2pyx3bp.jpg


First parallel cut done:
8zmo79.jpg


Now I just placed the first strip as "master" in the jig and made the second cut (I might as well have kept using the spacers, but with the master, it is less fiddly:
301dqbo.jpg


And here you see how it's also possible to use this system for repeated wide parallel cuts:
2n67qcz.jpg


Hope it helps,
Jimbo.

PS: Yes, I know, all equipment used has a funny colour  [big grin]
 
[member=60292]Jimdude[/member] nice thanks so much for the pics! Helps a lot. Reminds me of [member=182]Corwin[/member] 's Youtube video.

So after all the advice on this thread, yesterday I went to go create my first jig (pics below).

It was a mild success. I learned some things in the process:

1) Really I want the orientation flipped 90 degrees because I want the longest edge to reference the back rail.
2) I shouldn't put the left stop flush with the left side of the jig - the narrower the cut, the less reference surface against the back rail. It should be towards the middle of the jig actually.

I'm going to re-make this week with those 2 ^^^ things fixed. But thanks again everyone for all your help!

[attachimg=1][attachimg=2]
 

Attachments

  • IMG_0778.jpg
    IMG_0778.jpg
    1,020.3 KB · Views: 2,307
  • IMG_0779.jpg
    IMG_0779.jpg
    709.6 KB · Views: 2,317
[attachimg=1][attachimg=2]
 

Attachments

  • IMG_0781.jpg
    IMG_0781.jpg
    693.2 KB · Views: 2,321
  • IMG_0785.jpg
    IMG_0785.jpg
    719.2 KB · Views: 2,508
Back
Top