Using an ETS EC 150/5 for Car Paint Detailing - Could Use Some Advice Please

Ah yea... My only idea is if someone in this modern age could 3D print a frontal handle for RO90 like 150 has then it would be gamechanger.
 
I don’t see the point in this.

I have a 10” Ryobi elliptical buffer/polisher for about 10 years. I see that Amazon sells the contemporary version for $60.00.

The elliptical motion is far less likely to result in swirl marks on automotive finishes. If you are not a pro, it is a better choice. Unless you are doing tiny crevasses, the 10” makes sense for bodywork. I think autobody shops like to use air driven devices and rotary air driven motors are easier to produce than elliptical.

In any case, this would be an easy decision for me: Buy the dedicated buffer (which runs cooler than most shop tools).

 
Forced rotation machines are a thing, Rupes has one, Flex etc. No swirling or other dangers that you have with rotary and no pad stall.
 
It'll be interesting as to how it performs after the Festool service...maybe the heat issue will be minimized. :) I owned one of the original Fein multitools that had an aluminum head and after using if continuously for about 10-15 minutes I'd have to put on heavy leather gloves to continue the work. It didn't burn your hands but it was very uncomfortable...just part of its heritage I think.

I've used cerium oxide before and my experience is that if you can feel the scratch with your finger nail it's very unlikely you'll be able to completely remove the scratch. It'll look better because the surrounding area and parts of the scratch will be polished but you'll still feel the scratch.

Here's a thread (reply 283) of some mineral etching that I successfully removed from several glasses using a RO 90, a blue foam pad & some 3M cerium oxide.


Hi Cheese, well the repair came back and was a bit of an anti-climax really. The unit came back cleaned, tested and a couple of small minor parts replaced that I interpreted as consumable parts. The repair itself was amazingly cheap....some £60 including shipping. Can't accuse Festool of profiteering on these things.

Now I say all that, it may have addressed the heating issue, maybe one of the consumable items was a grease pack or suchlike. They didn't actually itemise the small parts. When they advise repair cost, there is a text box to ask the engineer any follow up questions and I've asked about that.

I've not got any specific to test it on right now. Well bar actually doing the glass refinishing work and the paint correction itself that is but time is a little tight on that job right now. But at least I'm geared up with equipment that looks right, the skill set from you and the folks on FOG. I just need get the pads and compounds now which will be down very shortly. Still intimidates me approaching the glass and paint but I'll need get over that .... I guess it's the one way nature of the material unlike wood :)
 
@atacama40 glad to hear you've received the sander back... :) ...however, I can't stress enough that you should take an hour or 2 and fully test it out before any time goes by.

As an example, I purchased a CXS 12 drill, had some issues with it and sent it into Festool Service. I received it back 7 days later with a list of small items they replaced and a note stating that it had been serviced & tested. I immediately used it on a project and noticed that while it was better, there were still some problems with it. I immediately sent it in to Festool Service again with a rather lengthy letter pointing out the exact issues I was experiencing. About 2 weeks later I received a new CXS drill set complete with new batteries and charger. I have to believe that the protracted issues I had with the drill weighed in on Festool's ultimate decision.

Is a good call Cheese ... I can see how things could go horribly wrong by not doing that. Especially with a machine with the power the 150 has. (y)
 
Thats the ripper right there. You are unstoppable with that, on anything. Mine have some nasty resonance (from time to time) from somekind of washer under the pad, maybe i should ship it in. Bought it in March

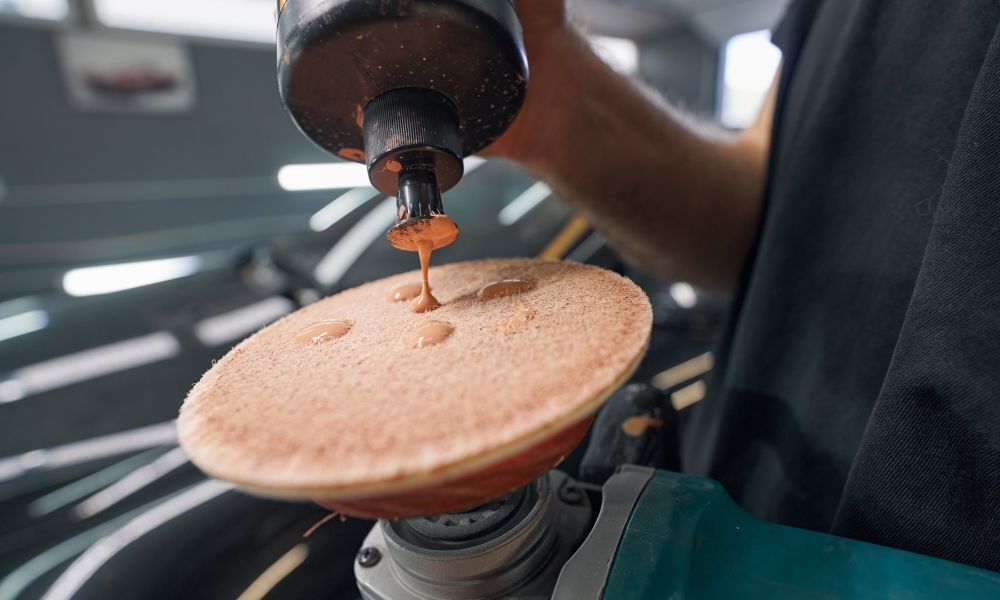
Remove dust port or not, use Festool own polishing system or Koch or whatever, you can make serious corrections with that. Get a pair of ear muffs and frontal handle.

I grinded off eem, i think seven different coats of paint with it today. From Triumph Spitfire. Used bit of RO 90 and Rupes long block and two Deoses also. We are working with what we have there on panel because budget does not favor full strip down. Sorry that theres only pictures of other tools, Festos were hanging on my cart, behind me. :)

Regarding lights. RO 90, soft pad or interface and let it rip in rotex mode on the haze. P500. Do it once in fine mode also. Then get 800 and get the previous marks out. If you want to be pedantic, continue with finer grits (i did it on this Toyota). Mask it and shoot 1.5 to 2 coats of 2K acrylic clear. Later in life theres enought to buff when the need arises.
Paintbooth isnt a must.

Just re-reading your post Erik. Almost an obvious question maybe but would removing the headlight be a better option? More time consuming and I imagine in a business body shop, leaving it in would be less in way of man hours. But for a home solution, would refinishing the units on a bench be better? I guess it would allow easier warm dry air to be focused on the unit for the clear coat as well maybe? Our workshop does not have heating .... well not very effective heating but localised heating with a heat gun an similar we can do.
 
I compounded and waxed my car last year. I used the white “finishing” (read “less aggressive”) compound. I used the Ryobi elliptical for that. For the detail work in the hard to reach areas, I went “old school” and did it by hand.

In my opinion it made sense, did not take long, and satisfied my need for hands on craftsmanship.

The biggest issue with machine compounding is the risk of burning through the top coat, especially easy to burn through a clear coat.

In any case the elliptical buffers are less likely to be over aggressive.

In any case the less aggressive polishing compound is likely to be safer for the finish, especially if machine applied. It is pretty easy to burn through the clear coat.

 
Just re-reading your post Erik. Almost an obvious question maybe but would removing the headlight be a better option? More time consuming and I imagine in a business body shop, leaving it in would be less in way of man hours. But for a home solution, would refinishing the units on a bench be better? I guess it would allow easier warm dry air to be focused on the unit for the clear coat as well maybe? Our workshop does not have heating .... well not very effective heating but localised heating with a heat gun an similar we can do.
Well yea, sure. Smaller item to work or mask. Thats true. Maybe even movable to bit more warmer/ergonomic area.

Just be sure its clean and well ventilated.

In my case, if client brings them separately then its fine by me. Bit finnicky to have them in lap for sanding but whatever.
If they order to be removed- can do that. Usually it means that i place car on my platform lift, remove two front wheels (or not because i have Insider), remove partially wheel liners and whole front bumper. Because headlights in 90% have bolts under bumper too (exept some Lolvos, Porsches/Vags).
Yes I did wonder about how to secure it but we,ll fettle something up. It just struck me as not having a pro workshop like yours, I would be less likely damaging surrounding bodywork. That said I've not looked at the securing mechanisms .... these things can be the easiest or a nightmare to remove. I suspect on a small car like this one it should be fairly straightforward .... famous last words :)
 
A belated thanks to everyone making time to explain their approach and helping to build my confidence to do this work.

In the end I used the Rotex 150 FEQ after having it serviced by Festool. A bargain in both senses. The unit off ebay many years back was only £70 from memory. And the service was just £50 end of last year! Amazing.

I delayed doing the paint correction and the lens work for a good while .... blammed on the weather and time, but mostly fear!

But wow, what an amazing result on both counts ... the paint and the lights. I've watched it on Youtube. I've spoke with you guys, but last week (at last) I did it .. on a 13 year old metallic orange Vauxhall Mervia. The car itself in amazing condition (mechanically, service and miles wise) but had sat some time moss covered and faded. It's my Mother's can and at 87 she has called it a driving day.

The uplift in colour and elimination of swirls was amazing. Bar two minor and awkward dents, the car is like it came out of the factory yesterday. I even did a ceramic coating on it. I was scpetical about this but again ... absolutely amazing, Here in the UK Spring, it's sunny, it's raining, we have dust falling from the Sahara and Saudi but not a spot of dirt on it. The sand fall just runs off.

I even added a Gycon ceramic wax on top. The benefit of that is harder to quantify but so far so good. It feels and looks amazing.

Anyway, a huge thank you to everyone on the thread who had the patience to share their skills and experiences. The Rotex is 100% the machine for the job. It worked perfectly. I put a new green grade pad on it. the old blue one was pretty tired to say the least. I used two grades of correction. Going to three seemed a bridge too far and I don't think was needed although the velcro on pad kit came with three. Also I didn't spend a fortune on them, they were very mid range ones. The same company did a ceramic package at modest money that was very good. Anyway the result was so good that I also did our main car ... which has been immaculately looked after but still came up nice.

We have a third car (in fact the one we were originally discussing when I asked the question here) , a little Toyota Aygo. and weather permitting that's next ... and indeed the lights are way worse on that one. So will be interesting.

To anyone thinking of doing paint correction or lens correction ... and using a Rotex, absolutely do it. it's hard systematic work but hugely rewarding.
 
Think of it like a community service, pics will help numerous guys more easily justify buying a Rotex to restore their missus's car and faded headlights to it's former glory! ;-)

100% and I should have thought about that. But 100% equally I will do that with the Aygo. Will be within the next week or two weather permitting.

A shame in the way as the Chilli Orange Vauxhall/GM paint is a very transition. The silver on the Aygo will be less so, but still there will be a significant before and after. What's more I will detail the steps I take in it. Nothing new to many of you but for those on the baby slopes (as I was) then hopefully it will have some value.
 
My 1967 Alfa Romeo Spyder had a flexible plastic rear window (convertible top) that was badly fogged up. It also had headlight covers that were similarly fogged.

I applied by hand Gleem tooth paste which had the reputation as being the most abrasive on the market. The rear window, which had to be polished inside and out) was crystal clear.

The head light covers were easier only because I could comfortably work at a bench. About 2 hours for the rear window, and an hour each for the headlight covers. Best of all, everything was minty-fresh when I was done.

The advertiser lists this as a 1967 1750 cc, which did not exist. The 1967s had a 1600 cc engine.

1776182256712.jpg

Restoration product of choice:

1776182780247.jpg
 
Last edited:
@Packard That's absolutely beautiful!
The image is one I swiped off the Internet. The same as mine.

I had two. I had the first one for about 20,000 miles when I got T-boned by an unlicensed driver who ran a red light.

The second one I had for about 40,000 miles, but then got a job that included a company car and it did not make sense to keep it anymore.

Alfa Romeo had new models every two years. So there was a 1963, 1965, 1967, 1969, etc. if you bought an Alfa in 1967, it was called an “early registration’67”. If you bought the same car in 1968, it was called a “late registration’67”.

They had an awful reputation for reliability, but I had nothing but maintenance done.

Starter motors were considered a “consumable” component, primarily because the Weber carbs did not have a conventional choke, but had an “enrichening” lever (which was ineffective). Instead I stared the car like a race car—on a cold winter day by pumping the gas pedal about 18 times. After letting it sit for a few hours, just 3 or 4 times. After a while I got to judge how many pumps was needed, and my starter motors never needed replacing.

I liked those cars.
 
I learned a trick from the Detailers and Porters at the BMW dealership where I worked in the 1990s. Back then, BMW too had plastic windows on the Convertible 3 series until later models changed that. They took Meguiars Plastic Cleaner or Polish, and cut it 50% with liquid wax. It ended up taking more of the fogged look out of the plastic than the stock Meguiars products did on their own. That was a never ending task for us since most owners, unlike Packard, would never do it on their own to their 3 Series Convertibles . We had to do that instead. Classic owner back then was an older woman who lived in a Condo in Lincoln Park or the Gold Coast. The 3 series never saw winter. They sat unloved and, uncharged, all Winter, until they needed to be run in the Spring. By then, mice or rats could have eaten some wiring in the engine compartment, the battery was flat and refused to take a charge, paint was covered in dust and the gas in the tank needed to be changed. Simple... :giggle: 🫣
So , we revived the vehicle as needed each Spring, only to have it go through the same stored cycle in the bowels of these huge apartment buildings that were built WAY before taking care of a stored car was much of a thought. Having been in a couple of them to retrieve cars that were dead and wouldn't start for the garage attendants, I'm amazed at how these cars were stored, it was like organized chaos that you'd never expect was going on in the building from the outside if you drove by. The worst was the ramps and tiny pathways to drive down into the depths of these basements. Seriously, there was one building that was in the heart of Lincoln Park, the ramp down or up [ ONE RAMP ONLY ], was such a steep grade, that wet tires would easily spin on it if you didn't take care with the gas pedal.
Add snow or rain to the mix from the outside weather,or, they WASHED the vehicle down in the basement if there was a wash bay, so, wet tires guaranteed, fun times. And people got their vehicles in and out daily with these places, since they had paid a premium to avoid on-street parking with all its hassles here in Chicago. And usually poor exhaust fume extraction on the oldest buildings unless the owners or the City watched over any updating of ventilation the basement space compared to the buildings built in the 1960s or later. :rolleyes:
 
Back
Top