tjbnwi
Member
- Joined
- May 12, 2008
- Messages
- 7,047
I'll start by thanking [member=19746]Untidy Shop[/member] for posting the link to the Conturo manual that contains the MFT "brackets". [member=8352]erock[/member] for the inspiration on hanging the pump off the MFT, and from what I understand [member=191]Rick Christopherson[/member] for the foot valve "holder".
I used the VAC SYS everyday, issue was set up and take down. I have this thing about putting items away. When I'm spraying I'll cover the system.
The MFT is set up to be an indeed table for my CMS.
I used drop off plywood from a set of shelves I'm fabricating for a pantry cabinet. I did ream the baseplate holes to 17/64" to accept 1/4" bolts.
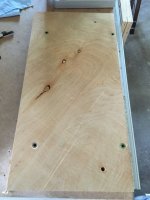
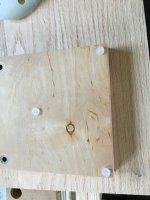
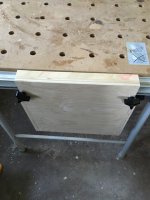
Backplates for the "heads", doubled 3/4" plywood, 1/4-20 threaded inserts with shoulder. I do not have stock metric threaded inserts. This plywood was sanded with the RO 125-80 grit Granat rotex mode only prior to spraying 2 coats of SW KA+ BRE. View attachment 1
2-1/2" long bolts were the proper length to mount the "heads".View attachment 2
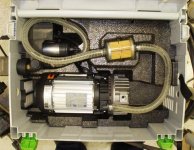
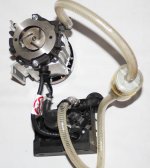
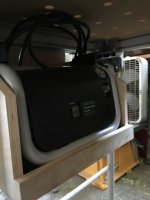
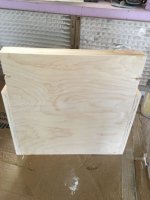
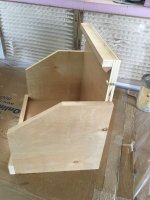
The "bracket" for the pump. View attachment 3View attachment 4View attachment 5View attachment 6
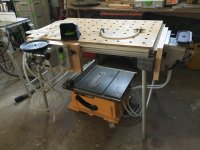
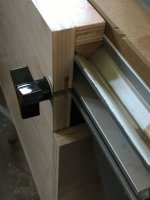
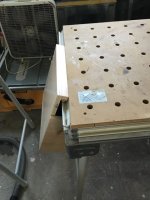
I chose to hang the pump under the MFT instead of it projecting outside the MFT. View attachment 7
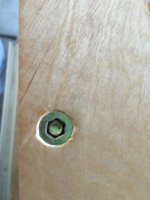
5/16-18x1.25" with tri-wing hand nut to retain the pump bracket. View attachment 8
Both bolt assemblies installed and tightened. View attachment 9View attachment 10
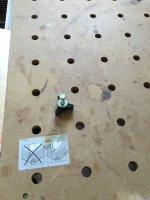
Close up of the bolt slot and v-groove insert.View attachment 11
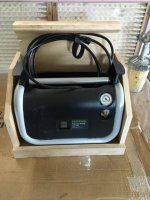
Pump in its new home. View attachment 12View attachment 13
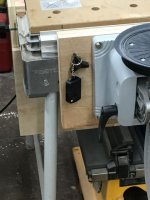
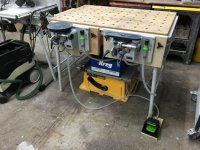
The three items on the MFT. The head plates are retained by 5/16-18x2.25" bolts with tri-wing nuts. View attachment 14View attachment 15
Nutserts and 5 stem bumpers installed on the bottom of the foot valve holder. View attachment 16
With the pump under the MFT I used a remote control on the system.View attachment 17
What I would change---
The heads sit about 1/2" above the MFT surface. I used the specs in the manual, I would prefer if the heads were flush when loaded with the MFT surface.
I may change the foot valve plywood to 1/8" aluminum. I'll remove the leg bore and mount it on the aluminum plate. this will prevent the plate from sliding out from underneath the leg.
Tom
I used the VAC SYS everyday, issue was set up and take down. I have this thing about putting items away. When I'm spraying I'll cover the system.
The MFT is set up to be an indeed table for my CMS.
I used drop off plywood from a set of shelves I'm fabricating for a pantry cabinet. I did ream the baseplate holes to 17/64" to accept 1/4" bolts.
Backplates for the "heads", doubled 3/4" plywood, 1/4-20 threaded inserts with shoulder. I do not have stock metric threaded inserts. This plywood was sanded with the RO 125-80 grit Granat rotex mode only prior to spraying 2 coats of SW KA+ BRE. View attachment 1
2-1/2" long bolts were the proper length to mount the "heads".View attachment 2
The "bracket" for the pump. View attachment 3View attachment 4View attachment 5View attachment 6
I chose to hang the pump under the MFT instead of it projecting outside the MFT. View attachment 7
5/16-18x1.25" with tri-wing hand nut to retain the pump bracket. View attachment 8
Both bolt assemblies installed and tightened. View attachment 9View attachment 10
Close up of the bolt slot and v-groove insert.View attachment 11
Pump in its new home. View attachment 12View attachment 13
The three items on the MFT. The head plates are retained by 5/16-18x2.25" bolts with tri-wing nuts. View attachment 14View attachment 15
Nutserts and 5 stem bumpers installed on the bottom of the foot valve holder. View attachment 16
With the pump under the MFT I used a remote control on the system.View attachment 17
What I would change---
The heads sit about 1/2" above the MFT surface. I used the specs in the manual, I would prefer if the heads were flush when loaded with the MFT surface.
I may change the foot valve plywood to 1/8" aluminum. I'll remove the leg bore and mount it on the aluminum plate. this will prevent the plate from sliding out from underneath the leg.
Tom
Attachments
-
 IMG_0695.jpg38.3 KB · Views: 476
 -
 IMG_0714.jpg42.6 KB · Views: 759
 -
 IMG_0711.jpg44.6 KB · Views: 438
 -
 IMG_0713.jpg62.7 KB · Views: 6,741
 -
 IMG_0709.jpg50.5 KB · Views: 1,016
 -
 IMG_0706.jpg33 KB · Views: 554
 -
 IMG_0705.jpg34.3 KB · Views: 548
 -
 IMG_0708.jpg34.7 KB · Views: 474
 -
 IMG_0708.jpg34.7 KB · Views: 535
 -
 IMG_0704.jpg42 KB · Views: 468
 -
 IMG_0696.jpg38 KB · Views: 464
 -
 IMG_0697.jpg38.9 KB · Views: 514
 -
 IMG_0698.jpg37.9 KB · Views: 433
 -
 IMG_0699.jpg43.4 KB · Views: 467
 -
 IMG_0700.jpg47.8 KB · Views: 695
 -
 IMG_0701.jpg42.2 KB · Views: 583
 -
 IMG_0702.jpg41.5 KB · Views: 456