Wainscoting: Domino overkill?

aprikh1

Member
Joined
Oct 30, 2011
Messages
35
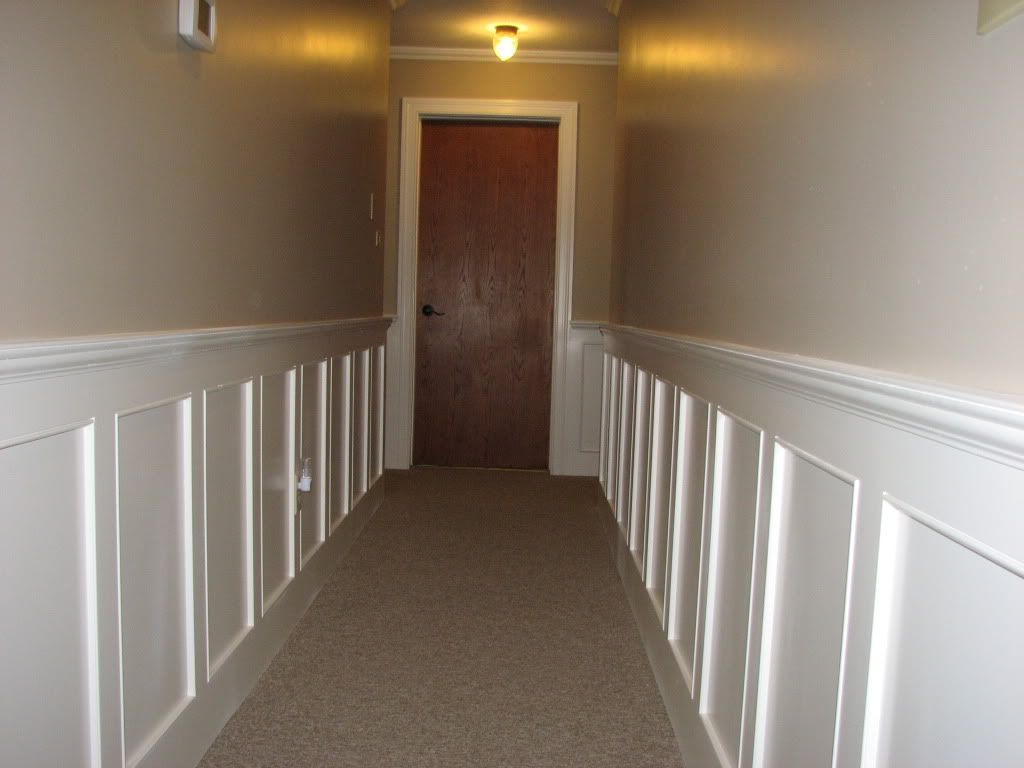
I am getting ready to start building some wainscoting for my dining room. Due to time constraints, and lack of faith in my own ability, I decided to stay away from real floating wainscoting made out of solid wood, and instead will be following a much simpler design I found in a November, 2011 issue of the Family Handyman magazine.

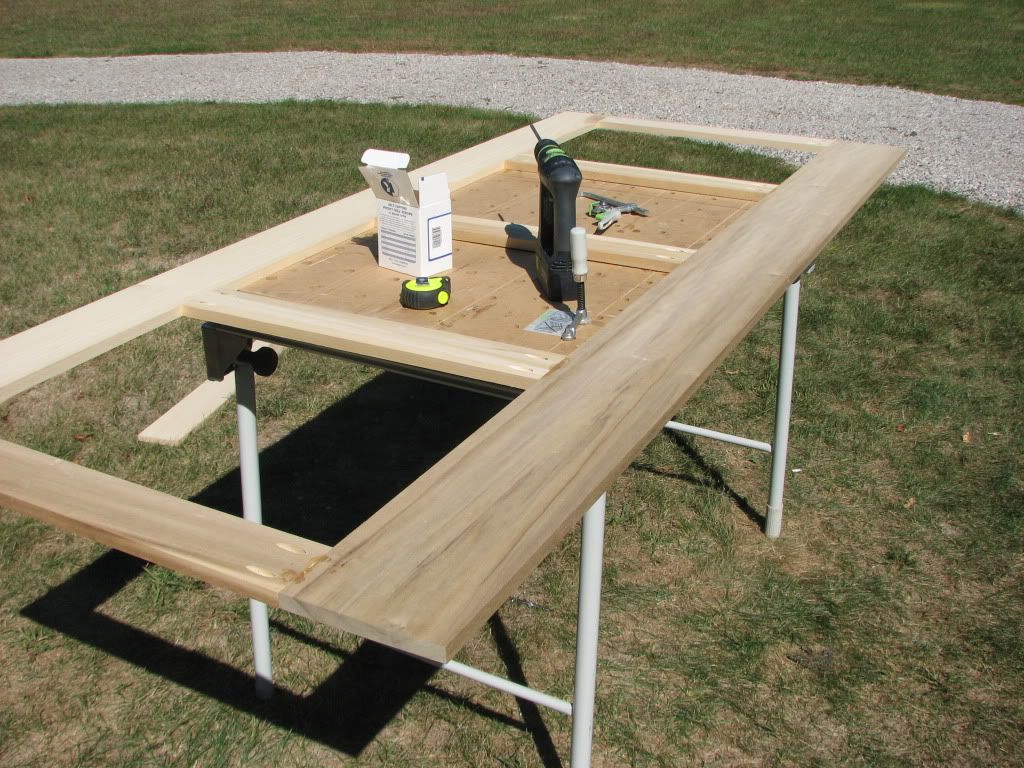
The instructions in the magazine recommend attaching MDF cutouts to the wall via construction adhesive and nails. This is fine and dandy, but I was wondering if the use of the Domino would be a better idea. I am on the fence. On one hand the dominoes should help with alignment and will produce a stronger construction; on the other hand, there is no need for stronger construction, since these parts are not subjected to any worthwhile forces, plus using dominoes will take longer. What do you guys think?

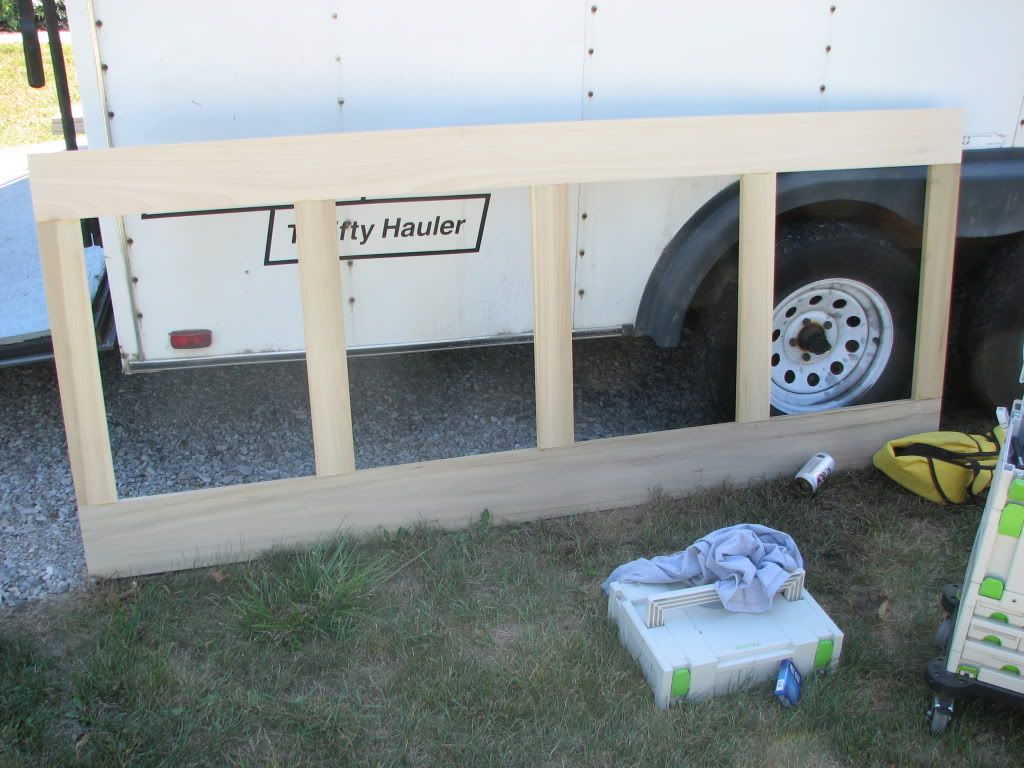
Here is a diagram of the work-plan...
wainscoting.jpg


Finally, the suggested use of MDF scares me. The wainscoting will be paint grade, so my only concerns is making sure that all of the edges between the MDF boards are hidden. I read that folks were having much success with using bondo, followed by light sanding to conceal any imperfections in the MDF. What problems can crop-up when using MDF? Should I consider switching to cabinet-grade plywood instead?

Thanks in advance :)


The domino requires a lot of clamps and time in clamps.

You could use a couple domino's and toss in a pocket screw to act as a clamp until the glue dries.

I normally just use PS, then rout out a 1/4" rabbate on the back side and then install a 1/4" mdf panel. 

Then I can install a few different types of panel moulding or leave the edges sharp like a shaker style.

IMG_0325.jpg


IMG_0326.jpg


IMG_0346.jpg


i think dominoes will help allignment and keeping the spaceing right.,they might keep all the parts stuck together instead of singly ,hopefully lasting longer

you could rebate the back of the top and bottom adn the fromt of the vertical pieces. that would do the same thing but you could move the vertical pieces sideways. then just glue and nails. i would use a PU glue myself (have done something like this in the past)  and a 18 gauge nailer
 
I've done budget wainscoting like you show using mdf. It's cheap looks good painted but it's heavy and dusty. I've used my ATF 55 to cut out the panels thereby eliminating rail and stile joints. This works great if the wall fit the magic number of 8' or shorter. When you have a longer wall use the domi, biscuit, or spline with glue and pocket screws. It takes a little time to layout but once you get cutting it goes very quickly. Cut to the corners and finish with a jigsaw. Patience and a steady hand will give you crisp corners. If your math on the panels are accurate you can cut and pre assemble your infill moulding and apply one unit instead of four pieces. You can set up cutting guides on your mitersaw for making repetitive and repeatable cuts. If you want to jazz up the panels you can use the off cuts to produce raised panels, just mark where the panel off cut matches the panel. With the addition of any number of mouldings you can make a detailed and classic raised panel wainscoting.
Good luck
Curt
 
I often use the MDF method as its quick and easy!   No need to clamp and start squaring your panel up and then wait for the glue to go off!   If you cut out the panels in MDF as long as your MDF is square and your measuring is accurate    using a TS55 its really quick you end up with rigid square cut out panels.    I then use 6mm MDF which I glue and screw to the back of the  panel I made!  Few reasons I do this

1. Keeps your reveal equal  ( if you use the wall plater as the finishing panel their can be unevenness)

2.  It allows me the FIX the paneling to the wall WITH out any fixing on show because I screw right near the edge so when I fix the bead mould around the inside it covers the screws.

What I have also done is in the past is use the panel you cut out. You can send it through a Panel mould cutter and stick it back in your cut out and then bead mould it  you then have a raised panel with not material waist.

I have some pictures and I can take a picture of a panel I have not spray painted yet on Tuesday as thats when I am back on that particular job.

JMB
 
OK, so based on everyone’s input I am leaning towards this methodology:

1. Make the entire frame at a time, top and bottom boards + stiles
2. Route ¼” rabbet  on the edges for ¼” MDF  back-board
3. Assemble with pocket screws
4. Attach to the wall with nails and glue
5. Add molding and chair-rail
6. Use bondo to fill-in the gaps and imperfections
7. Sand
8. Prime
9. Sand
10. Paint 

Did I miss anything? Thanks in again :)
 
aprikh1 said:
OK, so based on everyone’s input I am leaning towards this methodology:

1. Make the entire frame at a time, top and bottom boards + stiles
2. Route ¼” rabbet  on the edges for ¼” MDF  back-board
3. Assemble with pocket screws
4. Attach to the wall with nails and glue
5. Add molding and chair-rail
6. Use bondo to fill-in the gaps and imperfections
7. Sand
8. Prime
9. Sand
10. Paint 
11.  Send me a check for 79.99 for the free consultation. [big grin]

Did I miss anything? Thanks in again :)

It goes pretty quick.  I usually draw the wainscoting full size on the wall.  That way I can adjust my lay outs and if I have too, move outlets around a little.

 
Well hopefully I'll be able to start on this next weekend, and we'll see how it goes. I am also excited to use this project as a guinea pig for my Fuji HVLP. I'll keep you guys in the loop, and will post some pictures of the carnage  [tongue]
 
WarnerConstCo. said:
aprikh1 said:
OK, so based on everyone’s input I am leaning towards this methodology:

1. Make the entire frame at a time, top and bottom boards + stiles
2. Route ¼” rabbet  on the edges for ¼” MDF  back-board
3. Assemble with pocket screws
4. Attach to the wall with nails and glue
5. Add molding and chair-rail
6. Use bondo to fill-in the gaps and imperfections
7. Sand
8. Prime
9. Sand
10. Paint 
11.  Send me a check for 79.99 for the free consultation. [big grin]

Did I miss anything? Thanks in again :)

It goes pretty quick.  I usually draw the wainscoting full size on the wall.  That way I can adjust my lay outs and if I have too, move outlets around a little.

I do the same thing.  Always draw on the walls to get the layout rite to how I want it.  Plus show the client how it will look so they can make a decision.

Jmb
 
aprikh1 said:
OK, so based on everyone’s input I am leaning towards this methodology:

1. Make the entire frame at a time, top and bottom boards + stiles
2. Route ¼” rabbet  on the edges for ¼” MDF  back-board
3. Assemble with pocket screws
4. Attach to the wall with nails and glue
5. Add molding and chair-rail
6. Use bondo to fill-in the gaps and imperfections
7. Sand
8. Prime
9. Sand
10. Paint 

Did I miss anything? Thanks in again :)

That's fine, although I would not glue it to the wall.  There is no need for that, just 15 ga nail into every stud you can and you are fine.  If i had a domino, I would put one per stile just for alignment, any size domino.
 
I know this is old, but came up in my search; i'm planning to use domino for alignment purposes.
 
I did a bathroom using pocket screws for the rails and stiles.  I glued it to 1/4” birch plywood and primed and painted before installation.  I gave a final coat after installation. 

If you are going to trim out the rectangles with molding, play exacting care that the heights are all identical, and the widths are identical where practical.  That will greatly speed up cutting the trim molding to size. 

In the second bathroom, I used resin bead board and that installed far faster.  I chose to do that, because that bath included a tub and shower and humidity would be an issue. 

The other bath was powder room—toilet and sink only.
 
Back
Top