What finish for walnut coasters?

Joined
Jun 23, 2024
Messages
88
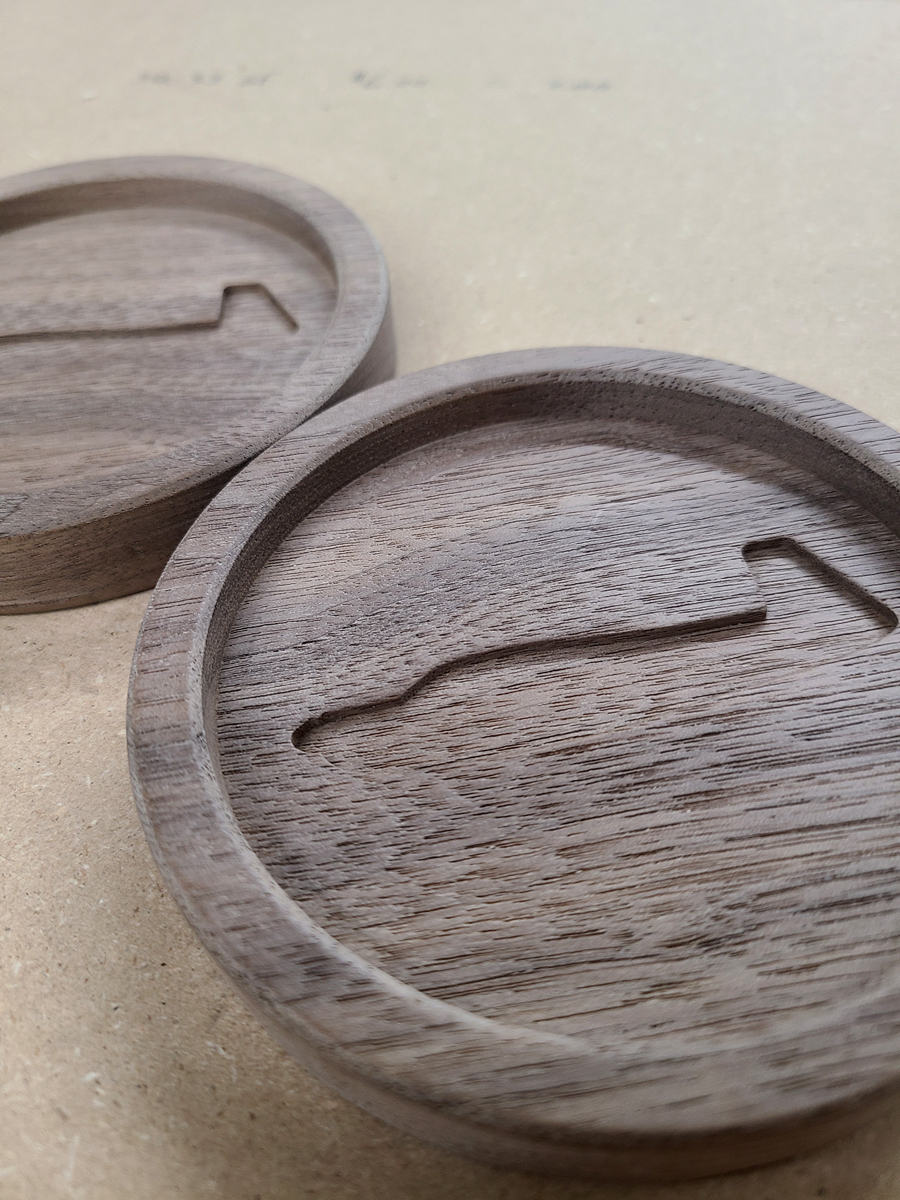
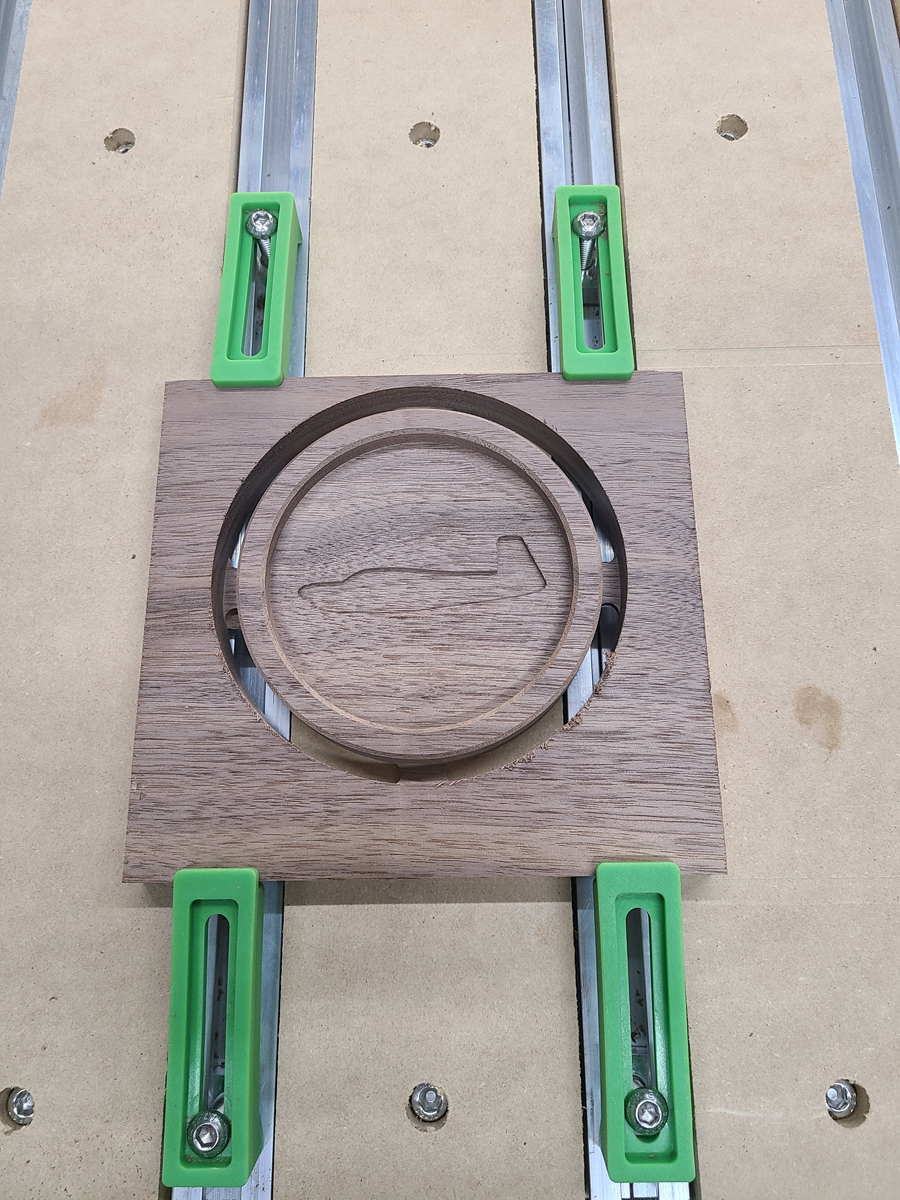
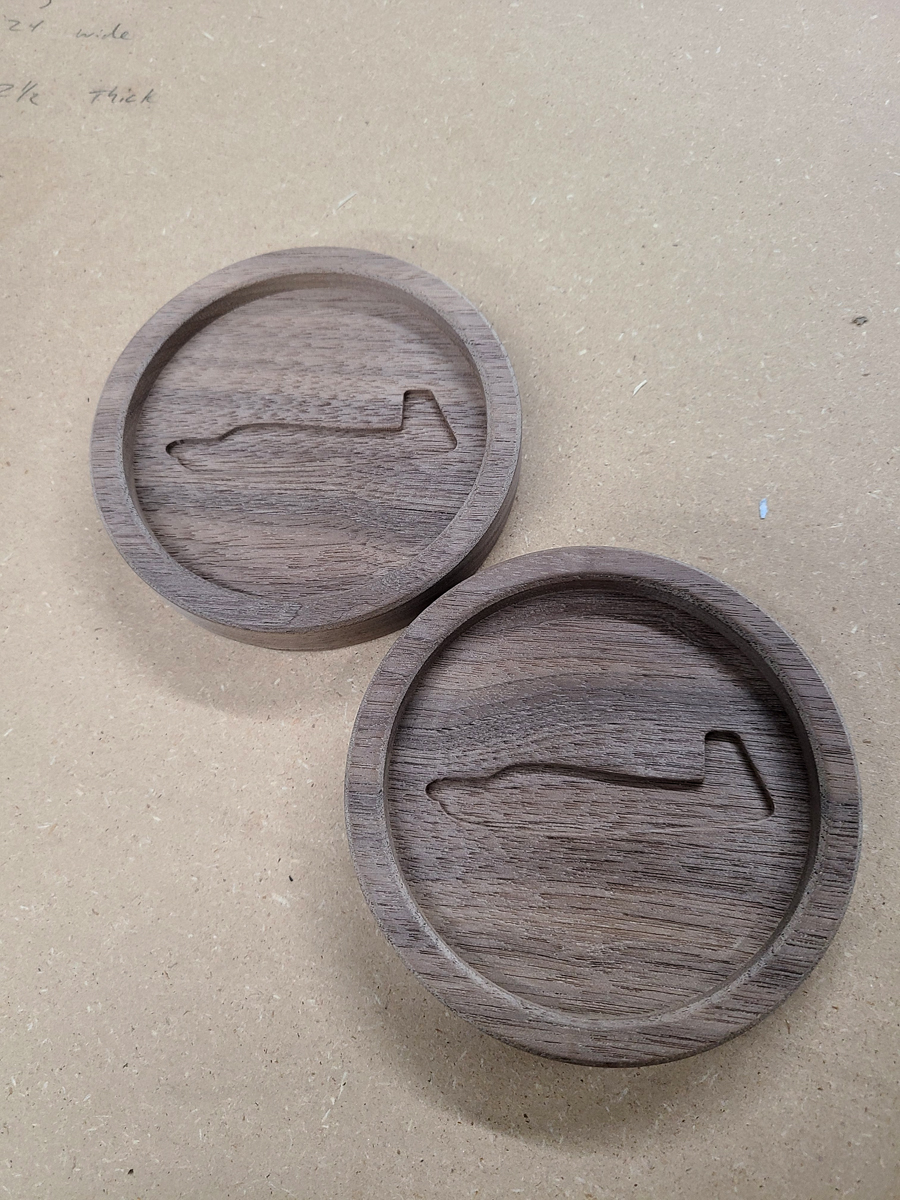
As my second "getting to know" my new Shapeoko 5 Pro CNC, I cut a pair of coasters out of walnut for my buddy.  I sanded them down to 220 grit and then raised the grain on them before sanding them to 320.  I'd like to get some recommendations on what finish to try on them. 

Here are the properties I'd like to have in the finish if possible:

Satin finish
Holds up well to moisture
Makes the grain pop
Water based, or if oil based I'd prefer wipe on... I hate cleaning brushes!

Here is what the coasters look like now...

20241008_205754.jpg


20241008_220021.jpg


20241008_220029.jpg

 
That's a really hard one and a huge can of worms. Any finish is a trade-off in some way or other, and I've been looking for the perfect finish for coasters and boards myself for some time and have tried almost everything.

- Danish Oil's work really well and gives a very nice finish, but doesn't handle heat rings and standing water real well, although it's easy to touch up, but not practical if giving them away or selling them.

- Osmo Poly-X oil I think will handle better than Danish Oil but not wear as well with use in my opinion.

- Varnish's will be quite hardy but don't look as nice. You could cut it down and buff with steel wool, but I'm not a huge fan of them on coasters.

- Rubio Monocoat others rave about, but for hard wearing and abused things like coasters I've heard it's pretty much useless long term.

- Pure tung oil cut with d-limonene will probably be the best all round finish, but it takes forever to cure between coats. I gave up on a board that was taking weeks, and on walnut and blackwood it just really made the surface look very dull, a good buffing and a wax polish over the top would probably make it look a million dollars, but it just takes so long to cure.

This led me to try a bunch of oils and hard wax oils, of which I wasn't happy with results in one or another, which led me to finally email Odie's which I'd been hearing a lot of glowing reports on for durability, wear and heat resistance, and ease of touching up.

I've been testing using their oils now and I must admit I'm pretty happy and reasonably impressed with them so far, they seem to wear well, look great, and are easy to apply and touch up. For now unless some new, superior product pops up, I plan on sticking with Odie's, and it is true what they say, a tiny bit goes a long way. So despite the high price, it's actually pretty good value in my opinion. I'll include their full response to my question about a finish suitable for resin/wood charcuterie boards and coasters:

"With the Odie’s Oil system of all-natural finishing, there is no one way to do it! If you’re new to Odie’s finishes, we recommend starting out with Odie’s Universal Oil and or Mr. Cornwall’s Super Duper Everlasting Oil. One or 2 coats of Super Duper Oil followed by a coat of Universal Oil will work great. Or you can just do multiple coats of either product. If using Odie’s Universal Oil alone, 1-2 coats is recommended. If using Super Duper Oil alone, 2-3 coats is recommended. Wait 24 hours between coats and be sure to buff the surface completely dry after each application."
 
+1 for Tung Oil. Use the quick-drying version containing a chemical dryer such as the 'Liberon' brand. Dry in 2-3 hours. Wipe on liberally, let it soak in for 10-15 minutes, wipe off the excess with paper towels, buff to a satin sheen with a soft cloth. Wait 2-3 hours and repeat. The more repeats you do, the more waterproof the wood will become. On oak and walnut countertops which take a heck of a daily beating (I install a lot of kitchens) 3 coats is usually enough.

Biggest advantage with this method is that if your coasters end up with a ring on them - 2 minutes with a 120-grit sander, re-oil. Done. Good as new. And ....... if you don't like the finish - just wipe it off with mineral spirits and in 10 minutes you'll be good to start again. The process is 100% reversible.
 
My go-to finish for small items is a wipe-on oil-based as follows. I use Scott paper shop towels.  I fold them to a suitable size to use, then unfold them allow to dry before putting them in the trash.  You can also soak them in water and then just throw them in the trash.  The volatiles will evaporate before the water and it will not combust.

1.  Sand thoroughly.
2.  Wipe on one coat of Seal Coat straight from the can.  It dries in about 20 minutes.
3.  Lightly sand with 400 grit wet or dry.
4.  Wipe on Minwax gloss oil based poly mixed 50% poly/50% mineral spirits.
5.  For horizontal surfaces, I apply 5 to 7 coats lightly scuffing the surface between coats with 400 grit wet/dry paper.
6.  I apply a coat of carnuba wax for the final finish.  If I want to maintain the gloss finish, I apply it with a cotton cloth and allow to dry and then buff.

If I want a satin finish, I apply the wax with 0000 steel wool.  Allow to dry and then buff.

If you want a duller finish, then use a coarser grade of steel wool. 

I never use anything other than gloss poly; the dulling agent that they add makes the finish look muddy. Over a black stain, it made my piece look gray.  It is better, especially for small pieces, to add the wax with the steel wool.  It also leaves the surface with a “hand” that definitely feels like quality. 

But note:  The wax can make applying additional coats problematic.  It may be difficult to remove all traces of the wax, which will create havoc with adhesion.

Never use any wax that contains silicone.

This is a no-cleanup process.  I do keep the 50/50 poly in a glass jar for storage between coats.  REMEMBER:  ALWAYS wipe the neck of the jar with mineral spirits thoroughly.  If there is any poly on the threads, the only way to remove the lid would be to shatter the glass.  I use small canning jars which do not neck down very much and are easy for dunking.  Lowes sells empty quart and pint cans and those don’t require special handling.

Tip:  Drive dry wall screws through a sheet of thin plywood all the way to the head.  Arrange the screws in a pattern that can be used to allow the coasters to dry.  Probably 3 per coaster.  The very sharp screw ends will leave little or no mark on the base of the coaster.  The painting triangles will not work as the points will end up too far apart for coasters.
 
sawdust-samurai said:
Here is what the coasters look like now...
p.jpeg
Maybe it's just me, but I don't see any images in your post. 

I'm also curious about finishes for walnut
 
I took a peek at the original post and this is how he posted the images.  I don’t know nearly enough to tell what went wrong.  I quoted the entire link, but only part of it appeared here.

I took a screen shot of one of the links and posted an image of the link below.  This is not the actual link; just an image of it.

MqicMXl.jpeg
 
Packard said:
I took a peek at the original post and this is how he posted the images.  I don’t know nearly enough to tell what went wrong.  I quoted the entire link, but only part of it appeared here.

I took a screen shot of one of the links and posted an image of the link below.  This is not the actual link; just an image of it.

Thanks!  My browser plug-in (uBlock Origin) blocked the dropbox link.
 
luvmytoolz said:
That's a really hard one and a huge can of worms. Any finish is a trade-off in some way or other, and I've been looking for the perfect finish for coasters and boards myself for some time and have tried almost everything.

- Danish Oil's work really well and gives a very nice finish, but doesn't handle heat rings and standing water real well, although it's easy to touch up, but not practical if giving them away or selling them.

- Osmo Poly-X oil I think will handle better than Danish Oil but not wear as well with use in my opinion.

- Varnish's will be quite hardy but don't look as nice. You could cut it down and buff with steel wool, but I'm not a huge fan of them on coasters.

- Rubio Monocoat others rave about, but for hard wearing and abused things like coasters I've heard it's pretty much useless long term.

- Pure tung oil cut with d-limonene will probably be the best all round finish, but it takes forever to cure between coats. I gave up on a board that was taking weeks, and on walnut and blackwood it just really made the surface look very dull, a good buffing and a wax polish over the top would probably make it look a million dollars, but it just takes so long to cure.

This led me to try a bunch of oils and hard wax oils, of which I wasn't happy with results in one or another, which led me to finally email Odie's which I'd been hearing a lot of glowing reports on for durability, wear and heat resistance, and ease of touching up.

I've been testing using their oils now and I must admit I'm pretty happy and reasonably impressed with them so far, they seem to wear well, look great, and are easy to apply and touch up. For now unless some new, superior product pops up, I plan on sticking with Odie's, and it is true what they say, a tiny bit goes a long way. So despite the high price, it's actually pretty good value in my opinion. I'll include their full response to my question about a finish suitable for resin/wood charcuterie boards and coasters:

"With the Odie’s Oil system of all-natural finishing, there is no one way to do it! If you’re new to Odie’s finishes, we recommend starting out with Odie’s Universal Oil and or Mr. Cornwall’s Super Duper Everlasting Oil. One or 2 coats of Super Duper Oil followed by a coat of Universal Oil will work great. Or you can just do multiple coats of either product. If using Odie’s Universal Oil alone, 1-2 coats is recommended. If using Super Duper Oil alone, 2-3 coats is recommended. Wait 24 hours between coats and be sure to buff the surface completely dry after each application."

Thanks for the very detailed response I'll be looking into both the pure tung oil and the Odie's.  I did watch a quick vid on Odie's on Amazon and it looks easy to use and quick drying.

woodbutcherbower said:
+1 for Tung Oil. Use the quick-drying version containing a chemical dryer such as the 'Liberon' brand. Dry in 2-3 hours. Wipe on liberally, let it soak in for 10-15 minutes, wipe off the excess with paper towels, buff to a satin sheen with a soft cloth. Wait 2-3 hours and repeat. The more repeats you do, the more waterproof the wood will become. On oak and walnut countertops which take a heck of a daily beating (I install a lot of kitchens) 3 coats is usually enough.

Biggest advantage with this method is that if your coasters end up with a ring on them - 2 minutes with a 120-grit sander, re-oil. Done. Good as new. And ....... if you don't like the finish - just wipe it off with mineral spirits and in 10 minutes you'll be good to start again. The process is 100% reversible.

Thanks, I'll be sure to look at ones with a chemical dryer.  Do you personally like the Liberon brand?

Packard said:
My go-to finish for small items is a wipe-on oil-based as follows. I use Scott paper shop towels.  I fold them to a suitable size to use, then unfold them allow to dry before putting them in the trash.  You can also soak them in water and then just throw them in the trash.  The volatiles will evaporate before the water and it will not combust.

1.  Sand thoroughly.
2.  Wipe on one coat of Seal Coat straight from the can.  It dries in about 20 minutes.
3.  Lightly sand with 400 grit wet or dry.
4.  Wipe on Minwax gloss oil based poly mixed 50% poly/50% mineral spirits.
5.  For horizontal surfaces, I apply 5 to 7 coats lightly scuffing the surface between coats with 400 grit wet/dry paper.
6.  I apply a coat of carnuba wax for the final finish.  If I want to maintain the gloss finish, I apply it with a cotton cloth and allow to dry and then buff.

If I want a satin finish, I apply the wax with 0000 steel wool.  Allow to dry and then buff.

If you want a duller finish, then use a coarser grade of steel wool. 

I never use anything other than gloss poly; the dulling agent that they add makes the finish look muddy. Over a black stain, it made my piece look gray.  It is better, especially for small pieces, to add the wax with the steel wool.  It also leaves the surface with a “hand” that definitely feels like quality. 

But note:  The wax can make applying additional coats problematic.  It may be difficult to remove all traces of the wax, which will create havoc with adhesion.

Never use any wax that contains silicone.

This is a no-cleanup process.  I do keep the 50/50 poly in a glass jar for storage between coats.  REMEMBER:  ALWAYS wipe the neck of the jar with mineral spirits thoroughly.  If there is any poly on the threads, the only way to remove the lid would be to shatter the glass.  I use small canning jars which do not neck down very much and are easy for dunking.  Lowes sells empty quart and pint cans and those don’t require special handling.

Tip:  Drive dry wall screws through a sheet of thin plywood all the way to the head.  Arrange the screws in a pattern that can be used to allow the coasters to dry.  Probably 3 per coaster.  The very sharp screw ends will leave little or no mark on the base of the coaster.  The painting triangles will not work as the points will end up too far apart for coasters.

Thanks Packard, your responses are always helpful.  Is the Seal Coat you are referring to Zinsser?  Also, your tip on the screws for holding the coasters while drying is great!

tjbnwi said:
Waterlox

Tom

Thanks Tom, I'll look into that one.  One of these days I might have to see if I can swing by and take a look at your setup, the photos you have posted of your work is amazing.

MikeGE said:
Maybe it's just me, but I don't see any images in your post. 

I'm also curious about finishes for walnut

Sorry about that.  I was trying to use Dropbox to make it easier than having to upload them to my server.  I've updated my first post so that the images should be showing to everyone now.

 
SealCoat is a Zinsser product.  It is a dewaxed clear shellac.  The advantages it adds, are it first acts as a primer for clear products.  It seals the surface so you don’t have to worry about raising the grain (especially useful if you are using a water based product).

My main reason I like it is that it seals the surface so that you are effectively getting the second coat down in an hour, instead of 8 hours.

I would note that I had issues using Benjamin Moore’s Advance cabinet paint over SealCoat, so, not a good primer for that paint.  But that is the only issue I’ve had with the shellac as a primer.
 
sawdust-samurai said:
As my second "getting to know" my new Shapeoko 5 Pro CNC, I cut a pair of coasters out of walnut for my buddy.  I sanded them down to 220 grit and then raised the grain on them before sanding them to 320.  I'd like to get some recommendations on what finish to try on them. 

Here are the properties I'd like to have in the finish if possible:

Satin finish
Holds up well to moisture
Makes the grain pop
Water based, or if oil based I'd prefer wipe on... I hate cleaning brushes!

Here is what the coasters look like now...

20241008_220029.jpg

Unless you plan on resin filling the image in relief, this is going to be difficult. 

If you are using this for cold drinks, condensation will pool into the engraved image and stand there.  Water sitting in the engraving will shorten the life of the finish.

Also, whether wipe on or brush on, it will be difficult to lay down an even coat with the engraving. 

On the other hand, if you resin fill the engraving (tinted or clear), this will be much easier and more durable.

Alternatively, if you can place the coasters on a perfectly level table and carefully regulate the amount of resin, you can fill the image area and leave a very thin and uniform coating on the rest of the coaster.  The outer edges and bottom you can finish with almost any clear coat.

I favor just using a tinted resin for the image and clear resin for the background.  It would be a very durable finish.

But note:  My only experience with poured resin finish is when I helped a friend pour a bar top.  It was crystal clear, looked nice and was exceptionally durable.  We had no adhesion problems, but I know that some people do.  I don’t know what we did to avoid that issue.

This guy does something similar but on a much larger scale:


I don’t know how you would mill it flush again on the coasters.

This gal gives more detail on the process:
 
Packard said:
Unless you plan on resin filling the image in relief, this is going to be difficult. 

If you are using this for cold drinks, condensation will pool into the engraved image and stand there.  Water sitting in the engraving will shorten the life of the finish.

Also, whether wipe on or brush on, it will be difficult to lay down an even coat with the engraving. 

On the other hand, if you resin fill the engraving (tinted or clear), this will be much easier and more durable.

Alternatively, if you can place the coasters on a perfectly level table and carefully regulate the amount of resin, you can fill the image area and leave a very thin and uniform coating on the rest of the coaster.  The outer edges and bottom you can finish with almost any clear coat.

I favor just using a tinted resin for the image and clear resin for the background.  It would be a very durable finish.

But note:  My only experience with poured resin finish is when I helped a friend pour a bar top.  It was crystal clear, looked nice and was exceptionally durable.  We had no adhesion problems, but I know that some people do.  I don’t know what we did to avoid that issue.

This guy does something similar but on a much larger scale:


I don’t know how you would mill it flush again on the coasters.

This gal gives more detail on the process:


Thanks for the links and info.  I decided to finish these with Odie's and I'm quite happy with how they came out.  I'll have to get some pics and post them for others to see.

I've done a resin (epoxy) pour on a small piece of walnut to fill the cracks that I turned into a key holder.  It came out nice as well.  If I was going to use resin on coasters like these, I'd CNC the image relief first and then do the pour.  Then I could CNC the pocket and that would flatten the resin image to the same level.  Then the rest of the coaster could be CNC'd and finished however one liked.
 
Back
Top