waho6o9
Member
Dowels done....
deepcreek said:Option A.
When you join the four panels, the top joints will be just as tight as where you have Domino's as long as you glue and clamp the the entire edge.
Are you still planning on wrapping them around an internal plywood column?
Grasshopper said:OK,
I am planning to make my mortises today.
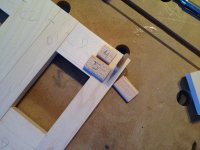
I wanted to see what you all do to mortise on small stock like you see in the picture below:
I assume a jig is in order, so if you have a clever jig, pics are appreciated.
[attachimg=1]
Ed Bray said:Grasshopper said:OK,
I am planning to make my mortises today.
I wanted to see what you all do to mortise on small stock like you see in the picture below:
I assume a jig is in order, so if you have a clever jig, pics are appreciated.
[attachimg=1]
Personally I don't think you need the double domino in that small joint, it will make the joint quite weak as there would be little wood left around the Dominos. I think you could easily get away with one #5 high and one #5 low on opposing angles. No requirement for more (and it will save you a few cents).
erock said:Do you have the clamping elements and some scrap 1/4" plywood?
If so, try this.....
Place a small piece of 1/4" plywood under the piece you want to plunge the mortise in. Using two stops and one clamp from the clamping elements. Have one stop set in the back to prevent the piece from moving back on you. And on the sides, have the clamp and other stop to secure the piece from moving left to right. Hope that makes sense?
Eric
Edit.....I just went out to my shop.....this won't work. LOL ! The holes in the MFT won't allow it. But just lifting the work piece up by 1/4" should depending on how long the piece is you're mortising.
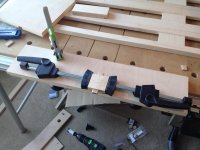
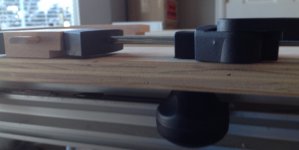
Mismarked said:Grasshopper, probably a few minutes too late for a suggestion, but if not.... It looked like you had a lot of the small pieces to mortise. If you could line them all up side by side pushing against a long straight scrap supported by two dogs at the rear and one dog or clamp at one end of the row of pieces, you would have a wide enough surface to lay down the Domino500, and you could hold them all together with one hand and then rearrange the last piece if necessary when you got to the end near the clamp.
erock said:BODA BOOM BODA BING BABY !
WINNER WINNER CHICKEN DINNER!
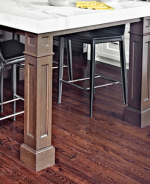
tjbnwi said:Route a dado 3/4" wide by 3/8" deep, in the posts about 6" down from the top. As you assemble the post insert a piece of 1x with a 3/4" hole in the center. locate the post center on the floor drill 3/4" hole. Use a length of 5/8" threaded rod to draw the post to the floor by tightening the nuts on the rod.
Tom

overanalyze said:Leave the lower base off. Cut blocks to fit snug inside the posts. Screw blocks to the floor. Slide posts over and screw to the blocks. Cover screws with base trim. It is how I did this one.