Have a job coming up where we have to clad walls with 8" tongue & groove planks.
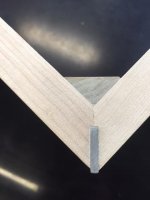
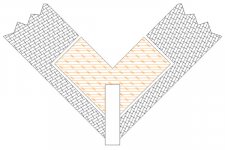
All the outside corners we have to miter and install a decorative metal trim piece (pic attached)
I was thinking of lining up 10 pieces and doing 1 pass with the track saw to make the miter. Then moving the track back slightly and making a 2nd pass with another track saw set at the correct depth to make the groove for the metal trim piece.
Anyone have any other suggestions?
I don't have the MFT table but this job is big enough to make it worth buying it if it would make life easier.