Woodpeckers Protractor (ruler)

I avoid measurements whenever possible.

If I want to create a hexagon, I know each cut has to be 60 degrees.

So I set my saw at the theoretical 60 degrees and make cuts on two opposite ends of a board.  Then I slice that board to 2” width pieces.  I then tape the mitered ends together into one long strip and fold it to a hexagon.  I then make adjustments to the angle of the cut ends until it makes a perfect hexagon.  I rarely have to make more than two samples.

I don’t actually recall assembling a hexagon.  But I have used this technique for rectangles and squares when required. 

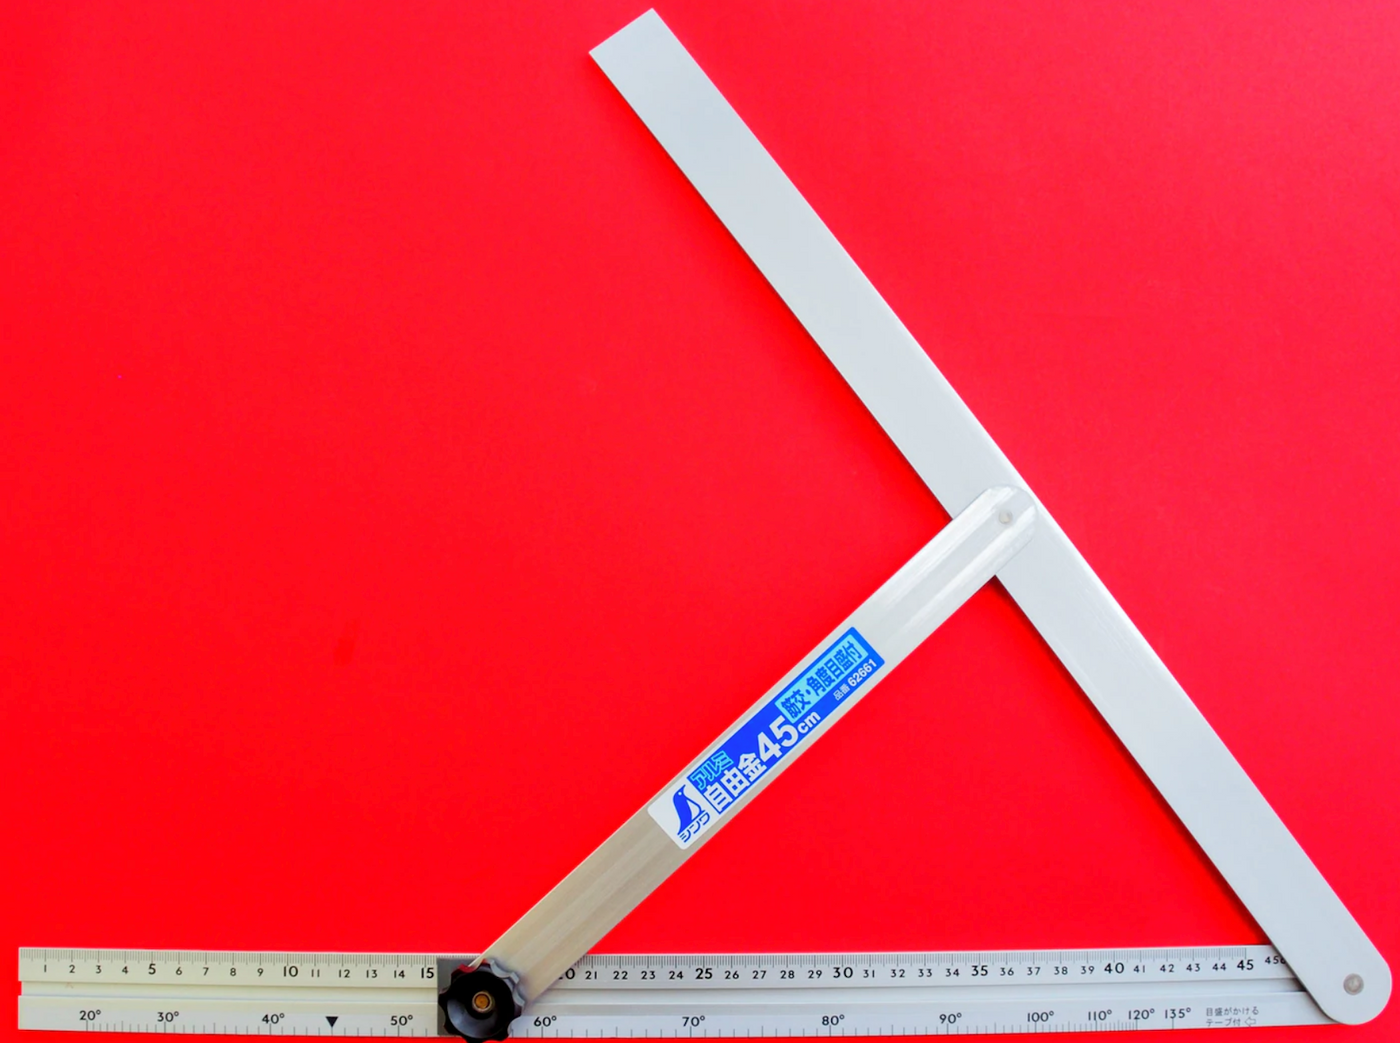
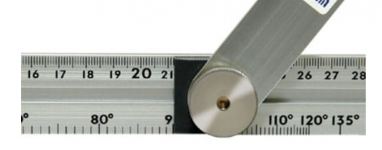
I do have a highly precise 45 degree only sliding table saw.  It can handle a maximum of about 4” width.

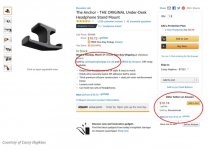
I did make an end table with miters along the 16” height a while back.  But not since.  I won’t be buying any precision angle measuring devices.
 
smorgasbord said:
Cutting a 150mm hexagon on my tablesaw sled a while back took a bit of trial and error before I got them perfect.

Packard said:
I avoid measurements whenever possible....
I then make adjustments to the angle of the cut ends until it makes a perfect hexagon.  I rarely have to make more than two samples.

That's the trial and error I'd like to avoid. With a hexagon, that's 12 cuts per trial, so even two samples is 24 cuts.

When I cut something to a rounded to 1mm length on my mitersaw or tablesaw sled, I've got my Incra fences, and they're fitting with shop-made micro-adjusters that I get usually get to 0.5mm numbers first time. For my tablesaw rip fence, I've got a DRO that gets me to 0.1mm dimensions. I check both with digital calipers every now and then (I've got 6", 8", and 12" calipers now, they're pretty cheap).

But for angles, I'm not trusting the digital angle finders that are all over YouTube. Unless in practice they're more accurate than their specs?
 
It is not 12 cuts.

Take a board about 12” x 12”.

Make a 60 degree cut on two opposing ends.

Then rip the board into 6 strips, with a 60 degree angle cut on both ends.

So two 60 degree angle cuts plus 5 rip cuts = 7 total cuts. 

Only two cuts that are fussy—the 60 degree cuts.  The rips could be off by a 1/4” and it would not affect the outcome of the process.

It does not come up often enough for me to consider specialized measuring equipment. 

If it has to be perfect, I would make test cuts anyway.  I would not risk expensive lumber based on my ability to accurately transfer dimensions from a measuring tool to the work product.

I use story sticks more often than I use rulers.  This is an extension of that mind-set.

If I were in the market for highly accurate angle setups, I would get a set of machinists’ triangles.  The inexpensive ones at Amazon.com would meet most woodworkers’ minds for accurate (about $40.00/set) or get the Mitutoyo version for about $160.00.

The basic set has two triangles, 30/60/90 degree and 45/45/90 degree.
https://www.higherprecision.com/pro...eries-981-angle-block-30-60-90-degrees-010014

Or buy the entire set: 

981-102-pic1__98469.1537904575.jpg


Be very careful about buying Mitutoyo products online as it is reputed to be the most counterfeited brand in the world.
 
Mini Me said:
Be very careful about buying Mitutoyo products online as it is reputed to be the most counterfeited brand in the world.

I didn’t know that. It’s pretty easy to fake too.

I read the other day that Amazon is plagued with counterfeit products, and despite spending huge amounts combatting the fakes, they seem to be losing ground.

Apparently Nike and Birkenstock will not sell on Amazon because they feel Amazon is not doing enough to combat the fakes.
https://www.nytimes.com/wirecutter/blog/amazon-counterfeit-fake-products/
 
[attachimg=1]

"Sold by and Fullfilled by Amazon".  Easy enough to buy from the actual manufacturer or by Amazon itself.


Attachments

  • Capture.JPG
    Capture.JPG
    90.7 KB · Views: 478
Packard said:
... I set my saw at the theoretical 60 degrees and make cuts on two opposite ends of a board.  Then I slice that board to 2” width pieces.  I then tape the mitered ends together into one long strip and fold it to a hexagon.  I then make adjustments to the angle of the cut ends until it makes a perfect hexagon.  I rarely have to make more than two samples.

Maybe I'm geometry impaired, but I'm not understanding how your process creates 6 equal-length trapezoidal pieces with 60º ends. Do you have a diagram or photo?

Packard said:
If I were in the market for highly accurate angle setups, I would get a set of machinists’ triangles. 

I have, and occasionally use, such a set. The problem I find is that they're typically too small for miter saw or tablesaw fence settings. They're OK for tablesaw bevel angles, but even there one has to be sure your throat plate is even with the tablesaw surface, and that your blade is reasonably flat, and that you're using a good square on the vertical edge. It's a bit fiddly for me - I probably should have a set that's magnetized.
 
smorgasbord said:
Packard said:
... I set my saw at the theoretical 60 degrees and make cuts on two opposite ends of a board.  Then I slice that board to 2” width pieces.  I then tape the mitered ends together into one long strip and fold it to a hexagon.  I then make adjustments to the angle of the cut ends until it makes a perfect hexagon.  I rarely have to make more than two samples.

Maybe I'm geometry impaired, but I'm not understanding how your process creates 6 equal-length trapezoidal pieces with 60º ends. Do you have a diagram or photo?

Packard said:
If I were in the market for highly accurate angle setups, I would get a set of machinists’ triangles. 

I have, and occasionally use, such a set. The problem I find is that they're typically too small for miter saw or tablesaw fence settings. They're OK for tablesaw bevel angles, but even there one has to be sure your throat plate is even with the tablesaw surface, and that your blade is reasonably flat, and that you're using a good square on the vertical edge. It's a bit fiddly for me - I probably should have a set that's magnetized.

I will make up a sample and take a few pics.  I do this most often with rectangles.  The process is the same, just 60 degree angles instead of 45 degree angles.
 
For this demonstration, I used 3/4” plywood about 6” x 12”.

The first step was to set the saw angle using a 30/60/90 triangle that is part of a $4.00 set.  It’s intended audience is high school students studying geometry.

The first photo shows the board with the opposite ends cut on the angle.

MPzneEm.jpeg


I next sliced the board into 6 equal sized pieces.

GgpGlKb.jpeg


I taped it up into a hex.  I am confident that with proper clamping all the miters will close up.  It might close up if I used packing tape instead of masking tape. If it did not close up, I would tweak the angles until it did, or I would burnish the joints to close up any outside gap.

gBvuCZN.jpeg


I re-taped the hexagon with a strong packing tape.  It tightened up the joints to what I would call “ideal”. 

The photo hosting site I use (IMGUR) is “over capacity”.  I will try posting the image a little later.

Addendum:  IMGUR got its act together.  Here is the hexagon assembled with stronger packing tape.  You can enlarge the image to better see the joints.

p98AlyZ.jpeg


The set up triangle was part of this Staedtler “math” set, which was $3.79 at staples.  It included a protractor, 30/60/90 triangle,, 45/90/45 triangle, 6” ruler.

These are all small items and perfect for my table saw.
https://www.staples.ca/products/455884-en-staedtler-4-piece-math-set-instruments

 
I once had to make several small tetrahedrons, about a foot on a side.

The joints had to be perfectly tight and sharp. After getting the blade angle about right I used a bevel gauge and feeler gauges to make the final adjustment. An order of magnitude finer than a digital protractor and also much finer than the vernier protractor I used initially.

Since the miter angle is much less than 45* I made a sled rig to run the parts vertically.
 
I was just trying to show how to test the setup.  If I were going to make a hex shaped end table, I would be ready to cut at this point. 

A burnishing tool (the chrome shaft of a screwdriver is good) can be used to burnish down any of the veneer that does not close up perfectly.  You can close up about 0.005” on each panel that way. 

These joints are stronger than most give them credit for.  Half the layers will be end grain to end grain glue-up.  But the rest would be face grain to face grain.  So for 3/4” plywood, a little stronger than 3/8 to 3/8” face grain glue ups.  With the addition of glue blocks on the inside, you can get stronger than solid wood joints. 
 
I was under the impression that the OP was making the hexagon fro plywood.

My example is showing that you can test the accuracy of your cuts rather quickly and easily.  It took me—tops, maybe 15 minutes to make the test cuts.

Even if I had a super accurate device to set the cut angles, I would want to make a test before risking the expensive lumber.

Also, it demonstrates that drafting triangles, even small ones, are fine for setting blade angle.  The one I was using probably cost less than $2.00.

The small size was an advantage when setting blade angle on the table saw.

I’ve only made square cuts on my track saw. It might be time to learn how to adjust that blade angle.
 
Packard said:
For this demonstration, I used 3/4” plywood about 6” x 12”....

OK, we're talking different things, sorry for not being clearer.

smorgasbord said:
I have, and occasionally use, such a set. The problem I find is that they're typically too small for miter saw or tablesaw fence settings. They're OK for tablesaw bevel angles, but even there one has to be sure your throat plate is even with the tablesaw surface, and that your blade is reasonably flat, and that you're using a good square on the vertical edge. It's a bit fiddly for me - I probably should have a set that's magnetized.

I'm talking wide stock, so not using the blade bevel angle but a miter gauge, miter sled fence, or even miter saw controlled angle. It's been a couple years, but the last time I did a hexagon it needed to be almost a solid that was about 150mm across.

Thinking about it more now, a larger version of the 30-60-90 triangle that I could just clamp in place against my miter sled fence would probably do the trick just fine.
 
Drafting triangles are great when the needed angle is 30, 60, 90, or 45 degrees. No help at all when you need 35.26*.
 
Mini Me said:
Patrick Sullivan made a very nice Mitre gauge ...

I'm on my second version of something similar (which is also very similar to Rockler's premade sled). I'm using an Incra fence (with their stop) on an L-bracket for pivot, and I've got a stop at the far end that is micro-adjustable for an pretty accurate 90º. I don't have markings on the base, which is a logical next step. Now that I've got a CNC it's probably time for me to remake the sled, using the CNC to drill the holes and an arc for the far support (I've got a metal T track that goes at an angle now), as well as to make markings for common angles.

Theoretically, having the angle markings far away from the pivot will make choosing angles more accurate than any miter gauge head,  but the detents in some miter gauge heads give repeatability. My tablesaw has non-standard miter gauge slots, which has complicated use of aftermarket miter gauges that often depend on accurate miter bar drilling for accuracy. Again, now with the CNC I can make my own accurate miter bars out of Delrin or even aluminum.
 
smorgasbord said:
Packard said:
For this demonstration, I used 3/4” plywood about 6” x 12”....

OK, we're talking different things, sorry for not being clearer.

smorgasbord said:
I have, and occasionally use, such a set. The problem I find is that they're typically too small for miter saw or tablesaw fence settings. They're OK for tablesaw bevel angles, but even there one has to be sure your throat plate is even with the tablesaw surface, and that your blade is reasonably flat, and that you're using a good square on the vertical edge. It's a bit fiddly for me - I probably should have a set that's magnetized.

I'm talking wide stock, so not using the blade bevel angle but a miter gauge, miter sled fence, or even miter saw controlled angle. It's been a couple years, but the last time I did a hexagon it needed to be almost a solid that was about 150mm across.

Thinking about it more now, a larger version of the 30-60-90 triangle that I could just clamp in place against my miter sled fence would probably do the trick just fine.

Drafting triangles are (usually) very precise.  My experience is with Staedtler, which I bought for my drafting class in 1964 1965.  For my earlier exercise I could not find my 30/60/90 (but could find my 45/45/90 and all my compasses, dividers and ruling pens.

They make a variety of sizes and despite the precision, are fairly inexpensive.  Mentions about counterfeit measuring tools has me divided on suggesting getting these from Amazon.

Perhaps a drafting supply company.
https://www.duall.com/store/category/431/staedtler-triangles.html

Also,  you can construct very accurate angles using a 30/60/90 triangle calculator (or you could do the math yourself). 
https://www.omnicalculator.com/math/triangle-30-60-90
 
smorgasbord said:
. . . Theoretically, having the angle markings far away from the pivot will make choosing angles more accurate than any miter gauge head,  but the detents in some miter gauge heads give repeatability. . .

Shinwah ran with that idea.  It is basically using the mathematical lengths of two sides to get the angle.

Here’s the math: https://www.varsitytutors.com/hotmath/hotmath_help/topics/30-60-90-triangles

Even easier, here is a calculator to do the math:
https://www.omnicalculator.com/math/triangle-30-60-90

Here is the Shinwah sliding angle gage.  Because of the size, the scale measurements are rather large, promoting accuracy.  They make a 12”, 18” and 24” sizes (all in metric, so my numbers are approximate).

ScreenShot2022-02-23at1.26.17PM.png


They come in a three sizes.  Less than $100.00.  Amazon and others online sell them.
 
Packard said:
Shinwah ran with that idea.  It is basically using the mathematical lengths of two sides to get the angle.
...
They come in a three sizes.  Less than $100.00.  Amazon and others online sell them.

Thanks for that! I found the Shinwa Sliding Bevels on OsakaTools and Amazon as you said. I do wonder about their accuracy and to what tolerances they're made. Here's a closeup of the largest one:
[attachimg=1]

As you can see, they're only calibrated in whole degrees. But since the scale for degrees isn't linear due to the math involved, it can get tricky to set the thing to better than 1/4º accuracy. I'd like to get 1/10º accuracy, which is what I believe I have with my AngleWright.  I was thinking of making another tablesaw sled, so perhaps I just mount the AngleWright to it, attach my Incra Fence to it, and use that. But, it's nice having the AngleWright separate on its own for setting my bevel gauges that I then use to set blade and fence, etc. angles. And I haven't seen one pop up on eBay ever.

I'll probably get the 60cm Shinwa and see how well it works out. If there's no play in the pivots I could always re-mark up the angles - perhaps the mm markings could be punched into a calculator as well.


Attachments

  • Screenshot 2024-04-02 at 2.51.52 PM.png
    Screenshot 2024-04-02 at 2.51.52 PM.png
    392 KB · Views: 472
smorgasbord said:
My tablesaw has non-standard miter gauge slots, which has complicated use of aftermarket miter gauges that often depend on accurate miter bar drilling for accuracy. Again, now with the CNC I can make my own accurate miter bars out of Delrin or even aluminum.

I gave up on using long bits of wood to locate any jigs in the mitre slot and now use suitably sized round dowels or pins made from synthetic material instead of wood. I haven't done it but if needed the dowels could be offset from their centre and made adjustable from the top so they could be turned to set very precise alignment or setting the angle on a mitre gauge. I have a Hammer slider which has an odd sized track and used pins as I described made of the white plastic material cutting boards are made from for my Frits add Franz jig and it slides with no effort at all and no hang ups either. 
 
Back
Top