EA Custom Millwork
Member
- Joined
- Aug 24, 2013
- Messages
- 45
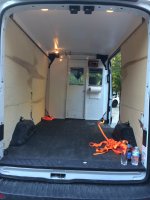
I bought a 2015 mid roof, std wb, 3.5 ecoboost Transit about 6 weeks back (blink of an eye). I intend to set it up for my custom millwork/renovation company and to use as a camper for my wife and I (recent empty nesters).
So far I've got the Weather Gaurd bulkhead with a door installed, foil faced bubble wrap for insulation, and 1/2" plywood on the ceiling. I used 3/16" foam weatherstrip between the metal and plywood and screwed in place with tech screws.
I hope to find an RV upfitter to set up a proper removable 3rd seat just behind the bulkhead door. Has anyone else done this?
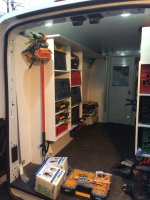
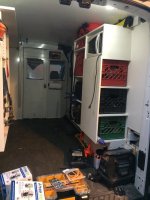
I hope to get to work on the walls tomorrow 3/4" plywood with the same insulation behind it. I will use DAP polyurethane glue between the metal and plywood, and on the joints
I'll attach photos as progress is made.
FYI: I used the plastic panels as templates for the wall plywood.
So far I've got the Weather Gaurd bulkhead with a door installed, foil faced bubble wrap for insulation, and 1/2" plywood on the ceiling. I used 3/16" foam weatherstrip between the metal and plywood and screwed in place with tech screws.
I hope to find an RV upfitter to set up a proper removable 3rd seat just behind the bulkhead door. Has anyone else done this?
I hope to get to work on the walls tomorrow 3/4" plywood with the same insulation behind it. I will use DAP polyurethane glue between the metal and plywood, and on the joints
I'll attach photos as progress is made.
FYI: I used the plastic panels as templates for the wall plywood.