Hello Everyone and Happy Holidays! I wanted to share my project that I'm making for X-mas gifts. I want to give credit to Spalm from Lumberjocks for taking the time to document and explain his 3D cutting board. It made it really easy to follow and if anyone ever wanted to give the 3D cutting boards a try you should.
I was intrigued from the first time I saw the 3d cutting board and have always wanted to give it a try and now that I just got a drum sander as a gift and had time to start I started the build process. Hope you enjoy.
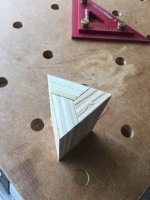
I first wanted to make test cuts on some scrap plywood to make certain the fit was tight.
View attachment 1View attachment 2
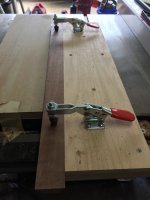
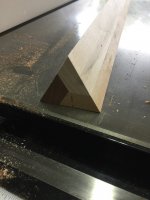
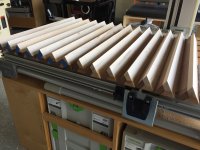
Jigs I copied from Spalm, it's a sliding jig to safely cut the trapezoid strips.
View attachment 3View attachment 4
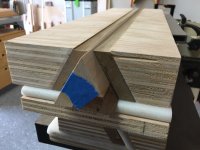
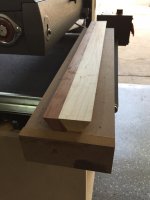
Three species of hardwoods were used: walnut, cherry, and maple test fitted and ready for first sub assembly glue up.
View attachment 5
Another jig copied from LJ. I used MDF because I had it on hand and plus it was easy to apply paste wax so the glue up was minimum mess.
View attachment 6
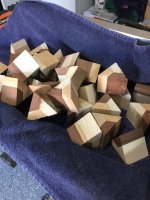
All glued up into triangles.
View attachment 7
Jig I made so I could run it through my drum sander which saved me a bunch of time.
View attachment 8
Triangles cut to 2 1/8" inch because I wanted the final thickness to be 2" thick.
View attachment 9
Laying out the triangle shapes
View attachment 10
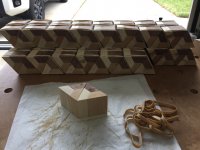
I decided I would glue two triangles together to make the final glue up easier. I have read on LJ's that the hardest part was the glue up and to keep all aligned. I am glad I spent the time to glue them up because the final glue up went pretty smooth.
View attachment 11
Clamp up jig made with MDF again, one side is permanent and the other side is moveable for clamping.
View attachment 12
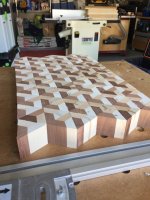
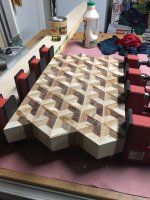
Final glue up before trimming, drum sanding, and edge work.
View attachment 13
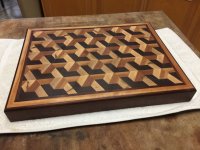
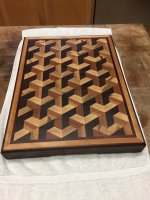
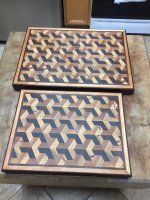
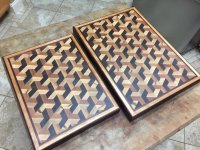
Completed boards. I used 5mm dominoes to make aligning the picture frame molding around the board.
View attachment 14
View attachment 15
View attachment 16
View attachment 17
I was intrigued from the first time I saw the 3d cutting board and have always wanted to give it a try and now that I just got a drum sander as a gift and had time to start I started the build process. Hope you enjoy.
I first wanted to make test cuts on some scrap plywood to make certain the fit was tight.
View attachment 1View attachment 2
Jigs I copied from Spalm, it's a sliding jig to safely cut the trapezoid strips.
View attachment 3View attachment 4
Three species of hardwoods were used: walnut, cherry, and maple test fitted and ready for first sub assembly glue up.
View attachment 5
Another jig copied from LJ. I used MDF because I had it on hand and plus it was easy to apply paste wax so the glue up was minimum mess.
View attachment 6
All glued up into triangles.
View attachment 7
Jig I made so I could run it through my drum sander which saved me a bunch of time.
View attachment 8
Triangles cut to 2 1/8" inch because I wanted the final thickness to be 2" thick.
View attachment 9
Laying out the triangle shapes
View attachment 10
I decided I would glue two triangles together to make the final glue up easier. I have read on LJ's that the hardest part was the glue up and to keep all aligned. I am glad I spent the time to glue them up because the final glue up went pretty smooth.
View attachment 11
Clamp up jig made with MDF again, one side is permanent and the other side is moveable for clamping.
View attachment 12
Final glue up before trimming, drum sanding, and edge work.
View attachment 13
Completed boards. I used 5mm dominoes to make aligning the picture frame molding around the board.
View attachment 14
View attachment 15
View attachment 16
View attachment 17
Attachments
-
 IMG_3830.jpg158.1 KB · Views: 310
 -
 IMG_3832.jpg166.1 KB · Views: 348
 -
 IMG_3836.jpg154.4 KB · Views: 328
 -
 IMG_3837.jpg142.2 KB · Views: 314
 -
 IMG_3838.jpg148.8 KB · Views: 371
 -
 IMG_3846.JPG249.4 KB · Views: 401
 -
 IMG_3845.JPG262.2 KB · Views: 448
 -
 IMG_3847.jpg129.5 KB · Views: 341
 -
 IMG_3849.jpg234.4 KB · Views: 396
 -
 IMG_3853.jpg186.7 KB · Views: 575
 -
 IMG_3863.JPG246.5 KB · Views: 360
 -
 IMG_3871.jpg195.3 KB · Views: 372
 -
 IMG_3882.jpg196 KB · Views: 407
 -
 IMG_3886.JPG398.4 KB · Views: 883
 -
 IMG_3887.jpg330.1 KB · Views: 1,607
 -
 IMG_3895.jpg357.7 KB · Views: 445
 -
 IMG_3896.JPG515.9 KB · Views: 343