Accurate Butterflies (Bowties?) for reinforcing cracks

Ugh, so I'm finding that the taper bit doesn't cut so well as a router bit, more like a drill bit. Maybe I dulled it already or something.

Going to try tapering the plugs and keeping the mortise walls square now. What a time sink, but learning stuff at least.
 
Ugh, so I'm finding that the taper bit doesn't cut so well as a router bit, more like a drill bit. Maybe I dulled it already or something.

Going to try tapering the plugs and keeping the mortise walls square now. What a time sink, but learning stuff at least.
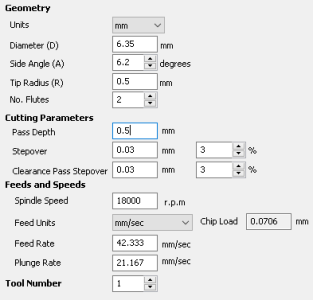
Yeah the very low degree ones need to take extremely light cuts generally. The thing to remember with them is that at dead centre it's effectively zero rpm so I use a very small stepover and DOC for plastics and wood.

I've added the settings for one of the ones I use most for tapering inside my silicone mold masters.
 

Attachments

  • tapered.bit.PNG
    tapered.bit.PNG
    7.9 KB · Views: 3
Yeah the very low degree ones need to take extremely light cuts generally. The thing to remember with them is that at dead centre it's effectively zero rpm so I use a very small stepover and DOC for plastics and wood.
Well, I'm using them like I'd use a regular spiral end mill cutting a dado - so using the sides, not the bottom. Ironically, using the bottom and "drilling down" seems to work best. Another interesting thing was that using the 1º taper bit on my CNC seems to work as a final clean-up pass (less than a mm of material to remove), but using it in my hand-held router is pretty much a no-go, except for drilling down. And what I'm dong there is clearing away most of the waste with a regular ¼" spiral cutter, then coming back with the tapered version. And, at 1º, it should be super-close to a standard 0º end mill, but the spiral on this bit is very steep. Maybe I already dulled the bit?
 
Maybe I already dulled the bit?
I'd be really surprised if you did, they aren't at all aggressive but they do last quite a long while even under heavy load. Mine on the CNC have lasted considerably longer that I ever expected and they are fairly cheap ones.

Which is always nice given how many cutters I manage to destroy! ;-)
 
OK, finally broke the code. Here's the result:
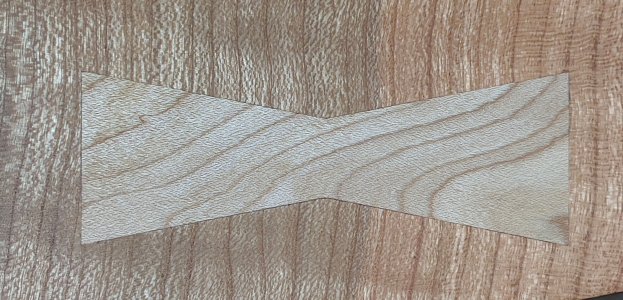
CoatOfFinish.jpg
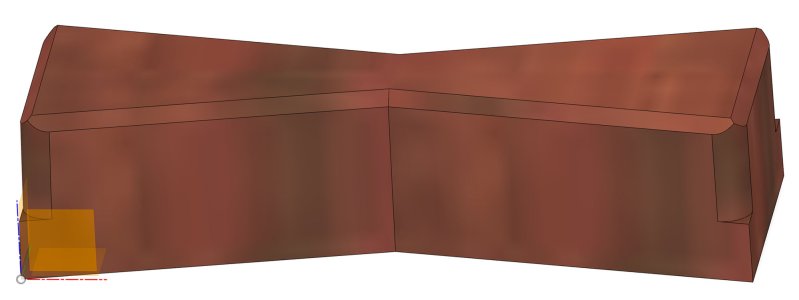
Backing up, here's the plug design:
FusionDesign.jpg
It's got 1º side walls, rounded corners 6mm below the surface, and chamfered edges at the bottom for excess glue.

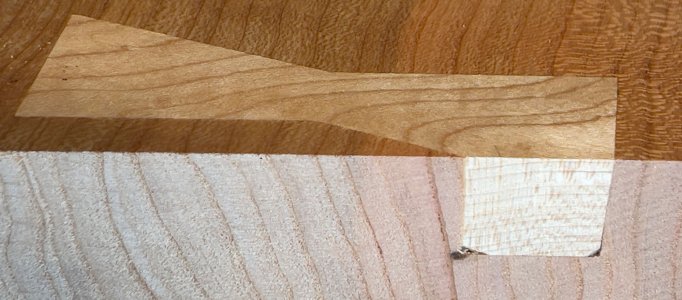
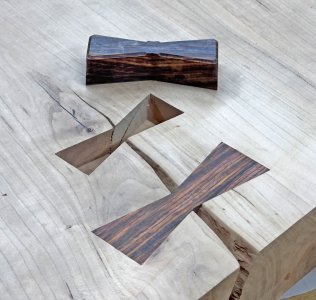
Here's what it look like after milling and chiseling the corners:
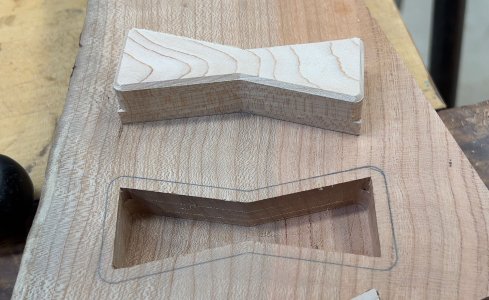
BowtieAndMortise.jpg

The mortise is from a template in the same Fusion file, cut using a guide bushing and ¼" spiral upcut bit.

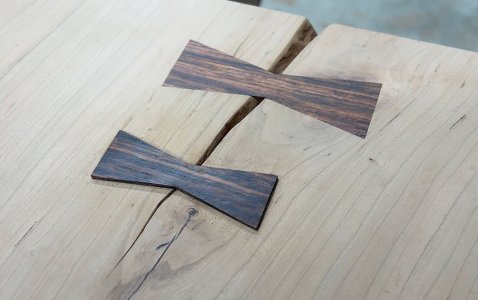
A trial fit:
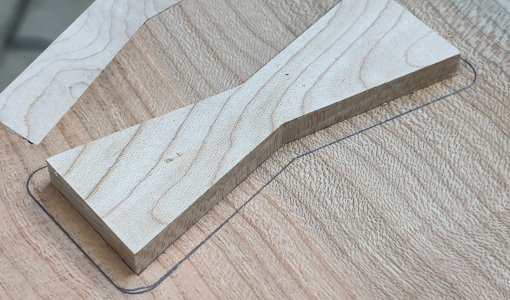
TrialFit.jpg

You can see a prior failed attempt above it.

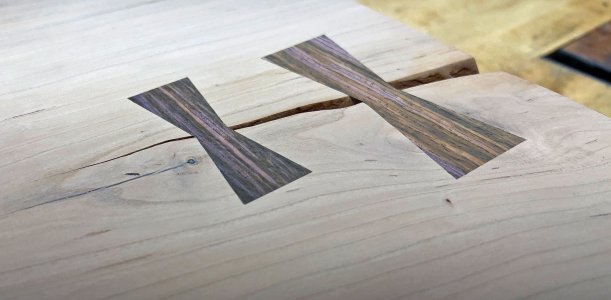
Glued in and leveled:
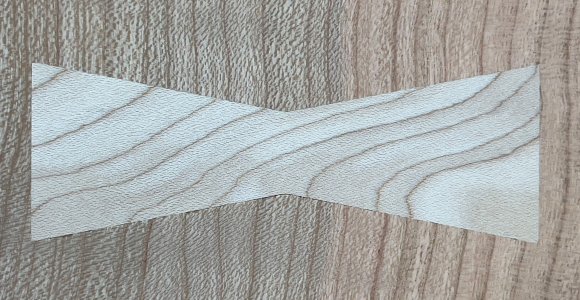
GluedAndLeveled.jpg

And if you look closely, especially at the bottom edge, you can see some tear out in the slab (cherry) from the upcut bit. For the real one, I'll at least do a couple passes with a down cut bit first.

The first photo shows the finished "joint." There is no filler here - just sanded everything down enough to remove most of the mortise tear-out, then a slap of Odie's that hasn't yet dried for the photo.

The plug is designed to fit in a 17mm deep mortise, but has 2mm of additional thickness above that. I cut the mortise to a 17.5mm depth (abouts) so there's some room to force it in deeper, hopefully slightly crushing some fibers for a tight fit at the top.

And hopefully with the Fusion 360 file using Parameters, I can easily dial in bowtie length, outside width, and "angle" of sides to the short ends/edges. This one is 82mm long, 29mm wide, and 79º - matching a similar bowtie on a genuine Nakashima table I inherited.

I saw a video by Katz-Moses, made some years ago, where he did a nice design change having the boxties ends not parallel to each other, but he also cut the mortises by hand and used a lot of sawdust filler.
 
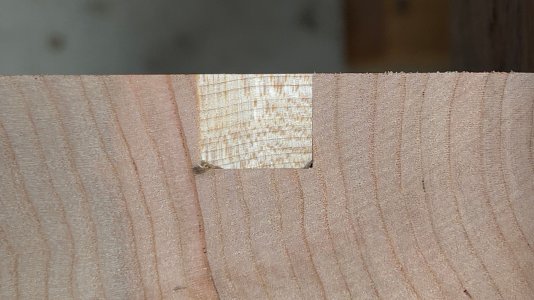
I cut through the bowtie to see how it looks structurally:
Cutaway1.jpg

Cutaway.jpg

I can see a slight gap on the wall at the right near the bottom, but the bottom itself looks fine, as does the wall on the left. So maybe had a sub degree tilt when I inserted. But, overall this should be structurally sound.

I'm happy with this result, and no taper bits are being used. I think the SO might have gotten me here faster, but I don't think making the tapered walls on the bowtie plug would be easy with the SO - maybe someone with experience can explain?
 
That's about as perfect as you can get!

And it's good you did it without using taper bits, once you get used to it they're not too bad to cut for a straight fit. Just a little more to and fro'ing to finesse the fit.
 
Well, Fusion 360 and my Shapeoko CNC make the tapers pretty easy to cut, although I need more passes than if I were using a good taper bit.

EDIT: I currently have zero finesse-ing. I literally put glue in the mortise and on the bottom of the plug, then insert and clamp.
 
Last edited:
That looks really good. For cherry I use Titebond original because it dries lighter. For walnut I’ll use Titebond III because it dries darker.

There’s usually a lot of hydraulic presses if you put a bunch of glue in the recess. Can create problems sinking the insert or create a blow out close by.

I’d suggest using the downcut spiral for the whole recess. I can’t tell a significant difference when using dust collection and you are less likely to get tear out.

Ron
 
For the final versions, I'm going to use cocobolo bowties in the cherry top.
I was worried about the hydraulic pressure, which is why I chamfered the bottom edges to give some place for excess glue to go. Since I don't put glue on the side walls of the plug, just the mortise, I think I'm OK as the plug will absorb some glue, and the cut-away seems to verify that. But, maybe I should mill some glue escape channels in the side walls of the plug (that don't go all the way up to the top, obviously) just to be sure.

Dust collection is all but impossible with guide bushings, unless I were to use a really large guide bushing (like 1" with a ¼" bit). Right now I haven't even bothered to hook up the dust collection to the router - just vacuum it out after each ¼" pass. I suppose I could change the Fusion parameters to use a 1" guide bushing and try that, but at this point I need only 4 bowties and so probably won't bother.

Here's my Fusion parameters file:
Parameters.png

One difference is that the assembly shown above had a FitGap of -0.1mm and that went in so smoothly that I thought I'd bump up the interference fit a tad to squeeze the fibers at the very top to get that glue line as thin as possible.
 
Last edited:
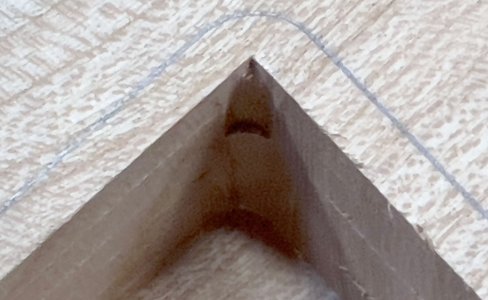
One more thing, I still have to chisel the corners out by hand. Rounding the corners of the plug 6mm below the surface makes that a bit easier, but I also switch from a ¼" bit in a ⅝" guide bushing to a ⅛" bit in a ½" guide bushing and just plunge at least 6mm into the corners. Here's a corner CU:
Corner.jpg

In addition to showing the upcut bit's tear-out, you can see the corner radiuses (⅛" at the bottom, 1/16" near the top) as well as the hand-chiseled corner that's only a mm or two deep. I do want to be sure I have enough sharp corner depth that when I final sand I don't expose a round corner.
 
The original idea was to have some lee-way built in such that you always knew the visible glue line would be tight, even if there were a gap on the bottom.

I'm no longer tapering the mortise sides, and the tapered plug is designed with an extra 2mm of headroom, so I don't have to mill the mortise depth exactly, as long as it's a minimum depth. The CNC-milled plug and created template seem to be guaranteeing me a really good fit with the sides converging just a bit before the plug bottoms out. I'm able to force the plug in that last bit (mm or so) which I'm guessing compresses the top visible fibers as the plug bottoms out. At least that's what I see in the last one I made, shown in the photos above.
 
Back
Top