This has been a helpful post, particularly the links; a keeper, among the usual chaff.
Clark,Thanks for your kind words and comments. I've dedicated a lot of time to the design process hoping it will help others who need a similar bench and don't want to spend the $1000 plus dollars it would cost to buy one.
For the re-build of the second table, permit some suggestions.
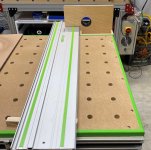
1. Consider inserting the T-Tracks in a dado, to provide a broader more stable surface for vertical clamping with T-Track clamps.
I have strips of 1/2" Oak cut to fit between and below the T-Tracks. However at this time I haven't found the need for them in my work. If I start doing vertical clamping I will install the strips.
2. Consider cutting hand-holes in strategic places to help with wrestling with the moving and hanging of the table. Consider adding the hand-holes to the shelf to make this more easily moved or carried.
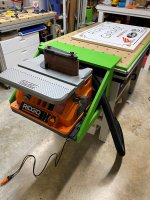
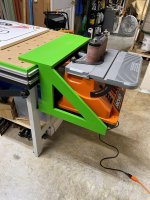
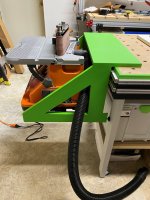
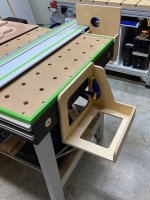
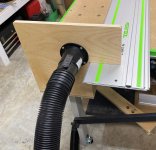
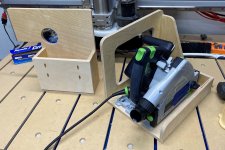
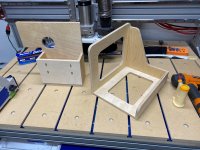
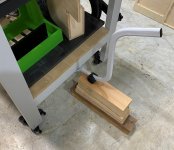
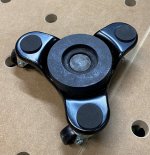
The tables was designed to be moved on 4 small 3 wheeled furniture dollies. A furniture lifter is used on the leg crossmembers to lift the table easily with one hand to place the dollies. (See Pic below) The dollies allow me to move the mft around the shop if needed. The modified dollies have a recess for the adjustable legs to set in so the table wont slip off during movement. The design is to roll the table up to a wall where supports are mounted and then lift the outer edge of the table up and secure with 2 clamping brackets. The legs can then be removed and stored in underside of mft with shelf.https://www.amazon.com/gp/product/B0835LH6C6/ref=ppx_yo_dt_b_search_asin_title?ie=UTF8&psc=1
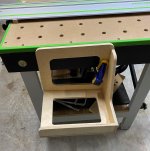
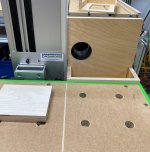
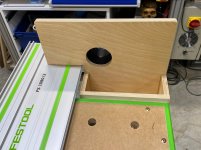
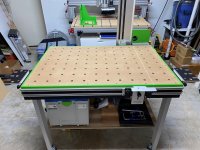
3. Consider cutting a 1/4 inch MDF sacrificial top with some 20 mm dog holes to hold in place for glue ups and finishing. By installing some posts on the underside of the table, using T-nuts, the sacrificial top can be fixed to the underside of the table to keep the legs
and shelf in place when stored.
I have a hardboard top/cover with a dog holes in each corner to secure in place. I use these to hold the cover in place for glue ups and other work.https://tsoproducts.com/bench-dogs/power-loc-bench-connector-dogs/
Other possible add-ons: A boom, a parts and tool tray, an electrical outlet, a narrow box like wheeled platform to move the table around the shop in a vertical position, also able to be stored, a shorter, second set of legs to lower the table for easier assembly work and finishing.
I normally don't work on projects large enough to require a boom but could be useful for some. I have a tool tray that attaches to t-track. Electrical outlet would be very useful and will install at some point. The present height of 36" works for me however others might find shorter legs useful. Presently I'm working on the wall brackets and not making much progress due to outdoor work on home/property!
I look forward to chapter two and seeing the second table.

") . Definitely keeping this handy for a future build
. Definitely keeping this handy for a future build