HowardH
Member
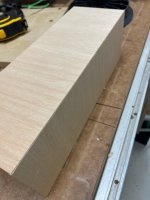
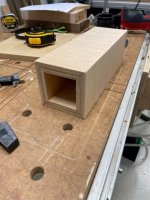
I have a fairly simple commission to build a pair of floating night tables for my brother and SIL. The boxes are going to be about 15" deep, 20-24" wide and 8-10" tall and I'll use a French cleat to attach them to the wall. My plan is use a glue up of hardwood to make panels and then miter the corners. I could also use a hardwood ply and edge band the exposed edge in the front. I have a Mafell DDF-40 to dowel the corners for strength. My question is what options are there to adequately clamp the miters so once glued, they will be tight. I have a pair of band clamps that I tested on a small box I made as a test piece.
[attachimg=1]
[attachimg=2]
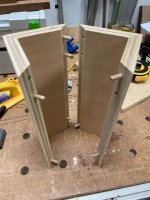
[attachimg=3]
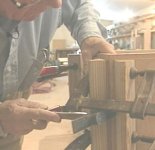
They don't have enough clamping pressure. I supposed I could use a bunch of parallel clamps and alternate the direction to have clamping pressure on all four sides. The corner clamps available I have seen are more for holding the parts together in order to fasten them, not to provide clamping pressure to bring in the corners tight. Ideas?
[attachimg=1]
[attachimg=2]
[attachimg=3]
They don't have enough clamping pressure. I supposed I could use a bunch of parallel clamps and alternate the direction to have clamping pressure on all four sides. The corner clamps available I have seen are more for holding the parts together in order to fasten them, not to provide clamping pressure to bring in the corners tight. Ideas?