JayStPeter
Member
- Joined
- Jan 24, 2007
- Messages
- 399
Hey guys, have not been actively posting for several years, but have been lurking around. My shop has been used heavily at times and sometimes gathering cobwebs.
I've been planning some garage storage and figure it's time to upgrade my plywood cutting setup a bit. This first post will mostly be a bit of what I currently have, why I want to change it, and my plan. But, the cutting has started.
First up, my current plywood cutting table. I made it back when I got my ATF55. It's about 40"x6'. There's a 3/4" plywood grid using some pretty heavy duty banquet table legs I pulled from a dumpster. I eventually covered the top with a piece of 1/4" ply so I could use it for an occasional assembly table and it has pretty much been setup constantly since. It is covered in glue and paint. But, it doesn't work great for much other than quick sizing plywood due to the lightish duty construction. I use a piece of 2" foam on it (yeah, they were out of the good kind when I bought that piece). I like the foam underneath as it really helps dust collection of the saw. So, I'll probably continue to use that in a slightly different way.
I also have a MFT1080, but I find it much too small. I find that by the time the pieces get small enough to process on it I can just use my table saw. The MFT usually stays setup also, but acts as junk collection. The shop is also pretty crowded with both tables setup. My goal is to eliminate one of them and maintain the functionality of both (including the junk collection point).
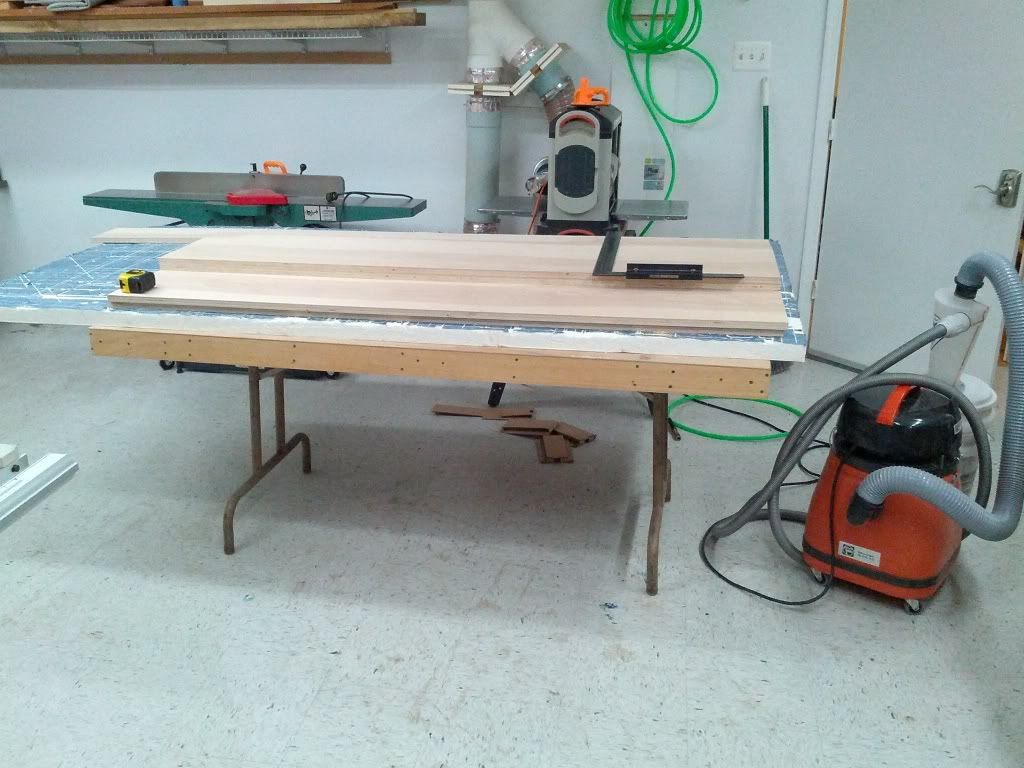
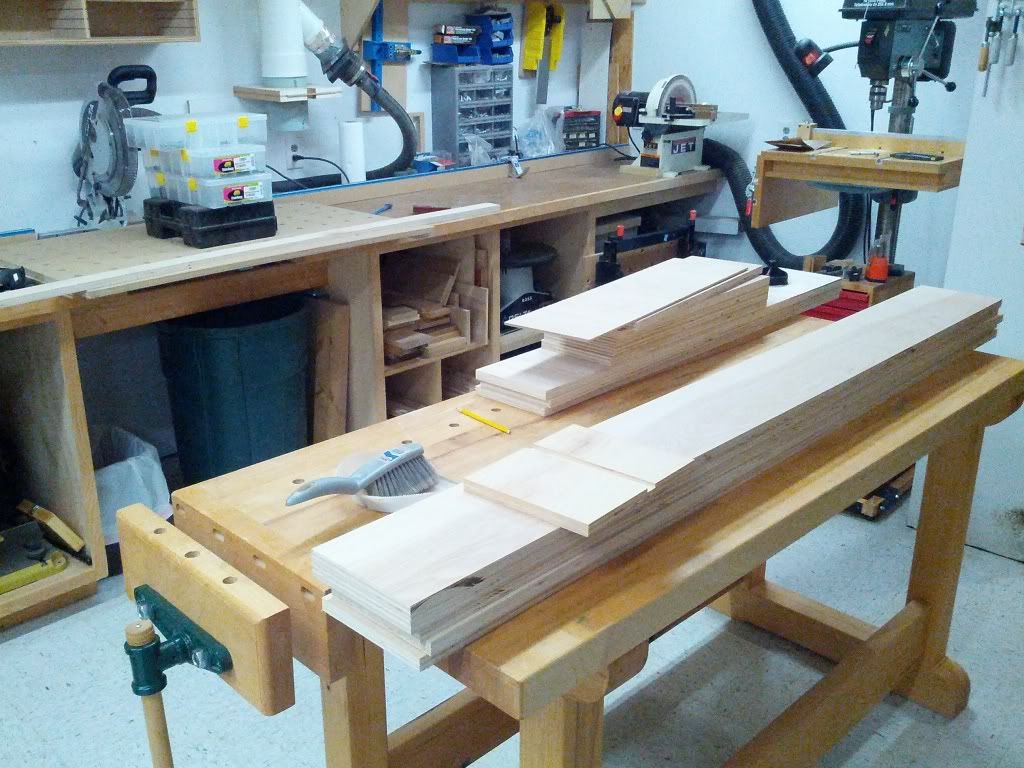
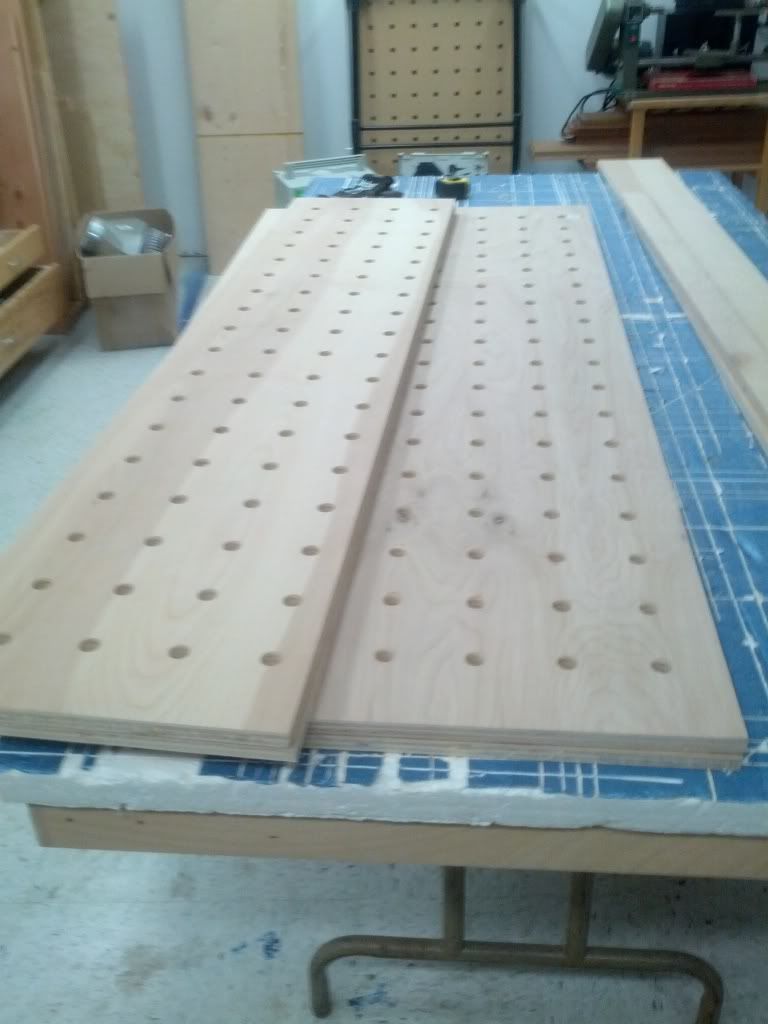
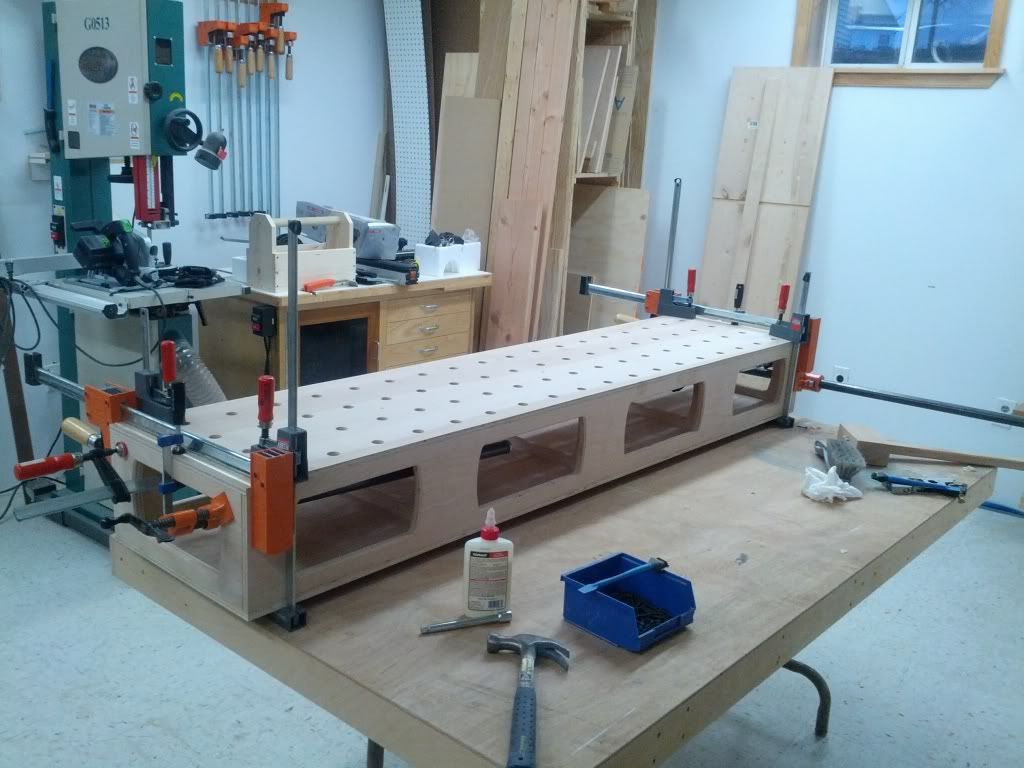
After some looking around, I liked the Paulk Ultimate bench design. Looks good since I already have a main workbench. The lower part can act as junk collection and the top will be heavier duty than the cutting table and a bigger MFT. I don't really need the jobsite portability though and expect it to be permanently setup. But, not at 4'x8'. I decided I would build it in two pieces like the Paulk design, but have the main/permanent half at around 32"x6' and the other half at 16"x6'. I'll make the base expandable so I can remove the 16" portion unless I'm processing plywood. I bought the plans from Mr. Paulk, so I'm not going to go into the details of that part of the build. But, you can see the top and bottom pieces cut on the table above and here are the blanks for the rest on my workbench. I may add some sort of extensions to support 8' also, but haven't really needed that on the current setup. Should be pretty easy to add if I need it later.
The top will have an MFT functionality. I plan have the ability to mount a 55" rail for crosscutting and have a fence with a tape measure built in for cuts up to 48". I'll probably modify Mr. Paulks fence design, but I'm planning on it being similar.
I'm going to use the Festool hole pattern by using an old MFT top as a template. This one got water damaged when my dishwasher leaked into the basement shop. It's been used as a template before, but this time I'm going to first try it with a 20mm Forstner bit and a cheap drill guide. It might go a little faster than the drill a smaller hole and pattern rout it to 20mm method. The template top has been in a closet leaned against a wall for a few years now, so I'm using my mortiser to try and take the wall lean bend out of it.
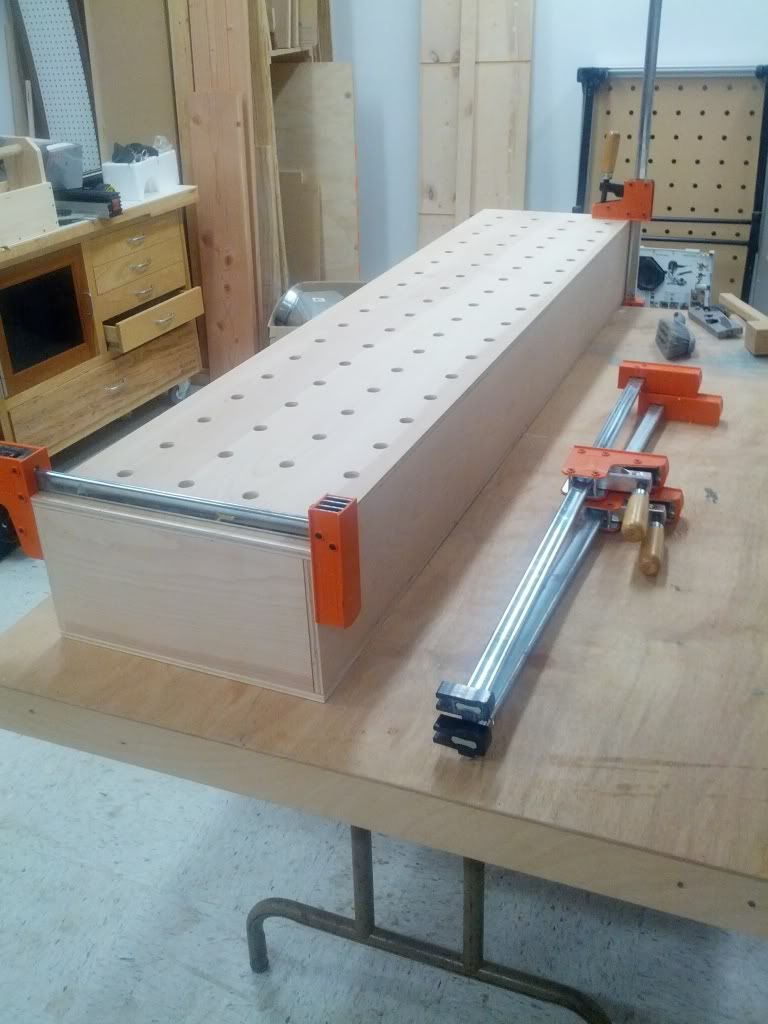
My plan for the base is something like the outfeed table I built a few years ago. I used 2x8s for each side and ripped them for the "legs" and strechers. Then just glued the whole thing into a rectangle (square in the case of the outfeed table). I plan to double the side stretchers and make an oversize duplicate of the back so it will slide out and take the table extension. Otherwise, the table extension will probably take a shelf of my wood rack.

Another improvement in plywood processing is a new 118" rail. That way I don't have to keep connecting and disconnecting my two 1400s. I wasn't really thinking how big that sucker really is. For some foolish reason I was expecting to hang it on one of my 9' walls. Duh. So, I took the crate and screwed it to the ceiling to get it out of the way. Worked out pretty well, I think that's permanent.

That's all I have for now. Will update as I progress.
I've been planning some garage storage and figure it's time to upgrade my plywood cutting setup a bit. This first post will mostly be a bit of what I currently have, why I want to change it, and my plan. But, the cutting has started.
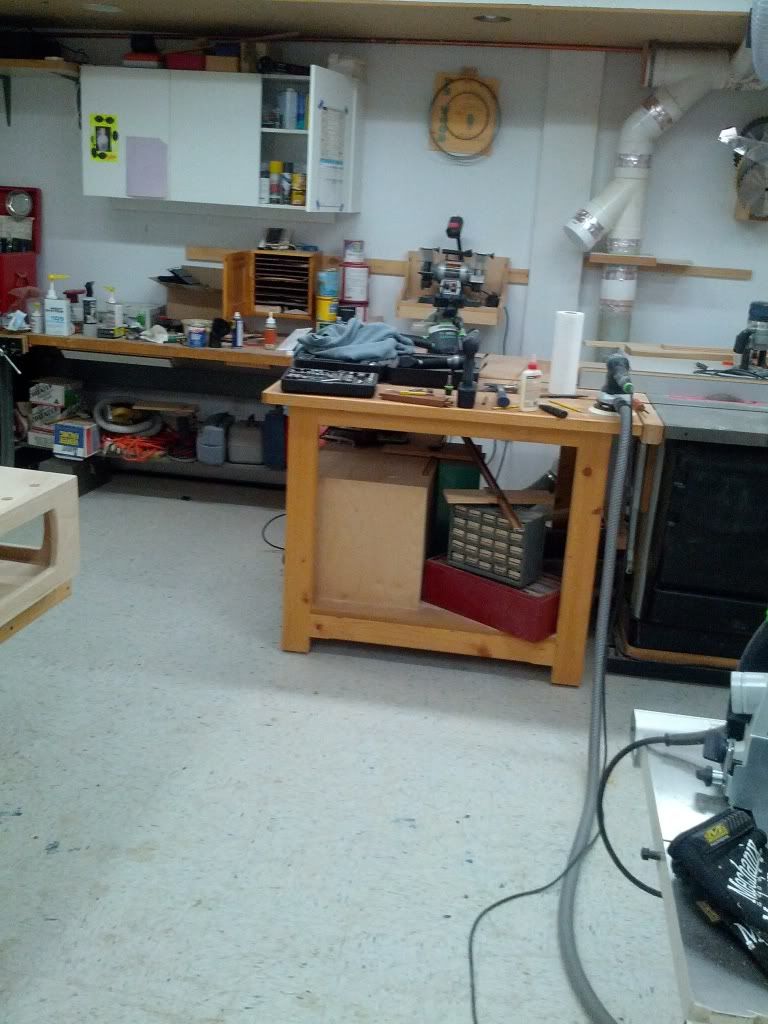
First up, my current plywood cutting table. I made it back when I got my ATF55. It's about 40"x6'. There's a 3/4" plywood grid using some pretty heavy duty banquet table legs I pulled from a dumpster. I eventually covered the top with a piece of 1/4" ply so I could use it for an occasional assembly table and it has pretty much been setup constantly since. It is covered in glue and paint. But, it doesn't work great for much other than quick sizing plywood due to the lightish duty construction. I use a piece of 2" foam on it (yeah, they were out of the good kind when I bought that piece). I like the foam underneath as it really helps dust collection of the saw. So, I'll probably continue to use that in a slightly different way.
I also have a MFT1080, but I find it much too small. I find that by the time the pieces get small enough to process on it I can just use my table saw. The MFT usually stays setup also, but acts as junk collection. The shop is also pretty crowded with both tables setup. My goal is to eliminate one of them and maintain the functionality of both (including the junk collection point).
After some looking around, I liked the Paulk Ultimate bench design. Looks good since I already have a main workbench. The lower part can act as junk collection and the top will be heavier duty than the cutting table and a bigger MFT. I don't really need the jobsite portability though and expect it to be permanently setup. But, not at 4'x8'. I decided I would build it in two pieces like the Paulk design, but have the main/permanent half at around 32"x6' and the other half at 16"x6'. I'll make the base expandable so I can remove the 16" portion unless I'm processing plywood. I bought the plans from Mr. Paulk, so I'm not going to go into the details of that part of the build. But, you can see the top and bottom pieces cut on the table above and here are the blanks for the rest on my workbench. I may add some sort of extensions to support 8' also, but haven't really needed that on the current setup. Should be pretty easy to add if I need it later.
The top will have an MFT functionality. I plan have the ability to mount a 55" rail for crosscutting and have a fence with a tape measure built in for cuts up to 48". I'll probably modify Mr. Paulks fence design, but I'm planning on it being similar.
I'm going to use the Festool hole pattern by using an old MFT top as a template. This one got water damaged when my dishwasher leaked into the basement shop. It's been used as a template before, but this time I'm going to first try it with a 20mm Forstner bit and a cheap drill guide. It might go a little faster than the drill a smaller hole and pattern rout it to 20mm method. The template top has been in a closet leaned against a wall for a few years now, so I'm using my mortiser to try and take the wall lean bend out of it.
My plan for the base is something like the outfeed table I built a few years ago. I used 2x8s for each side and ripped them for the "legs" and strechers. Then just glued the whole thing into a rectangle (square in the case of the outfeed table). I plan to double the side stretchers and make an oversize duplicate of the back so it will slide out and take the table extension. Otherwise, the table extension will probably take a shelf of my wood rack.
Another improvement in plywood processing is a new 118" rail. That way I don't have to keep connecting and disconnecting my two 1400s. I wasn't really thinking how big that sucker really is. For some foolish reason I was expecting to hang it on one of my 9' walls. Duh. So, I took the crate and screwed it to the ceiling to get it out of the way. Worked out pretty well, I think that's permanent.
That's all I have for now. Will update as I progress.
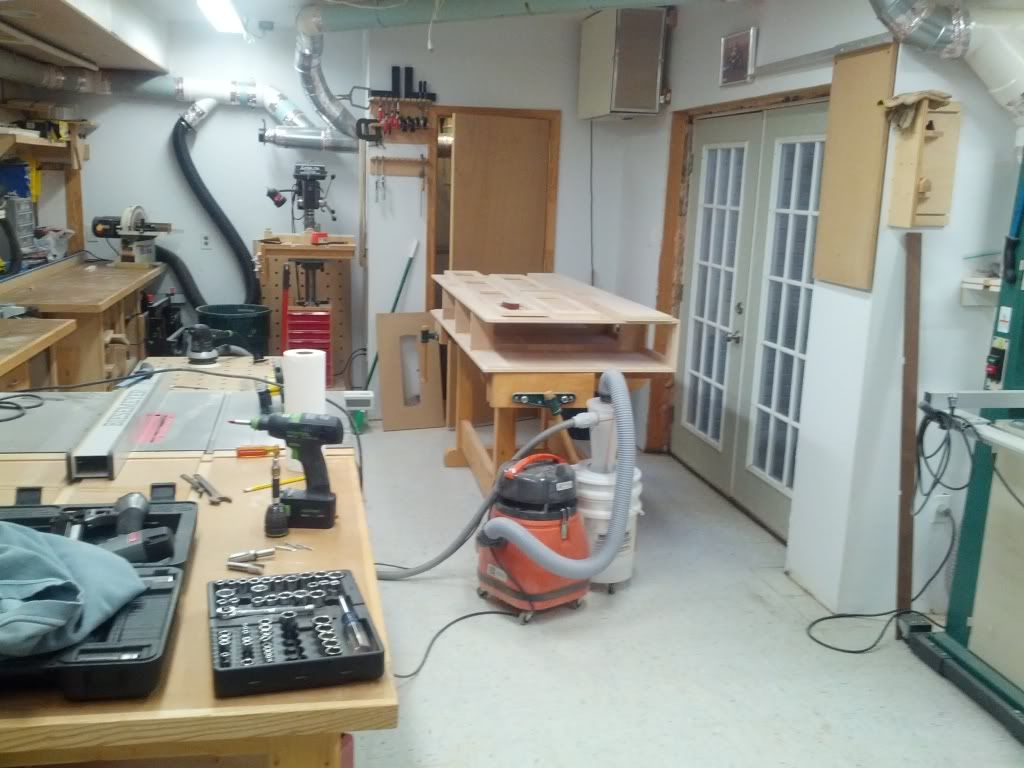
") A month ago, the whole shop looked like this, but with scrap piled on every surface and in every corner.
A month ago, the whole shop looked like this, but with scrap piled on every surface and in every corner.