Drilling 1,200 holes.

Gacleader1

Member
Joined
Jun 12, 2025
Messages
6
I am starting a huge project with 70 drawers that are 40 inches deep. The manufacturer says to use self tapping screws, not euro screws. I purchased some euro screws because I would rather use them, but the heads are too small.

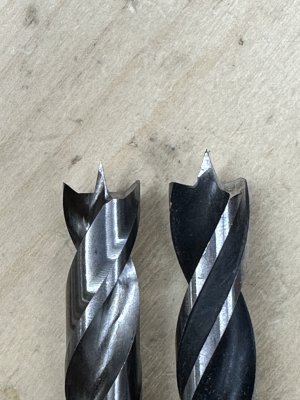
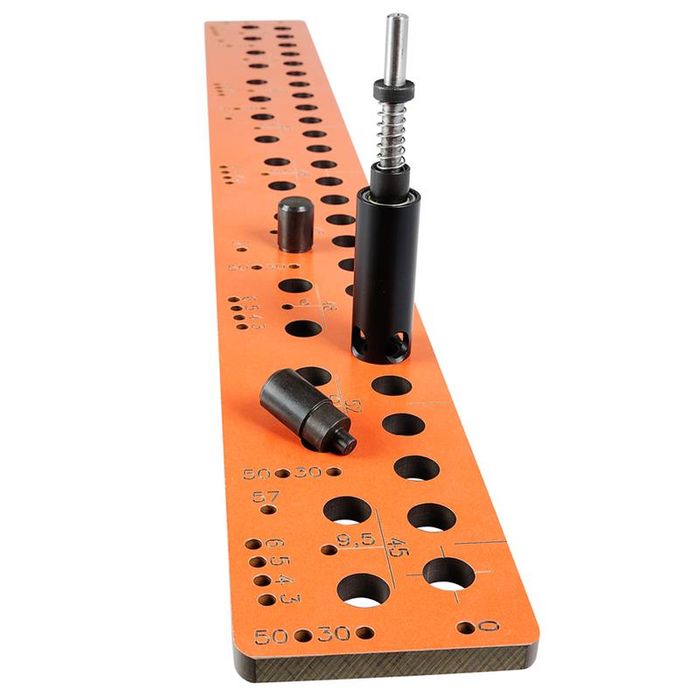
I had purchased an OF1010 router and LR32 system in anticipation of drilling all of these holes, but obviously a 5mm cutter will not work; so here are options that I am considering, your thoughts are appreciated

1.) Find a small bit just big enough to start the fasteners, that will fit in the 1010 and still use the LR32.

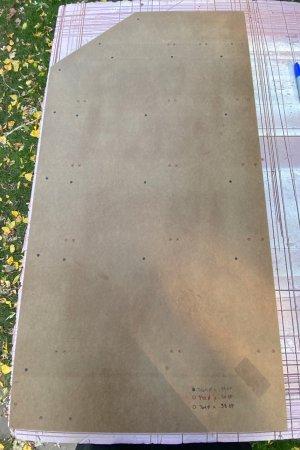
2.) Make a very large template from 1/4" plywood and hope to not elongate the holes after using each hole 20 times. I could install bushings, but that would be horribly expensive.

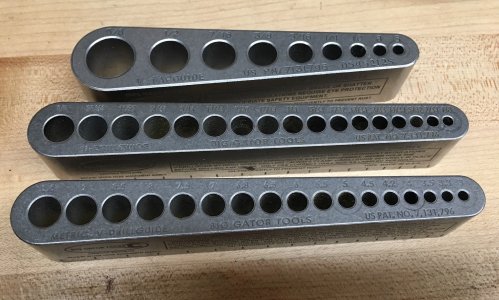
3.) Carefully lay out horizontal lines on each cabinet panel (7 drawers per cabinry), then clamp the slider in place, then drill the holes with a self centering bit.

Your thoughts on these or othef options would be appreciated.
 
You don’t mention what size hole you need, this bit will fit the 1/4” collet. There are others with different size drills.


You also have the option of ordering the collet set from Shaper Tools, the Origin and 1010 take the same size collet. This will give you additional collets to choose from.

Mind telling us ther brand of slide? I find it unusual that the 5mm Euro screw will not work.

Tom
 
I had a similar project...5 cabinets holding 5 drawers each so, 5 LH sides & 5 RH sides to drill for drawer slides and miscellaneous attachments. I took hard Masonite and made a pattern from that using painters tape and ACCURATELY laid out each hole. I then used a small, very sharp awl to place a small center mark on the crosshairs of each hole. This would become a positive centering/registering mark when I drilled out the holes with a 1/8" diameter brad point drill bit. Using a Big Gator drill guide along with the brad point drill, I was able to locate the center mark of each hole and then drill the thru-hole perfectly perpendicular to the Masonite surface. This template will become strictly a MARKING template for the sides of the cabinets. Its only function is to accurately transfer the position of each hole centerline to the plywood carcass.
Choose a brad point drill with a sharp centerpoint, the sharper the centerpoint the more accurate the transfer of the hole centers will be. Here's a comparison between a Fuller vs Colt brad point drill. The 1/8" Fuller brad point drill bit will also be used to mark the location of each hole.

Once the pattern is clamped to the cabinet carcass, each hole center is marked and the holes are drilled later using a Woodpeckers Auto-line drill guide. This allows me to drill different diameter holes at varying depths easily and perpendicular to the ply surface. Obviously this single Masonite template will provide hole locations for both sides of the carcass.
 

Attachments

  • 13147 Fuller vs Colt .JPG
    13147 Fuller vs Colt .JPG
    548.6 KB · Views: 18
  • 3820 Tap-Drill-Drill.jpg
    3820 Tap-Drill-Drill.jpg
    650.5 KB · Views: 17
  • 9670.JPG
    9670.JPG
    842.4 KB · Views: 16
  • 9671.jpg
    9671.jpg
    697.8 KB · Views: 13
  • 9674.JPG
    9674.JPG
    805.2 KB · Views: 13
  • 9675.jpg
    9675.jpg
    764.7 KB · Views: 17
You don’t state where you live, and this is easier if you live somewhere in Europe.

A CMT dowel template and a 14mm bushing will make quick work of this. Unfortunately, the template is not currently imported to the USA. I got mine through Amazon.de (Germany) though it ended up shipping from Amazon.es (Spain).

Officially called a “boring template” and is shown below with a Vix-style bit with a 14mm outside barrel diameter, but will work fine with a router and a 14mm bushing.

Very efficient and easy to use, and based my my experience and comparing it to videos of the Festool LR32, a little faster than the Festool option.


eyJidWNrZXQiOiJ3ZWItbmluamEtaW1hZ2VzIiwia2V5IjoiY2FyYmF0ZWNcL2ltYWdlc1wvcHJvZGltZ1wvMzQ2MTJfMS5qcGciLCJlZGl0cyI6eyJyZXNpemUiOnsid2lkdGgiOjcwMCwiaGVpZ2h0Ijo3MDAsImZpdCI6Imluc2lkZSIsIndpdGhvdXRFbmxhcmdlbWVudCI6dHJ1ZX19LCJ2ZXJzaW9uIjoiZThlYzMyNTBiYzQ4YmNhMjE5YmI0MGQyODlhMTY4MThlMzE0NTMzYyJ9

Though, if it were me, I would make my own dedicated template using whatever size router bushing you have in your tool box. Attach reverence pieces so it will repeatedly place the template in the exact same position each time. And retire the template when you are done. This involves enough pieces that a dedicated template makes sense and would be cost effective. Probably under $5.00 in materials. You will need a router bushing and an appropriate sized router bit.

I have the CMT template, but I’m sure I would make a dedicated template for a run this long. The CMT is made from 1/2” thick phenolic sheet, but for the limited run involved, 1/2” thick MDF will probably prove satisfactory. Drill through holes and glue in short dowels for location. Normally, I would bank off of two edges only, but if your blanks are cut accurately, you can put location pins on all 4 edges, which might improve repeatability.
 
Last edited:
What do you care what they say?
I do not care, that is why I bought the euro screws. I ordered the 6.3, which are supposed to be for the 5mm holes, but they fell right through the installation hole. I did find that there is a pan head euro and am trying to get a sample.
 
You don’t mention what size hole you need, this bit will fit the 1/4” collet. There are others with different size drills.


You also have the option of ordering the collet set from Shaper Tools, the Origin and 1010 take the same size collet. This will give you additional collets to choose from.

Mind telling us ther brand of slide? I find it unusual that the 5mm Euro screw will not work.

Tom
The brand is Coralov. They are 500 pound 40 inch rails.
 
The brand is Coralov. They are 500 pound 40 inch rails.
I found the slides on Amazon, unfortunately they do not give the screw size they supply. The bit size you need is just slightly larger than the screw root size.

Again, find the closest bit size you can that can be installed in the router.

One other option if the panels are transportable is find a shop with a CNC that will machine the holes for you. The machine I have drills 5 holes at a time with a cycle time of about 7 seconds running at 50%.

Tom
 
You don’t mention what size hole you need, this bit will fit the 1/4” collet. There are others with different size drills.


You also have the option of ordering the collet set from Shaper Tools, the Origin and 1010 take the same size collet. This will give you additional collets to choose from.

Mind telling us ther brand of slide? I find it unusual that the 5mm Euro screw will not work.

Tom
Coralov
 
I used similar slides on my workbenches. 30 drawers total. 26" length. Mine were TCH brand.
I didn't have a vix bit at that time, but I almost always pre-drill, so I would have put the slides in place, marked the hole with a pencil, and drilled a pilot hole by eye.
I don't want to empty out a drawer to remove it and count the screws on the bench, but no way I put a screw into every hole,(on the fixed side anyways)
If I recall correctly, I used regular pan head wood screws, and possibly washers too.
But I did put supports under the slide to take the vertical load.
I recall spending forever getting the left and right rails supports exactly parallel and level, but once I did that, I could just drop the rails in place.

(FYI - for anybody interested, probably OPs slides are something like THIS )
 

Attachments

  • Left small drawer slides.jpg
    Left small drawer slides.jpg
    319.4 KB · Views: 7
Last edited:
Back
Top