Festool CSC SYS 50 Tablesaw

mcfal12 said:
woodferret said:
** Update: they're gonna take pity on me and take the saw as a 30-day given how it's been in transit/service most of its life.  Good sales/CS take and effort.

Im glad to hear they are taking it back. Are you getting a replacement or refund? Please keep us posted on the replacement if thats the route you go.

The 30-day is a refund.  They credit the company you bought it from, who then credits you.  It gets shipped all over the place, normally.  Although in my case, my rep had me just ship it directly back to Festool and handled the B2B credit refund.

While I like the saw in general, it doesn't do what I need it to do and I can't think of a way to fix it so it does other than drastic griding.

 
Well, shame on me for thinking I didn't need to check a Festool saw during the return period.  On my saw, the extension table, the fixed table and the sliding table are all in separate planes.  The fixed and extension tables are 0.10" apart vertically.  The sliding table is angled relative to the fixed table, the difference being 0.15" across the (short) distance from the far edges of the sliding and fixed tables.  Further, the sliding table is cupped (edges proud) by at least 0.17".  I checked my receipt and the purchase date was roughly 5 weeks ago or a little more.

I should have known better, too, because several years ago I went through four Kapex saws before I got one which didn't have the center (rotating) table significantly below the side tables.  This wasn't 0.10 or 0.20, either, these saws were out by 1/16" (0.625") or so.  You could not have cut a piece of wood accurately unless its dimensions and your desired cut permitted solidly clamping both sides of the work piece.  Fortunately, no one tried to tell me that it was within tolerances or didn't matter or wasn't repairable.  I think the store staff got pretty tired or seeing me, but none of them thought that was OK...and it wasn't.  You can walk into HD or Lowes and literally any SCMS with a three digit price tag is flat across all three tables.  The saw arbor may be hopeless and incurably out of alignment, but at least the tables are flat.
 
ElectricFeet said:
JimH2 said:
Does the Bow Featherboard fit right out of the box? I did not measure but the miter bar looks to have a non-standard width.
I can’t speak for the two-knob ordinary-sized featherboard.

However, the portable saw version featherboard — model fp5; single knob — fits great in the clamping t-slot, right out of the box.
I just got the FP5 - you have to use the smaller 5/8" adapter and crank it a little - it works ok.
 
LDBecker said:
I just got the FP5 - you have to use the smaller 5/8" adapter and crank it a little - it works ok.
You don’t need the adapter. The T bolt is all you need to use.

Make sure you put it in the clamping slot, not the miter slot. It’s quick and works really well in there. A pic explains better:

[attachimg=1]
 

Attachments

  • IMG_9545.jpeg
    IMG_9545.jpeg
    162.9 KB · Views: 3,251
ElectricFeet said:
LDBecker said:
I just got the FP5 - you have to use the smaller 5/8" adapter and crank it a little - it works ok.
You don’t need the adapter. The T bolt is all you need to use.

Make sure you put it in the clamping slot, not the miter slot. It’s quick and works really well in there. A pic explains better:

[attachimg=1]

Sheesh! Why didn't I think of that?!?!  Perfect solution, and it works perfectly. I didn't like having to crank it down so much with the smaller adapter. Thanks, ElectricFeet!
 
mcfal12 said:
I checked my saw after unboxing it, and immediately noticed this same issue. I am flabbergasted at Festool as this is such an obvious thing to check on a tablesaw.

I am providing an update on the instructions that were provided by [member=72072]woodferret[/member] and @xeres. They were very helpful, but some folks might find the technical descriptions a bit cumbersome.

1. Unlock the sliding table
2. Push the table forward (towards the dust port) and in the center of the rail remove the plastic black cap. Caution, the cap breaks easily (see picture 1)
3. Unscrew the black screw underneath the cap using a Torx 20 bit.
4. Slide the table backwards (towards the control panel) and in the center of the rail remove the plastic black cap. Again use caution, the cap breaks easily. (See picture 2)
5. Under the black cap there is a silver 4mm cap head screw. Use a 4mm hex to undo the screw.
6. At this point, you should be able to lift off the table and expose the height adjustment shims located underneath
7. At this point, you can decide what material you want to use for the additional shim. (I first tried copy paper, but wasn’t satisfied with that solution and then tried using gorilla tape. This prove to be too much and I was unable to get the slider flat where it meets the fixed table. So I took everything apart and switched to blue tape and found that, it was the right adjustment so I taped it to the bottom of the shim as shown in the picture 3). After this attempt, I noticed that the back of the sliding table near the dust port was flat however, the front by the controls was still a little low. So I took it apart again, and added a piece of paper, which proved to be too much and ultimately settled on putting a piece of blue tape on top of the shim as seen in picture 4).
8. Reverse the procedure to reinstall everything
9. Once the table is reinstalled, you may have to relevel, front to back, the sliding table by turning the  set screws counter clockwise to raise or clockwise to lower the sliding table (see pictures 5&6)

There was a lot of trial and error involved, and while I settled on the blue tape, it will take a number of attempts to get the individual adjustments for each saw just right. ultimately this isn’t a solution as you can see in picture 7, I’m able to put a playing card which is a touch snug but nonetheless able to slide it under the square. Ultimately the combined setup isn’t perfectly flat which means something is still not flat and I’m probably going to always have to tweak and adjust my cut parameters (blade angle) depending on whether the wood is resting in the middle of the sliding table or crosses the entirety of the sliding table.

Further complicating everything is that the blade opening/throat plate is slightly bowed up.

After spending about two hours fiddling with this and settling on the solution above, I did call Festool. When I explain the problem to the “applications” customer service agent his response was that “the sliding table should be higher than the saw body in in order to allow for the clearance necessary for the cut.” I explained several times that what I was describing was that the table itself was not level from right to left but after several minutes, it became apparent that my best course of action is to send the saw in.

Well, thanks to you all, I now have a saw that I consider to be accurate. It does have a little dip in the sliding table, but it doesn't seem to affect the cut. Once I was able to get the slope of the table taken care of (I used a piece of blue tape as a shim on both black plastic pieces under the table), re-leveled the sliding table so it's just a hair proud of the fixed table (otherwise the miter bar scrapes on the table when you move the sliding table), and I'm good to go. The cuts are square and precise. I also adjusted the rip fence a bit to make sure it was square to the miter fence using a digital gauge. Also the cutting width scale was about 1/16" off, so I adjusted that.

With the addition of the Benchdog miter fence attachment, this is the accurate tool I was hoping for - but the Benchdog fence won't fit at all in the systainer with the saw, so I need another systainer to hold the miter fence now? Hmmmm...

I DO wish there was a digital readout on the rip fence - I have a Wixey digital readout on my ancient Delta Unisaw that has spoiled me. It would be awesome if Wixey or someone else figured out how to adapt such a thing for the CSC SYS 50.

A minus on the saw for me is dust collection. I was using it with and without the saw guard and with a CT-36 -  Not great... Ok, but even my Milwaukee battery powered saw was a little better - especially when I found a dust attachment for the shroud that I could hook a 2nd hose to. Not sure how that could be done with the Festool. Oh well, it's fine.

Again, the accuracy seems really great to me. I can set it for very precise cuts and it delivers. And thanks for all the great explanation on how to get the sliding table off - that made all the difference. Now I see how the thing works and exactly how to adjust it. Easy-peasy, and really not much different than any other table saw. Compared to dialing in my old Delta Unisaw/Beisemeyer fence, this was a breese. I am delighted with it.
 
All,

Black plastic throat plate is not flush with the top of the table. It is slightly lower at the out feed side making thin pieces hang up.  Anyone else having this problem? Is anyone doing a zero clearance?

Thanks
 
LDBecker said:
And thanks for all the great explanation on how to get the sliding table off - that made all the difference. Now I see how the thing works and exactly how to adjust it. Easy-peasy, and really not much different than any other table saw.
Yes, once you know how, it’s easy enough. It would have been nice if Festool had anticipated the need for adjustments in this lateral direction though.

I too followed [member=76944]mcfal12[/member] ’s steps and they work a treat.

A few extras for others who might be doing this:

1. The black plastic caps are like this:
[attachimg=1]

In order not to break them, use a torch to locate the tabs and use two small flat screwdrivers from opposite sides to push the tabs in and prise each cap up.

2. Under the sliding table looks like this:

[attachimg=2]

You can see on the left where I added blue tape. I also tried printer paper and aluminium tape. Blue tape works best.

3. The only additional problem I had was a slight high spot here:

[attachimg=3]

I used some clamps and a block of wood to persuade the table down a bit:

[attachimg=4]

(This photo shows the first block of wood I tried. After this, I used a much smaller one to localise to the high spot, but forgot to photograph it.)

If instead you have a low spot here, I guess you could use clamps in spread mode do the opposite. However, I wouldn’t do this. A low spot is way less important in this location because the material will either be supported by the sliding table or supported on the fence side of the blade. I wouldn’t have been worried by it.

Note/warning: Do this at your own risk etc. You could permanently damage your table top. I was able to push down on this precise part of the table because it is not part of the saw mechanism in any way: it’s on the other side of where the saw is mounted. If your high spot is elsewhere, I would not recommend trying this approach. Also, the bending that I needed was very slight — the height difference was around 0.3mm. I took it slowly and gently; clamping/unclamping 4 times before getting the right amount of force. It’s a delicate job.

After all of this, I’m happy with the flatness of the top. The sliding table is cupped — in my case between 0.25-0.3 mm — but I can live with it. I guess it’s the price of using aluminium and getting portability, which is something I really need.

LDBecker said:
I am delighted with it.

Yes, I’m having a blast with this saw [big grin]
 

Attachments

  • IMG_3080.jpeg
    IMG_3080.jpeg
    58.5 KB · Views: 2,846
  • IMG_9572.jpeg
    IMG_9572.jpeg
    1.1 MB · Views: 2,898
  • IMG_3161.jpeg
    IMG_3161.jpeg
    27.5 KB · Views: 2,803
  • IMG_3160.jpeg
    IMG_3160.jpeg
    58.6 KB · Views: 2,838
Hi ElectricFeet,

After shimming the black plastic height plates (I put tape on the bottom of that side of the plastic rather than on the metal - not sure it makes a difference), I proceeded to rip down a bunch of hard maple with the saw. Using the rip blade, the saw was a joy to use. With blades this small, using the appropriate blade - not just a general purpose blade - would be critical. Also did some crosscuts - not a problem at all. After shimming, I had to adjust the height of the table just a hair - it was causing the miter gauge to scrape the stationary part of the table.

My table has a little bit of a dip, but that doesn't seem to affect the cuts. At this point I don't think I'll mess with it.

I showed another user the problem with the tilt and he was a bit upset, until I fixed it for him. I promised it would take 10 minutes and I wasn't kidding. Another happy user now...

I agree on the little plugs. Mine are loose now. Next time I order a part from Festool I'll get some of those as well.

I was wondering about a zero clearance insert for the saw, but I don't think that would work unless you never changed the angle of the blade - but that happens when you change the blade and the saw moves the blade into position for changing it. Maybe some Fastcap Zero Clearance tape would work? I have a zero clearance insert on my Kapex, and a replaceable wooden insert on my Unisaw and really like it. I think I'm going to order some of the tape. Any other ideas for zero clearance?
 
LDBecker said:
I was wondering about a zero clearance insert for the saw, but I don't think that would work unless you never changed the angle of the blade - but that happens when you change the blade and the saw moves the blade into position for changing it. Maybe some Fastcap Zero Clearance tape would work? I have a zero clearance insert on my Kapex, and a replaceable wooden insert on my Unisaw and really like it. I think I'm going to order some of the tape. Any other ideas for zero clearance?
I even got as far as almost finishing designing one so I could cut it out with the shaper origin, but like you I wonder what might happen when you change the blade angle by mistake.

So in the end I decided that I will instead (eventually, ha!) build sleds / a Fritz & Franz to improve the quality of cuts and in the meantime clamp anything critical to an offcut sheet.

However, I’ve been pleasantly surprised by the quality of the cuts so far.

I’m intrigued by the fastcap tape. I’ve only seen youtube influencers using it so far, so I haven’t tried it. Maybe I’ll try it too.
 
I have used the fast cap zero clearance tape on a number of miter saw over the years and it’s decent. I’ve always gotten a lot of chip out on the tape itself, and I’ve never been able to quantify, but certainly wondered how much that impact the quality of cuts. I will say it’s easy enough to apply the adhesive is very good. Additionally, depending on your saw, it may or may not raise the throat plate of the cut, making it not feasible to be used given you want a flat surface
 
I found this interesting, particularly about the decade of development, discussion about the CSC SYS 50 saw.
 
Just ordered the csc. I read through the posts, but was wondering if there's an updated list of must-have accessories on this to get the most out of this saw (I don't have a cabinet saw, just a track saw). I was hoping to order them around the same time. Is the benchdogs fence the go to fence for this? I am a beginner hobbyist - if that changes anything. Thanks!
 
Probably the only thing I'd call worthwhile is the bow featherboard because that's a safety thing.  Live with the saw first before trying to mod it.  Grab a grippr too if that's gonna ever be a thing, although the guard is good on this and should stay on unless absolutely necessary.
 
sean_g said:
Just ordered the csc. I read through the posts, but was wondering if there's an updated list of must-have accessories on this to get the most out of this saw (I don't have a cabinet saw, just a track saw). I was hoping to order them around the same time.

For my money (ninja'd by [member=72072]woodferret[/member] on two of them while I was typing ;D ):

1. If you're going to be ripping thin stock, then Bow Product's FP5 portable saw featherboard is really useful and works really well. (Note: don't get not the normal-sized featherboard; get specifically this one). Make sure you attach it as shown in the pic in this post.

2. A D36 anti-static hose (N.B. not the D36/32 conical hose -- you need the full diameter all the way along the hose). The bigger size improves dust extraction significantly in my experience. It's still not zero, but it much improves the clean-up afterwards. To attach it, you will need to use the connector that comes with a TS55/TS60 (you can also buy 3rd-party 3D prints of these). The main reason I suggest an anti-static hose is because the non anti-static hose tends to attract dust. If you're not overly bothered about zero-dust, then you can save money and get a cheaper non anti-static hose. (Admission: I did this and regretted it later and bought an anti-static one). And yes, you can also get a small shock from a non anti-static hose (I did -- specifically with this saw) but it is tiny and not worth worrying about.

3. For general tablesaw safety: a Grr-ripper. Prices are crazy high, but they are very good.

sean_g said:
Is the benchdogs fence the go to fence for this? I am a beginner hobbyist - if that changes anything.
I haven't bought it and won't. Peter Millard did a video on it and I wasn't impressed:


Firstly, it seems to be using an unnecessarily-deep/thick fence extrusion (so that they can use the profiles that they use in other products, I guess), with an adapter plate that sits between Festool's own attachment and the fence. Together, these seem to significantly reduce the maximum depth of cut. Not an issue if you're cutting thin skirting or floorboards. But IMO it would have been better to design something new that sits directly onto the mitre's own attachment points.

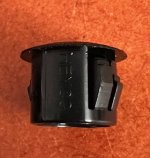
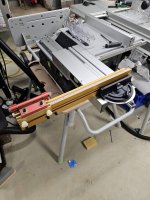
Secondly, I dislike aluminium fences and intend -- ha! procrastination notwithstanding -- to build my own out of mdf or melamine ply. The benefit of a movable wooden fence is that you can cut into it, eliminating blowout at the back. Alu fences on the other hand don't lend themselves to being sacrificial. This is not an issue if you're cutting floorboards, but will be an issue for higher-quality cuts. (Up to now, I have add a piece of scrap, but this would even further reduce the max depth of cut with Benchdog's fence.) While I'm still procrastinating, I have at least bought what looks like the right router bit (CMT 950.003.11 -- with 8mm shank) to create one:

View attachment 1

Thirdly, if you do cut into it, the fact that they have printed the scale directly onto the extrusion means that you can't just saw off the end and start again with a fresh zero. IMO it would have been better to have a moveable scale that you could screw / stick into position.

All credit due, though: they were quick to market with a product that fills a niche (and I think Festool should have at least included a stop block with the saw).

tl;dr: I think that there is scope for better-designed fences -- even a diy one.
 

Attachments

  • CMT 950.003.11.JPG
    CMT 950.003.11.JPG
    1.2 MB · Views: 200
I think it’s discussed in another CSC Sys 50 thread, apparently Incra’s fence fits the miter gauge directly. I had been set to get the Benchdog’s one, but I’m also put off by the need for an adapter block. Real estate is pretty sparse on the saw already.

In the dealer area someone has flag stops that fit the Festool rail, so that’s an alternative to a rail that includes rule markings.
 
pixelated said:
I think it’s discussed in another CSC Sys 50 thread, apparently Incra’s fence fits the miter gauge directly. I had been set to get the Benchdog’s one, but I’m also put off by the need for an adapter block. Real estate is pretty sparse on the saw already.

In the dealer area someone has flag stops that fit the Festool rail, so that’s an alternative to a rail that includes rule markings.

Can confirm then Incra flip fence fits directly onto the Festool mitre gauge. I just received mind (opted for the 27-49" version) and an add flip stop and all is good.
The additional weight though does tip it a bit as there's play where the mitre gauge inserts into the table. Think this should be a simple fix.
One thing I'm looking into doing is making up a couple of 3D printed blocks which could slide into the rear t slot and become a stop against the mitre gauge once the fence is calibrated. That way there's one less process each time you come to use it.
 
Thanks so much for the rec's [member=72072]woodferret[/member] and [member=64013]ElectricFeet[/member]!
 
I can confirm the Incra works beautifully.

I really haven't used it much yet, I prefer the stock fence for most simple cuts, but the Incra will be great when I need to do repeatable miters.

[attachimg=1]
 

Attachments

  • 20240130_154658.jpg
    20240130_154658.jpg
    244.7 KB · Views: 2,467
I plan to replace my Sawstop contractor tablesaw with this Festool sys 50 tablesaw. The Sawstop contractor saw is really nice except two things that I hate to use it these days. One is the saw is too big and take too much space, it's bigger than the more expensive cabinet saw because the motor is hanging outside on the back. The second is the dust collection.

The Festool sys 50 is very tiny and has thinner blade. I have a TSC 55 track saw but track saw is very difficult to cut small wood pieces. I think Festool sys50 would be nice to cut small pieces. The TSC 55 use battery, and is powerful enough to me, and I would assume SYS 50 would be powerful enough to me. How about dust collection of SYS 50, do you all satisfied with the dust collection?
The TSC 55 track saw dust collection is  kind of disappointing to me because it always generate duct at front even I connected to festool dust extractor.

 
Back
Top