4nthony
Member
Last year, I had my service panel upgraded to 200A in preparation for a Hammer A3-31. Since then, I've procrastinated on getting it patched up and reinstalling the shingles. I'm looking for some advice on order of operation to seal this up.
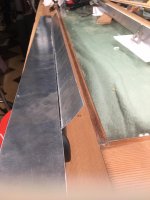
To protect (sort of?) the panel from rusting due to salty air, I built a simple cabinet out of OSB. There is also a door with a meter window. I'll sand it a bit and give it a few coats of exterior paint. I'm also on the hunt for a small piece of Tyvek or other house wrap. I'd rather not have to buy an entire roll.
In my head, the order i see this happening in is:
- Install the cabinet on the wall
- Install L-shaped rain flashing/drip edge on top of the cabinet
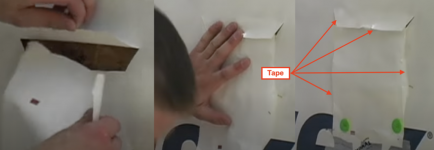
- Install the house wrap on the framing, tucking and taping it behind the old wrap and at the seams of the cabinet (I'm aware of overlapping the wrap from the bottom up to keep moisture from getting behind the wrap).
- Reinstall the cedar shingles
I'm not sure if I would do the house wrap around the panel first, add the cabinet, then do additional wrap around the cabinet seams.
How would you do it?
Thank you!
Anthony
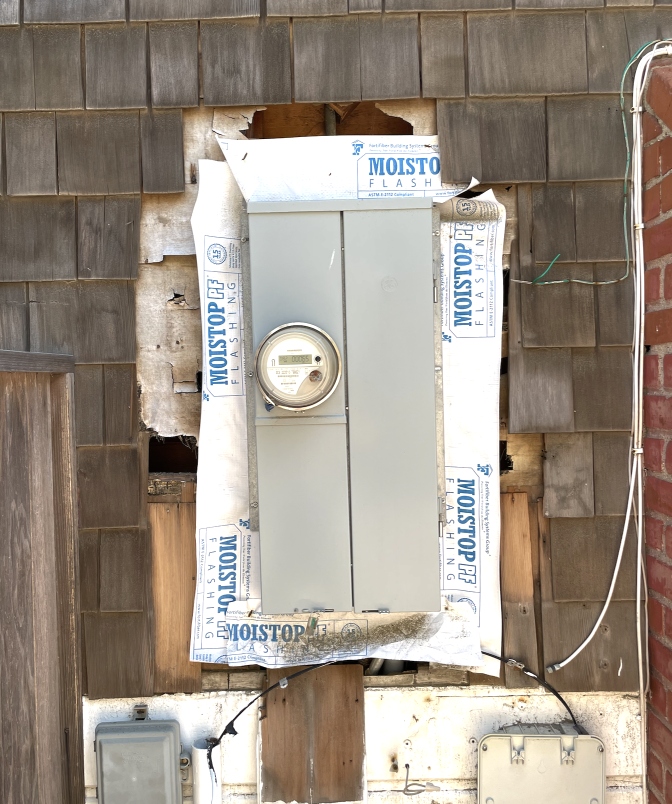

To protect (sort of?) the panel from rusting due to salty air, I built a simple cabinet out of OSB. There is also a door with a meter window. I'll sand it a bit and give it a few coats of exterior paint. I'm also on the hunt for a small piece of Tyvek or other house wrap. I'd rather not have to buy an entire roll.
In my head, the order i see this happening in is:
- Install the cabinet on the wall
- Install L-shaped rain flashing/drip edge on top of the cabinet
- Install the house wrap on the framing, tucking and taping it behind the old wrap and at the seams of the cabinet (I'm aware of overlapping the wrap from the bottom up to keep moisture from getting behind the wrap).
- Reinstall the cedar shingles
I'm not sure if I would do the house wrap around the panel first, add the cabinet, then do additional wrap around the cabinet seams.
How would you do it?
Thank you!
Anthony