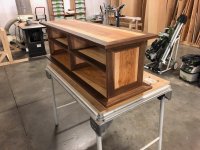
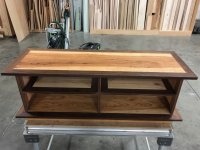
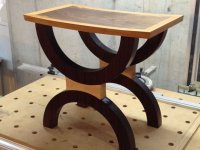
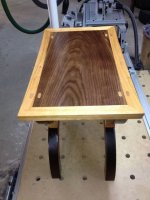
Full Panel Shelf/Partitions versus Stretchers for Cabinets?

Thanks for sharing ... do you have any interior cabinet photos as examples of the drawer glides and how they attach in these various applications?

I would’ve never guessed that was Hickory!!
 
Bugsysiegals said:
Thanks for sharing ... do you have any interior cabinet photos as examples of the drawer glides and how they attach in these various applications?

I would’ve never guessed that was Hickory!!

I'll get some pictures (if I remember, I'm an old guy) of the slides installed sometime next week. I'll be back at the house that has both the inset and overlay faces.

Not many can figure out what wood it is.

Tom
 
Hickory and walnut TV stand. Surfix oil finish.

Tom
 

Attachments

  • IMG_0337.jpg
    IMG_0337.jpg
    305.5 KB · Views: 270
  • IMG_0336.jpg
    IMG_0336.jpg
    331.4 KB · Views: 236
  • IMG_0340.jpg
    IMG_0340.jpg
    322.2 KB · Views: 250
Nice stuff Tom... [big grin]....I'm not really a fan of hickory but the walnut edging kind of takes some of the "wildness" away from the hickory.
 
My entire bedroom set is Hickory and they did a fairly good job of choosing pieces or gluing strips together to avoid large dark areas. My wife wants me to make our master bathroom vanity and now I’ll have to rip the boards and put them together like a puzzle until I find a good combination that softens the look like the bedroom set.

I would’ve never thought to put those woods together.  I’ve used Walnut and Maple and recently seen Gregory Paolini mix Cherry with Maple which have a nice accent.

View attachment 1
View attachment 2
 

Attachments

  • image.jpg
    image.jpg
    1.5 MB · Views: 156
  • image.jpg
    image.jpg
    2.2 MB · Views: 157
A little creativity you can mix anything.

Walnut seat with cherry edge, maple bowtie, Ipe legs, Dominos in the seat are cherry. Surfix finish.

Also known as, time to use up some scraps

Tom
 

Attachments

  • IMG_1642.jpg
    IMG_1642.jpg
    45 KB · Views: 243
  • IMG_1644.jpg
    IMG_1644.jpg
    45.6 KB · Views: 216
Very cool indeed!

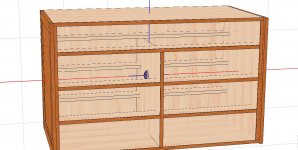
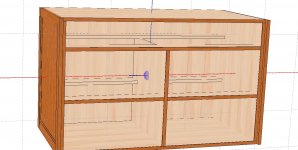
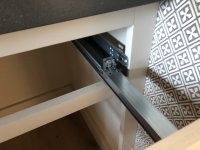
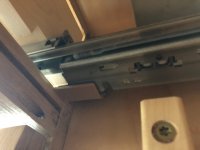
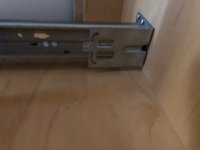
With regards to stretchers/partitions, per the 32mm cabinet information at davelers, you're supposed to use dual partitions when making Full Overlay cabinets versus a single partition with Half Overlay cabinets.  It seems logical to have symmetry for many reasons but I'm struggling with a few things perhaps somebody can help me understand.

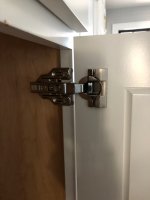
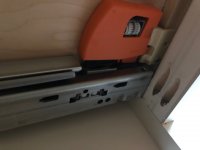
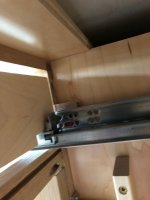
Per davelers, Full Overlay has 1.5mm gap around door/drawer edges; however, will split the difference when sharing a single stretcher.  This results in the inability to move a middle drawer to the top or bottom of the same or another cabinet later on because it's not symmetrical.  Additionally, even if using two partitions, if you desire applied end panels, you either need to rabbet 1.5mm off the end panel to keep a consistent 3mm gap between doors/drawers or remove 1.5mm from the outer edge of doors/drawers which also means they cannot be interchanged to the opposite side of a cabinet.

I'd put two partitions into my design because I was following the 32mm cabinet making spec hoping to find a consistent method which once I learn does not require a lot of thinking or changing as I make different cabinets and reduces opportunity to make errors; however, Full Overlay really has me confused ... it doesn't seem consistent or symmetrical so I'm left wondering why do I need two partitions ... is there something I'm not understanding here?
 
It seems perhaps the White cabinets in the office and perhaps one other is Half Overlay, is that correct?  While I like the closer gaps of Full Overlay these do not look bad and perhaps make things much simpler in terms of balanced panels than Full Overlay?
 
I've drafted the cabinets with 32mm Half Overlay sizes which provide greater consistency between pieces resulting in less error and part interchangeability.  That said, should I have the first stretcher sitting on top of the partition or connecting to the side like the rest?  I considered the longer stretcher would not show any seem but there will be seems below anyways and I doubt you'll notice them with 3mm gap between drawers and looking from eye level downwards.  If anything, I think it would be better to have shorter stretchers since it's easier to find short material than full long length boards.

View attachment 1
View attachment 2

versus

View attachment 3
 

Attachments

  • Front.jpg
    Front.jpg
    422.1 KB · Views: 127
  • 32mm Half Overlay 5_6_6_6.jpg
    32mm Half Overlay 5_6_6_6.jpg
    134.4 KB · Views: 137
  • 32mm Half Overlay 7_8_8.jpg
    32mm Half Overlay 7_8_8.jpg
    117.4 KB · Views: 132
Bugsysiegals said:
Thanks for sharing ... do you have any interior cabinet photos as examples of the drawer glides and how they attach in these various applications?

I would’ve never guessed that was Hickory!!

[member=60777]Bugsysiegals[/member],

Picture of how it all comes together, both inset and overlay.

This is the bracket I use for insets with the face frames.
http://www.tenntex.com/uploads/4/8/3/9/48398755/inset_bracket_instruction_sheet.pdf

I include some hinge configurations also.

Tom
 

Attachments

  • IMG_1190.jpg
    IMG_1190.jpg
    153.6 KB · Views: 181
  • IMG_1189 (1).jpg
    IMG_1189 (1).jpg
    169.1 KB · Views: 187
  • IMG_1187 (1).jpg
    IMG_1187 (1).jpg
    219.3 KB · Views: 204
  • IMG_1186.jpg
    IMG_1186.jpg
    138.1 KB · Views: 193
  • IMG_1185.jpg
    IMG_1185.jpg
    206.7 KB · Views: 178
  • IMG_1181.jpg
    IMG_1181.jpg
    156.6 KB · Views: 160
  • IMG_1179.jpg
    IMG_1179.jpg
    179 KB · Views: 181
  • IMG_1178.jpg
    IMG_1178.jpg
    158.8 KB · Views: 178
  • IMG_1177.jpg
    IMG_1177.jpg
    177.6 KB · Views: 226
[member=1583]Tom[/member], thanks for sharing!  A picture is worth 1,000 words.  It seems these are all face frame cabinets?  Do you make frame-less cabinets?  If so, do you use the L bracket on them or mount to the sides?
 
Bugsysiegals said:
[member=1583]Tom[/member], thanks for sharing!  A picture is worth 1,000 words.  It seems these are all face frame cabinets?  Do you make frame-less cabinets?  If so, do you use the L bracket on them or mount to the sides?

[member=60777]Bugsysiegals[/member]

I do very few frame-less cabinets. When I do the slide gets mounted directly to the gable (cabinet side). Hinges get the winged plated.

Tom
 
This might be more what you are looking for, I do very few face frame builds. This is a current build for a 12 drawer pantry with Blum Movento slides and Blumotion Zero Protrusion hinges. Tandem slide install is identical.


Attachments

  • Pantry Hardware.jpg
    Pantry Hardware.jpg
    371 KB · Views: 228
Thanks for sharing. It’s very interesting to me since I have the LR32 and was expecting to plunge holes with it but it seems you’re using some other method of alignment and then just screwing them in?
 
I very rarely use the LR32 system unless its for a tall gable that needs a continuous line of holes. The 32mm hole system is very restrictive in some applications. It works for those in production setups but then they use other methods that are faster. I'm strictly custom builds. As with everything once you have an understanding of the basic system you can manipulate for your needs.
 
Maybe I’m a little slow but since I’ve never worked in a cabinet shop, and have never built a cabinet, I find myself overthinking things and wanting to know exactly where the holes go to have symmetry, etc., which is why I’ve tried to figure out a consistent method. This way once I understand it, there’s not a lot of thinking required and less room to goof something up but I suppose using customized dimensions breaks the standards and requires the thinking, glad it works for you, I think it would take me a bit to get used to.
 
Oh I see, you thought it was going to easy to build custom units, LOL. Good luck with that. No matter what way you want to build, the first is the hardest (most mistakes) and takes the longest. In your case what I would do is get some hardware, some plywood and experiment with what you've read and the info that has generously been given on to you. Build a basic box to typical euro sizing, use the LR32 to bore your holes according to the instruction you've read, try mounting slides where you want them for your predetermined drawers, then build your drawers. Apply properly sized drawer fronts if wanted.
 
Back
Top