ear3
Member
- Joined
- Jul 24, 2014
- Messages
- 4,341
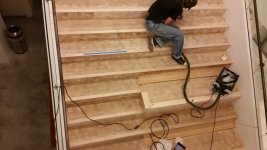
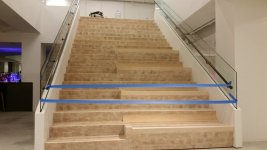
I was hoping to solicit some advice on the project I've been working on, which is a large stairwell.
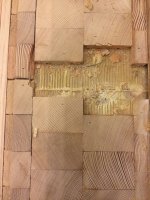
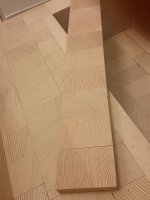
Some background -- this is actually the second time this year we've worked on the stairs. It's covered with these 3/4" thick end grain doug fir tiles, and had these thin maple caps at the front of the tread.
View attachment 1
View attachment 2
View attachment 3
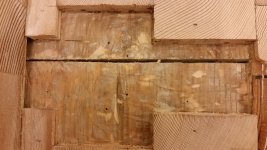
You'll see that the thick part of the maple cap is a lot narrower than the channel it's supposed to fit into. Not only that, but the front edge of the wooden tile where it meets the cap is actually back beveled 5-10 degrees, so there is all this additional space between the cap and the tile the lower you go. There are many other features of how the stairs are constructed that just kind of make you scratch your head. They were also originally stained white, so they scuffed up very quickly.
They have had problems with the stairs almost from the moment they were installed. So we were asked last year to sand down and fill the gaps that had developed especially near the front of the treads (almost certainly, as we just recently found out, because of the spacing between the maple cap and the front row of tile on the tread), as well as reattach the maple caps that were coming up in a few places. We did so, but with the warning that there might be more serious issues with the stairs that a cosmetic resurfacing was not going to solve.
Well, a year later, we're back, and dealing with the exact same problems. The problems have been exacerbated by the fact that the custodial service has apparently been mopping the stairs with copious amounts of water. They didn't want to do a complete overhaul, so we settled on a partial rehab, with disclaimers that this still may not be a long term fix, and recommending too that the stairs won't be mopped like they were.
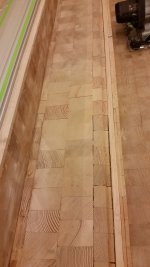
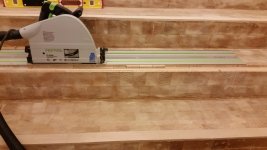
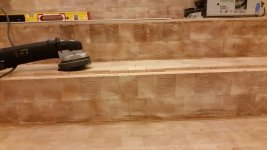
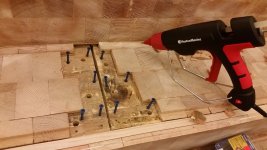
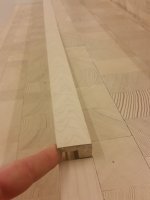
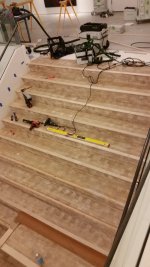
The main part of the fix involves redoing the maple caps -- cutting a channel in the front of the stairs with the tracksaw (and finishing up with the Vecturo on the ends) so that they're actually resting on and can be secured to the wooden tiles, as opposed to just butting up against them (and also filling in the gap left by the previous maple cap, and using a generous layer of adhesive and fasteners to make sure the new cap doesn't come loose). A router would have been more efficient, but there were too many variables to control (nails in the path of the channel, the bowing out of some of the stairs) to make it that much faster such that it would justify the risk you take with one errant move of the tool.
View attachment 4
I made the caps wider and a consistent thickness (which is thicker at the edge than they previously were). This should cut down on the movement in the front of the treads that was causing the filler to disappear and gaps to open up.
View attachment 6
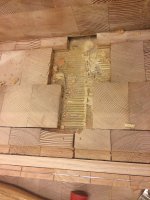
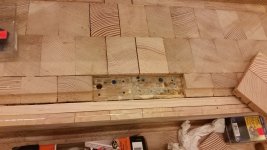
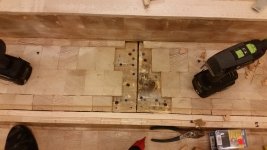
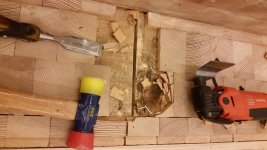
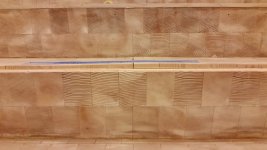
But we've now run into a problem with one of the stairs, where the subfloor itself is actually coming up. The subfloor is just a layer of 3/4" ply over the concrete structure of the stairs.
View attachment 5
It's not clear whether it's coming off of the concrete or just delaminating, but we're going to have to take out some of the tiles to investigate. So my question is whether a repair can be done that doesn't involve ripping out the plywood subfloor of that entire stair. Since the plywood is itself resting on the solid surface of the underlying concrete, it's not a question of degraded structural integrity, but simply flatness -- so wouldn't it be possible to remove tiles in a few strategic places, then secure the ply to the concrete using something like tapcon/blue screws? What about shooting some additional adhesive under the ply where the screws go to up the holding power to the concrete?
What would you guys do to make the best of what is this less than optimal situation?
Some background -- this is actually the second time this year we've worked on the stairs. It's covered with these 3/4" thick end grain doug fir tiles, and had these thin maple caps at the front of the tread.
View attachment 1
View attachment 2
View attachment 3
You'll see that the thick part of the maple cap is a lot narrower than the channel it's supposed to fit into. Not only that, but the front edge of the wooden tile where it meets the cap is actually back beveled 5-10 degrees, so there is all this additional space between the cap and the tile the lower you go. There are many other features of how the stairs are constructed that just kind of make you scratch your head. They were also originally stained white, so they scuffed up very quickly.
They have had problems with the stairs almost from the moment they were installed. So we were asked last year to sand down and fill the gaps that had developed especially near the front of the treads (almost certainly, as we just recently found out, because of the spacing between the maple cap and the front row of tile on the tread), as well as reattach the maple caps that were coming up in a few places. We did so, but with the warning that there might be more serious issues with the stairs that a cosmetic resurfacing was not going to solve.
Well, a year later, we're back, and dealing with the exact same problems. The problems have been exacerbated by the fact that the custodial service has apparently been mopping the stairs with copious amounts of water. They didn't want to do a complete overhaul, so we settled on a partial rehab, with disclaimers that this still may not be a long term fix, and recommending too that the stairs won't be mopped like they were.
The main part of the fix involves redoing the maple caps -- cutting a channel in the front of the stairs with the tracksaw (and finishing up with the Vecturo on the ends) so that they're actually resting on and can be secured to the wooden tiles, as opposed to just butting up against them (and also filling in the gap left by the previous maple cap, and using a generous layer of adhesive and fasteners to make sure the new cap doesn't come loose). A router would have been more efficient, but there were too many variables to control (nails in the path of the channel, the bowing out of some of the stairs) to make it that much faster such that it would justify the risk you take with one errant move of the tool.
View attachment 4
I made the caps wider and a consistent thickness (which is thicker at the edge than they previously were). This should cut down on the movement in the front of the treads that was causing the filler to disappear and gaps to open up.
View attachment 6
But we've now run into a problem with one of the stairs, where the subfloor itself is actually coming up. The subfloor is just a layer of 3/4" ply over the concrete structure of the stairs.
View attachment 5
It's not clear whether it's coming off of the concrete or just delaminating, but we're going to have to take out some of the tiles to investigate. So my question is whether a repair can be done that doesn't involve ripping out the plywood subfloor of that entire stair. Since the plywood is itself resting on the solid surface of the underlying concrete, it's not a question of degraded structural integrity, but simply flatness -- so wouldn't it be possible to remove tiles in a few strategic places, then secure the ply to the concrete using something like tapcon/blue screws? What about shooting some additional adhesive under the ply where the screws go to up the holding power to the concrete?
What would you guys do to make the best of what is this less than optimal situation?

 ). The real fix is to redo the whole thing and properly seal the concrete with some type of roll on membrane, but you already know that and they don't wanna pay for it!