How to plunge Domino 500 to center mark

NYC Tiny Shop

Member
Joined
Sep 12, 2013
Messages
929
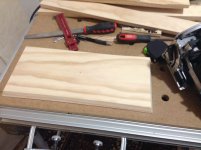
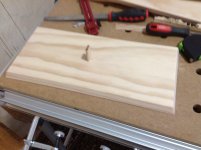
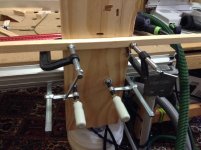
I came up with a bunch of ways to plenge the center with the Domino 500, but. I don't like any of the ways that I came up with. Would a Domino xpert please tell me how to accurately and safetly plunge the center marking on this base? (Pic 2 shows the direction that the tenon needs to be.). Thank you!
 

Attachments

  • image.jpg
    image.jpg
    1,009.5 KB · Views: 596
  • image.jpg
    image.jpg
    965.4 KB · Views: 636
Option 1) The base of the domino is 10mm from the centreline of the cutter. If you clamp a fence across your wood parallel with the base of the domino and 10mm below the centre of where you want your domino, you'll have a perfect mortise.

Option 2) Draw a line through the centre of where you want your mortise across the workpiece. On the sides of the domino are little steps which are in line with the cutter's centre. Line these up with your pencil line and plunge away.

 
Certainly no expert here, but that's easy.

The pictures should be self explanatory.


Richard, I went with option 1. Worked like a charm! Here is a pic of my set-up on a test piece. Bullseye! Thank you! And, thank you, barnowl!
 

Attachments

  • image.jpg
    image.jpg
    906.9 KB · Views: 545
Hi

I use a combination of these. A put a pencilmark on the guide-rail on my MFT, measured from the MFT-fence to center of the mortise. I then mark the wood 10mm from the mortise. Line up the domino to the rail to get it square. This is good for repetitive jobs.
I use the left side of the rail (not splinterguard side).

[smile]

Festoolviking
 
That's funny, Tom!  I remember when we first bragged that our baby daughter, for the first six months,  was sleeping through the night...and almost to the day, she had us up through the night for the next six months!  Right? If your pitching a no-hitter...keep your mouth shut.
 
Back
Top