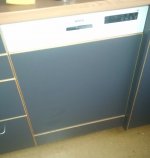
How Would You Solve This? (Panel Ready Dishwasher Needs Smaller Panel)

Grasshopper said:
OK FOGgers,

How would you solve this situation? 
...

Well get the wife some dishgloves and an aproooooooo.

I just woke up with a lump on the back of me head and a cast iron skillet is nearby.
I think the Haus-Frau was looking o'ar me shoulder. [embarassed]
 
Thanks all.

After thinking about this, I am going to lower the DW and add an "L" shaped filler strip along the top, attached via pocket screws to the  face frames left and right.  I will have the full sized panel stick out from the top.

I wouldn't have solved this without your help.

THANKS!!!
 
Hi grasshopper,
I know this is a one year old thread but I'm very interested to know how your solution worked out.  I ordered a Bosch 18 inch custom panel d/w because I want to fully integrate the d/w into my kitchen.  But like you, I learned after purchasing the d/w that this unit was created to be ada compliant.  I have a shaker door (18x30) and standard 4-4.5 inch toe kicks.  Can you explain a little more how you created your L shaped filler?  Can't it be any shape filler? Why L? How did you secure the d/w into its space so it does not move when opening and closing the door?  Did you end up installing a toe kick to match your kitchen? 
Thanks for your help!
 
Thanks for the reply.  I got caught in a couple projects, so I haven't finished this yet.

I am confident lowering the DW and having the panel sit 1 1/2" higher (vs. flush with the DW) will be just fine.

As for the "L" shape filler.  I haven't done this yet, but the plan is to basically extend the faceframe from the cabinets on either side of the DW.  I'll then place a 1x3 at a 90 degree angle from the new faceframe which will create the "L" (so I have something to attach the DW s mounting brackets to.)

I hope to get to this too, and must if I am to stay married.  I'll plan to post pictures when I finish.

Skl17 said:
Hi grasshopper,
I know this is a one year old thread but I'm very interested to know how your solution worked out.  I ordered a Bosch 18 inch custom panel d/w because I want to fully integrate the d/w into my kitchen.  But like you, I learned after purchasing the d/w that this unit was created to be ada compliant.  I have a shaker door (18x30) and standard 4-4.5 inch toe kicks.  Can you explain a little more how you created your L shaped filler?  Can't it be any shape filler? Why L? How did you secure the d/w into its space so it does not move when opening and closing the door?  Did you end up installing a toe kick to match your kitchen? 
Thanks for your help!
 
Grasshopper said:
I got caught in a couple projects, so I haven't finished this yet.

So I'm no to late ;)

Had the same issue with a bosh, not full but partly panel type.

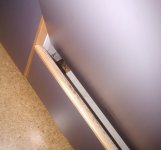
My solution, attach something in the lower space:

View attachment 1
View attachment 2

The inner top edge had to be slightly broken as the door swings down a bit before moving inward enough to clear the lower front...
 

Attachments

  • IMG_20170323_161704707.jpg
    IMG_20170323_161704707.jpg
    104.5 KB · Views: 1,172
  • IMG_20170323_161717366.jpg
    IMG_20170323_161717366.jpg
    116.4 KB · Views: 787
Thank you for sharing.

Gregor said:
Grasshopper said:
I got caught in a couple projects, so I haven't finished this yet.

So I'm no to late ;)

Had the same issue with a bosh, not full but partly panel type.

My solution, attach something in the lower space:

View attachment 1
View attachment 2

The inner top edge had to be slightly broken as the door swings down a bit before moving inward enough to clear the lower front...
 
How dd you attach that bottom filler to make it easy to remove the DW when needed?  A friend has that same situation except his has raised panels on it.
 
I don't know how Gregor actually did it but I can envision a removable panel that sits on pins or small dominos (2 on each side) inserted into each adjacent panel the project out about a 1/2" and matching L-shaped or angled slots on each end of the removable filler piece. Then to install/remove you just lift it on/off no tools required. If it's an L-shaped slot then you line up the filler with the pins and push in then let it drop down to lock in place.

Put a slight back bevel on the top of the filler and a complementary bevel on the bottom of the door panel so to provide clearance for the door opening/closing.
 
Bob D. said:
I don't know how Gregor actually did it but I can envision a removable panel that sits on pins or small dominos (2 on each side) inserted into each adjacent panel the project out about a 1/2" and matching L-shaped or angled slots on each end of the removable filler piece. Then to install/remove you just lift it on/off no tools required. If it's an L-shaped slot then you line up the filler with the pins and push in then let it drop down to lock in place.

Put a slight back bevel on the top of the filler and a complementary bevel on the bottom of the door panel so to provide clearance for the door opening/closing.
I applied KISS and used a single L-shaped metal bracket (single line of screws) on each side. The IKEA panels I used have a real wood edgebanding so I was able to simply cut the top banding of the bottom filler into a triangle (and seal with clear coat) to make just enough room for the door to move - as it was my kitchen I could decide 'good enough'  ;).

More convoluted methods may need to be applied though in case the door moves down to much before swiveling inward.
It could be an option to use two brackets per side, the lower to form a rotation point for the filler (so it can turn outward on the top of it) by using one screw on the side of the bracket and add another bracked higher (just attached to the sides of the hole to form a stop so the filler will be perfectly vertical when closed), plus a rubber ring to pull the filler into the vertical closed position and some glide strip ontop of it to avoid scratching/friction. With this the door panel would be able to push the filler out a bit to make the room for itself to move.
 
Back
Top