Interesting Dominio gluing method

smorgasbord

Member
Joined
Jan 7, 2022
Messages
1,242
I hadn't seen this before, other than gluing into end grain first, not sure I like this:


You can see in the cut-away later that the glue didn't go all the way into the second piece, which they say is good as it stops the joint from being pushed apart. But, to me it looks glue-starved.

Thoughts?
 
What an absolutely useless join.

I use a massive amount of reclaimed timber, and have pulled apart many Domino joined furniture, and almost without exception all were glue starved to the point I could wiggle the tenon with multigrips and pull it out intact.

The big problem I have with the Domino tenons are that they are an extremely tight fit, so they actually wipe most of the glue off the faces. There is a little in the glue channels pressed into them, but if the faces are dry this is of little or no consequence, especially as in the case of the video where they uselessly put glue around the edge AFTER inserting tenons!

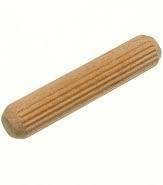
I machine my own dominos and use a brush to get the glue on all surfaces in the mortises, and over the entire tenon. Squeezing the assembly together slowly ensures excess glue can exit the reeded sides, and not end up hydraulic locking the joint. However, even using the genuine Festool tenons I've never had an adhesion or glue starved issue when ensuring all surfaces have good glue coverage.
 
Last edited:
At one point in the video the guy says to lightly sand the dominos....
I have to admit I didn't watch the whole video as it was just so ridiculous to me. Even if he sanded them though the glue spread around the tenon won't transfer adequately to the tenon in the mortise. It needs to be applied properly, especially as glue can skin over very quickly limiting or stopping absorption.
 
New method and better method? Don't care. I just follow the "if it ain't broke, don't fix it" wisdom. Glue on both sides (or four sides where needed) of the tenons and glue in the mortises.

Zero failure rate for the past 10 years (and after a thousand or two of dominoes).
 
I've trended towards being very conservative with my glue ups - meaning I try to use "just enough" glue for the joint or domino - so that there's not a lot of squeeze out. When you guys are talking about "good glue coverage" on the dominos, just how much coverage are we talking about?
 
For myself it might be considered over zealous by some, but I've always erred on the side of caution and applied enough glue on all contact surfaces so there's a tiny bit of squeeze out evenly distributed, not slathering it on but enough brushed or wiped onto the surfaces so then I know there's no dry bits.

And after having disassembled numerous doors, mantels and furniture over the decades, it's greatly reinforced the importance of the above!

I must admit I die a little everytime I see a maker putting together timber for a chopping board, and they just squirt some glue on only one face, and then slap the boards together and clamp!
 
I've trended towards being very conservative with my glue ups - meaning I try to use "just enough" glue for the joint or domino - so that there's not a lot of squeeze out. When you guys are talking about "good glue coverage" on the dominos, just how much coverage are we talking about?
Thin coats on all mating surfaces such that only a very tiny bead of glue squeeze-out is produced on one or two faces of the joint.

It isn't wrong per se to have massive glue squeeze-outs but why waste glue and why waste a lot of time in clean-up.

This advice applies to all types of joiney, not just dominoes.
 
The hydraulic is an issue when using tenons, dowels or dominoes.

With dowels, the solution is simple: Use fluted dowels that allows a release of the hydraulic pressure. That solution is not available to tenon users or domino users.

When I glued up 1/2” diameter fiberglass pultrusion shaft into a Bakelite sphere using epoxy, the hydraulic pressure was so strong that it repeatedly drove the shaft completely out of the hole.

To resolve that issue, I drilled a small pressure relief hole (about 1/8” diameter) adjacent to the 1/2” hole I had drilled to accept the 1/2” diameter shaft. I angled the hole so that it would intersect the 1/2” diameter hole near the bottom of the hole.

After that, assembly was easy. I added a coating of epoxy to the interior of the hole and drove the shaft into the hole. A good deal of the epoxy was squeegeed off the shaft hole and driven to the bottom of the hole. Some of the epoxy was driven up the relief hole and extruded out that hole. The hydraulic effect was eliminated and the joint stayed tight.

I suspect you could do the same with a domino. It would be a lot less work than the solution suggested in the video.

Alternatively, using a jig for that purpose, you could make shallow grooves using a narrow blade on a table saw. The groves would run along the length of the dominoes allowing a release of the hydraulic pressure.

The video used an English language sound-over for the dialog. I read lips and I found that very distracting as the words did not match the lip movement. In any case, I did not hear the term “hydraulic pressure”, but I might have been distracted because of the lip reading. At any rate, that is the culprit behind the problem. There are other ways to defeat that problem.

If someone made threaded blocks that could be mounted in a vise, then the fluting that resolves this issue in dowels could be pressed into the dominoes (and also make for a slightly looser fit. Not to worry about the fit. As the wood absorbs the moisture from the glue, it will expand back to its original shape and make a tight fit.)
1755179812972.jpeg
 
The hydraulic is an issue when using tenons, dowels or dominoes.

With dowels, the solution is simple: Use fluted dowels that allows a release of the hydraulic pressure. That solution is not available to tenon users or domino users.
Domino users don't have a hydraulic lock issue unless way too much glue is applied and/or the joint is assembled too fast to allow squeeze out.

The tenons already have reasonable sized flutes along both sides that allow good squeeze out, and even on the tight setting the mortise is slightly wider and deeper than the average width or length of the tenons.
 
With dominoes, if too much glue is there, it will spill out on the edges when the mating pieces are clamped together in addition to what luvmytoolz pointed out.
 
I consider that some of the worst advice I've seen on YouTube lately. I agree with some of the early replies...cover the Domino with a thin film, cover the entire walls of the mortises with a thin film and assemble. Any method that relies on volume to get full coverage is going to risk failure and create a mess at the same time. Why is everyone afraid of a glue brush? Buy them by the box and throw them away when you're done each time.
 
I consider that some of the worst advice I've seen on YouTube lately. I agree with some of the early replies...cover the Domino with a thin film, cover the entire walls of the mortises with a thin film and assemble. Any method that relies on volume to get full coverage is going to risk failure and create a mess at the same time. Why is everyone afraid of a glue brush? Buy them by the box and throw them away when you're done each time.
I use a lot of silicon brushes for spreading glue on faces and edges, and inside the mortises I use ear buds, a pack of 500 is about $2, and the size is absolutely perfect.

Some stuff I've pulled apart, you can see dried glue covering the area, but it hasn't actually bonded with the wood and can be pulled off, probably because of a combination of a lack of pressure in applying the glue to the timber, and inadequate clamping.

Some glues can skin over pretty quick, so it's really important to actually brush the glue on. Especially with some timbers that the glue "wicks" into the grain, effectively drying the joint. A good squeeze out is essential in my book to know it's a success.
 
I smear just a thin film on the Domino with my finger (Sedge method) and put some down in the hole. Insert Domino and any excess squeezes out. I aim for a little bit of squeeze out, not a bunch. Seems to work well enough.
 
I now drill a small hole at the bottom center of the hole in the side. Then plug with a tooth pick if it is pine. Or sometimes a bit of brass rod. I drill the relief hole 1/32 or 1.5 mm depending what is going to fill the hole. Sometimes I add a bit of sanding dust and glue with 1/32 hole is almost invisible. I bought some water resistant PVA, its terrible, as it dries or initially sets too fast. The bond is not that great for what I am doing. Great for small stuff that youwant to quickly assemble etc. I like to prime the block with thin layer of glue and my latest has been to run around the top edge and break the sharp corner that is responsible for being the glue wiper. I do it with the dremel and tapered sanding cone on a mandrel.
 
Neil you shouldn't need to drill any relief holes mate. A thin smear of glue over all the contact surfaces is all that's needed, any excess glue will squeeze along the reeded edges out to the join, and there's a bit of space at each end of the mortise as well.

Drilling a hole you also run the risk of too much of the glue dripping out and ending up with a dry'ish joint.
 
I have yet to work out why a Domino has to be glued at all.
No glue is needed if the dominoes are for an edge /panel joint because even without the tenons, a panel joint is strong enough by itself with glue. Tenons are for alignment in that case.

All structural joints will fail if glue is not used with the dominoes. E.g. a chair built with loose tenons could fall apart if someone sits on it or, worse, rocks it. The same goes for drawers, butt joints, miter joints, etc.
 
Last edited:
Back
Top