Latest Built-In Entertainment Center

WoodWhisperer

Member
Joined
Jun 25, 2013
Messages
175
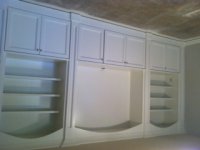
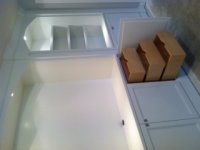
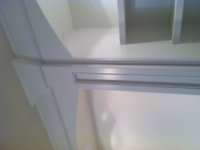
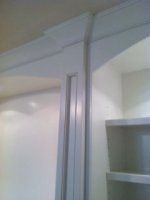
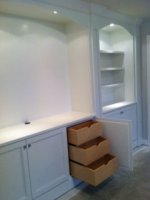
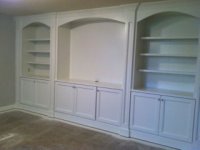
This Built-in was for a basement Family rm. Built it all at the shop and some how we got all the pieces down the stairs!!! It was painted on site by our painter who
was lucky enough to be able to spray it in place. Turned out pretty nice I think!!

Thanks for the look.
Sean
 

Attachments

  • photo 3 (1).JPG
    photo 3 (1).JPG
    26.1 KB · Views: 458
  • photo 2.JPG
    photo 2.JPG
    24.5 KB · Views: 416
  • photo 1.JPG
    photo 1.JPG
    21 KB · Views: 350
Looks great, very well done! What a beautiful piece for a basement. What paint was used for the finish?
 
Sorry, I started and then dinner interrupted.

[attachimg=#]

[attachimg=#]

[attachimg=#]

Peter
 

Attachments

  • photo1alt.jpg
    photo1alt.jpg
    8.7 KB · Views: 1,283
  • photo2alt.jpg
    photo2alt.jpg
    11.2 KB · Views: 1,296
  • photo3alt.jpg
    photo3alt.jpg
    11.9 KB · Views: 1,298
Johncarlo said:
Looks great, very well done! What a beautiful piece for a basement. What paint was used for the finish?

Thanks!!!
The painter took control once I installed.  He always uses a high quality material and sprays the finish on. He makes it look easy!!
 
WoodWhisperer said:
Johncarlo said:
Looks great, very well done! What a beautiful piece for a basement. What paint was used for the finish?

Thanks!!!
The painter took control once I installed.  He always uses a high quality material and sprays the finish on. He makes it look easy!!
The paint does look great, but it wouldn't look great if the construction and sanding wasn't done well. Don't discount your role in the project! Very nice work.
 
Sean, that looks fantastic!  I love the pilaster bump outs which create a really nice crown detail!  How did you create your curves?
 
It looks amazing, as a newbie wood worker I have a couple of questions.

What type of material did you use?

Was it prefinished?

Was it spray finished in place?

Just curious how it came together, again it looks great.

Thanks,
Jason
 
builderbob said:
Sean, that looks fantastic!  I love the pilaster bump outs which create a really nice crown detail!  How did you create your curves?

Thanks Bob!  Loved the closet u posted.  Turned out awesome!!
I think the pilaster on this project make all the difference in detail and depth.  I created the curves the old fashion way!!  With a thin piece of wood.  I put 2 screws at the bottom of the curve to hold the width. These screws act as a guide pin for the scrap to rest on.  Push up on the center to the desired height, put a screw in the center of the scrap wood.  Then I measure in a couple of spots to ensure the arc is symmetrical.  I screw the scrap every 6-8".  Rough cut it out with a jig saw and flip it over and finish it off with a large flush trim bit.  The end result is a smooth curve.  If I have 2 arches that are the same, I clamp them together and use the first arch as a template.
 
Devildawg91 said:
It looks amazing, as a newbie wood worker I have a couple of questions.

What type of material did you use?

Was it prefinished?

Was it spray finished in place?

Just curious how it came together, again it looks great.

Thanks,
Jason

Thank You!!

I like to use shop grade Maple plywood when a project is painted.  It is smoother and doesn't require as much sanding as birch or poplar ply.  I use poplar for the face frame and doors.  The drawers are pre-finished maple plywood with edge banding on the top edge.  I installed the units and then the painter sprayed them in place.  We were lucky enough that the customer was replacing the flooring. 

Good luck to u on your woodworking!!
 
Back
Top