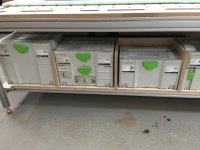
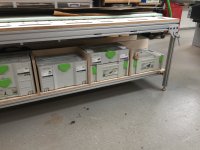
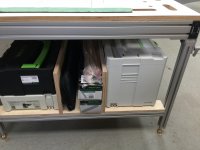
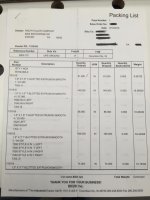
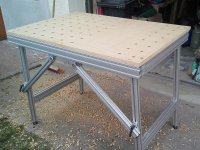
Long extrusion profile for mft/3?

magellan said:
I do have a list of all the parts.  Yes you are correct about the center bar it does have to be removed before you can fold the table.  In reality I built this table with expectations of it only being used occasionally but it has been my primary assembly table.  I recently added a few more pieces to the lower structure and added a shelf to store my Festool Systainers.  I will add pictures tomorrow when I get to the shop.  Yes I spent a few dollars making it foldable and ended up not folding it up.  Oh well.   

I forgot about this thread.  This table ended up being one of the best additions to my shop. I was always working on my wall benches meaning benches I had pushed up against the wall. Now I can maneuver all around it.

Its a great table and exactly what I am looking to do. Would love to see more pics and hopefully get a list.
 
View attachment 8View attachment 8View attachment 8View attachment 8Here are a few pictures of what it looks like now with the lower shelf and dividers. 
I also included the list of the first build and then the last two pages are the parts for the lower shelf.  You don't need all the clips for the attaching the table.  I had one of the engineers at draw it up and he did all the clips.  In fact I have a bunch left over. 

See if this is helpful.

BenView attachment 1
 

Attachments

  • IMG_0370.JPG
    IMG_0370.JPG
    1.8 MB · Views: 945
  • IMG_0371.JPG
    IMG_0371.JPG
    1.9 MB · Views: 884
  • IMG_0372.JPG
    IMG_0372.JPG
    1.7 MB · Views: 890
  • fullsizeoutput_301.jpeg
    fullsizeoutput_301.jpeg
    1.4 MB · Views: 847
  • fullsizeoutput_306.jpeg
    fullsizeoutput_306.jpeg
    1.5 MB · Views: 633
  • fullsizeoutput_309.jpeg
    fullsizeoutput_309.jpeg
    1.5 MB · Views: 584
  • fullsizeoutput_30c.jpeg
    fullsizeoutput_30c.jpeg
    1.5 MB · Views: 699
  • fullsizeoutput_30f.jpeg
    fullsizeoutput_30f.jpeg
    1.3 MB · Views: 696
Thanks for continuing to update the thread as your table evolves. The parts list and new photos are especially helpful. The long "slot" on the under table shelf is brilliant!
 
magellan said:
View attachment 8View attachment 8View attachment 8View attachment 8Here are a few pictures of what it looks like now with the lower shelf and dividers. 
I also included the list of the first build and then the last two pages are the parts for the lower shelf.  You don't need all the clips for the attaching the table.  I had one of the engineers at draw it up and he did all the clips.  In fact I have a bunch left over. 

See if this is helpful.

BenView attachment 1

Thank you [member=10212]magellan[/member] for posting these pictures.  I will be ordering it soon so I will post it when mine is done.
 
Hey fellows
Thanks for all the kind words

Just a few thoughts before you go and spend your money.  The table works just as I need it to but my first mistake was thinking I was going to fold it up at times.  Without the lower shelf it’s a bit heavy but it is solid that is the purpose of the center bar was for stability. 

The reason for the shelf being low and only so high is so I can still reach under the the top to access the holes for clamping and sometimes push the dawgs out in the tight holes.  So remember to leave some space.  I was originally going to use the Sys AZ sliding drawers but I felt it would be more show and I would have only been able to fit 4 Systainers and not 5 plus no room for the long space down the center or very little space in the middle. 

What I normally do is store my large pieces of card board on top the Systainers.  It keeps them clean and it keeps the card board out of my way.  I keep Card board for patterns and testing my spray pattern before shooting a piece. 

Let us see some pictures when you complete them

Take care
 
magellan said:
Hey fellows
Thanks for all the kind words

Just a few thoughts before you go and spend your money.  The table works just as I need it to but my first mistake was thinking I was going to fold it up at times.  Without the lower shelf its a bit heavy but it is solid that is the purpose of the center bar was for stability. 

The reason for the shelf being low and only so high is so I can still reach under the the top to access the holes for clamping and sometimes push the dawgs out in the tight holes.  So remember to leave some space.  I was originally going to use the Sys AZ sliding drawers but I felt it would be more show and I would have only been able to fit 4 Systainers and not 5 plus no room for the long space down the center or very little space in the middle. 

What I normally do is store my large pieces of card board on top the Systainers.  It keeps them clean and it keeps the card board out of my way.  I keep Card board for patterns and testing my spray pattern before shooting a piece. 

Let us see some pictures when you complete them

Take care

I am buying ultralight MDF - I am not sure what the difference in weight will be but do you think it will be ok without the center bar or do you think it is needed.  I saw this table and I was thinking I could just do this instead of the lower center bar. Thoughts [member=10212]magellan[/member]

I do not have the room to keep this up all the time so I want to make sure before I buy and build this that I will I wont be stuck with a table thats not stable.


Attachments

  • Werkbank_1.jpg
    Werkbank_1.jpg
    127.1 KB · Views: 1,026
I think you will be fine.  I used 3/4” Baltic birch and then laminated both sides.  The weight of the Baltic birch alone is pretty stout.  As for the center bar I would do without if you plan to fold the table for storage.  My trade was an Iron Worker and fabricator so I tend to build on the heavy side.  What Is nice about having them cut the parts is the entire table can be assembled in an hour or so   
 
magellan said:
I think you will be fine.  I used 3/4” Baltic birch and then laminated both sides.  The weight of the Baltic birch alone is pretty stout.  As for the center bar I would do without if you plan to fold the table for storage.  My trade was an Iron Worker and fabricator so I tend to build on the heavy side.  What Is nice about having them cut the parts is the entire table can be assembled in an hour or so 

[member=10212]magellan[/member]  Ok so go with yours without center bar.  Thanks again for the advice
 
I know an old thread, but was wondering, could I butcher an mft, and make longer sides by using the mft connector bars, set a larger top in the rails.

I'm thinking would have to make some kind of support beams front to back, as I'm leaning toward making it two.long sides wide, and one long side deep.
 
Hi not a great vid and i think there more info on this, but this is what he did.
 
Back
Top