LR32 with 1400

Brighton

Member
Joined
Jan 3, 2015
Messages
6
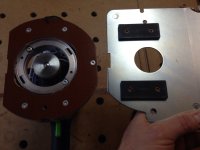
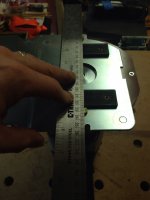
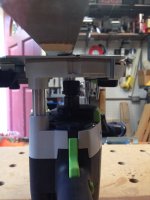
Am I doing something wrong in the setup of the LR 32 with the 1400 router? I attached the base to the router, zero'd out the parallel guides and attached them to the track, loosened the set screw on the parellel guide, put the router on the track and slid the router up to the guide. The router hits the parellel guide before the pin on the guide slides into the slot on the router base. I know lots of guys are using the 1400 with the LR system so it's probably something dumb that I'm missing.
Thx for the help!!
 
Hi,

I'm guessing that you are try to set (zero) the lateral stops.
If you trying to set them with the router on the guide plate then that is the problem.
1. Set the play of the plate( without router) on the rail.
2. Secure the stops on the rail.
3. Adjust(zero) the stops to the plate.
4. Install and center router.

Hope this helps,

George
 
Based on your post, it sounds like maybe you didn't calibrate the set up, though, I might be reading it wrong...

The first thing to do with either the 1400 or 1010 is mount to the sled while locating using the centering mandrel chucked in the collet.

The next thing is to mount the sled on the guide rail and adjust it to take out the slop but still allow it to move.

Now, adjust the slop between the lateral stops and the guide rail. Then, you have to calibrate the lateral stops to the sled. Line up the "0" (zero) on each of the bar and the outer piece of the lateral stop and lock that down. Loosen the bar so it can slide in the guide rail mount and configure it so the pin that would normally hang over the edge of the work piece is in the notch on the router sled. Now tighten the bar to the guide rail mount. Do that with both later stops.

If I misunderstood your issue, please ignore this...

Tom
 
macrutt said:
Hi,

I'm guessing that you are try to set (zero) the lateral stops.
If you trying to set them with the router on the guide plate then that is the problem.
1. Set the play of the plate( without router) on the rail.
2. Secure the stops on the rail.
3. Adjust(zero) the stops to the plate.
4. Install and center router.

Hope this helps,

George
Well like I said it probably something really dumb...zero the parellel guides/stops without the router attached to the plate. [doh] Thanks for the help!!
 
There are a couple of good videos from Festool and Erock on YouTube.  Suggest you watch as they will guide you right through the process....

Gary
 
Actually, it doesn't matter if the router is attached or not. The same calibration of lateral stops to sled and guide rail will work for any router as long as the router is centered in the hole using the centering mandrel.

I think the step you left out is loosening the bar of the lateral stop at its guide rail mount, sliding it until it centers in the notch on the sled and tightening at the guide rail mount.

After rereading your post, it sounds like you did the other stuff. Don't forget to take out the slop where everything goes over the "hat" in the guide rail.

Tom
 
macrutt said:
Hi,
Here's a youtube link:


Take care, George


And the major  [doh] [doh] part is I watched that video a couple times before I bought the system. Couldn't put it together once I was in front of the parts setting everything up. Thanks again!!
 
I think the confusing part for mounting the 1400 on the LR 32 is that you need to turn it around 180 degrees from where you think it needs to be. You think the leveling outrigger notch in the 1400 should align with the notch in the LR 32 plate, but no.

1st photo shows "how you think it should be" mounted, (ok me),
2nd shows the mounting holes not aligning in the "how you think it should be" position,
3rd shows the 1400 turned 180 degrees with mounting holes aligned and mandrel aligned,
4th shows that the center of the bit does align with the alignment notch in the LR32 plate,
5th shows the 1400 center mark aligning with the edge of the alignment notch.

So the lateral guide set is the same for both the 1010 and 1400.

Hopefully this will add clarity for someone in the future.


Attachments

  • image.jpg
    image.jpg
    647.5 KB · Views: 563
  • image.jpg
    image.jpg
    758.9 KB · Views: 475
  • image.jpg
    image.jpg
    685.8 KB · Views: 527
  • image.jpg
    image.jpg
    542.8 KB · Views: 516
  • image.jpg
    image.jpg
    724 KB · Views: 527
Back
Top