HA! There must be definitely more than one way to skin something.
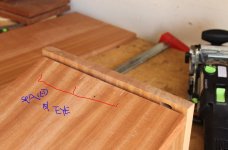
I find the simplest and quickest marking jig is...eyeballing, since I by default use the tight setting on one edge, and wider setting on the mating piece EXCEPT for the first alignment mortise which is cut in the tight setting on BOTH pieces. In most of the cases (not for narrow pieces), the first alignment mortises can be cut using the paddles for registration with no pencil lines needed there.
The "eyeballing jig" does have one unexpected advantage: When I dry fit, if I mix up a mating piece, it often shows up quickly because lines free drawn at "rough" spacing on the boards rarely line up identically on different pieces, nor do the mortises so milled.
The use of tight-wide settings prevents straining my eyes, too, as there's no need to be dead-on in lining up the machine (scribed line on the sight gauge) with the pencil lines. The wide mortises will take care of any minor discrepancies. To me, that's design brilliance, compared to other joinery tools that demand exact precision.