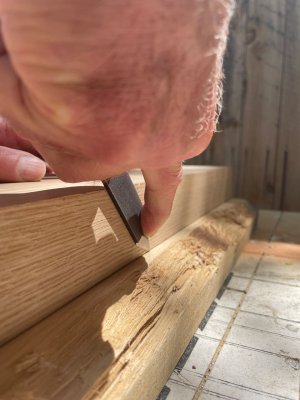
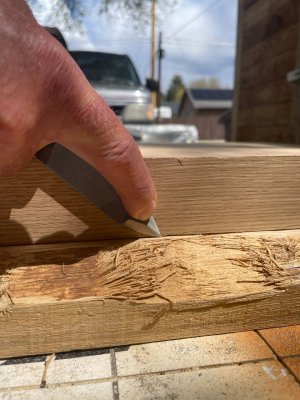
E, marking across the grain is best with a thin-bevelled blade. Look at the way a knife gauge or wheel gauge is used to mark dovetail line versus the result from a pin gauge. The latter lkeaves terrible tearout. Thinner blades (with sharp edges) penetrate more easily, and a thick, Japanese knives, with thick blades, had better be really sharp, otherwise it will leave a wider line/depression. I love my kiridashi knives, but not for the finest cross-grain marking.
About marking knife design and, in particularly, the design I have posted ...
There are those who view a tool as an object to get a task done, are likely to grab the first one to hand that can do the job, and as long as it gets them there in the end, that is all that is important. Any sharp object within reach - chisel, sharpened piece of steel offcut, pocket knife ... The thought that some see tools as precious objects seems absurd.
There are those who pay a little more attention to the quality of the tool, purchasing something that was specifically made for the purpose, but without exploring the how form follows function. It is just a knife-looking object (form) which is wanted, and there follows a special attachment to shiny objects and shopmade tools. Pride in ownership comes into the picture. Membership develop of groups based on cost and availability. Do you belong?
Lastly there is the group who spends time wanting to understand how the tool functions and what makes it better. Both form and function are the focus. Form as quality and aesthetics, and function in regards to how well it does in the actual task. It is no longer about 'good enough'. They want the best outcome. This is the group who cause headaches for others with their focus on ergonomics, steel quality, line thickness, and so on.
Clearly the discussion I bring to the table is the latter area. Anyone who lives in the first group will consider this discussion obsessional. Here we come together with opinions, based on experience, hopefully in open discussion, and share our understanding with each other, hoping to learn something that will further our skills and/or enjoyment of woodworking.
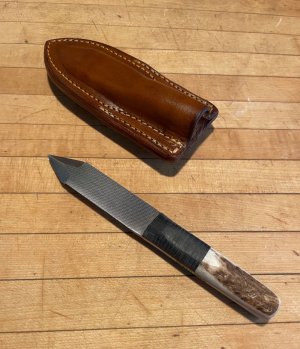
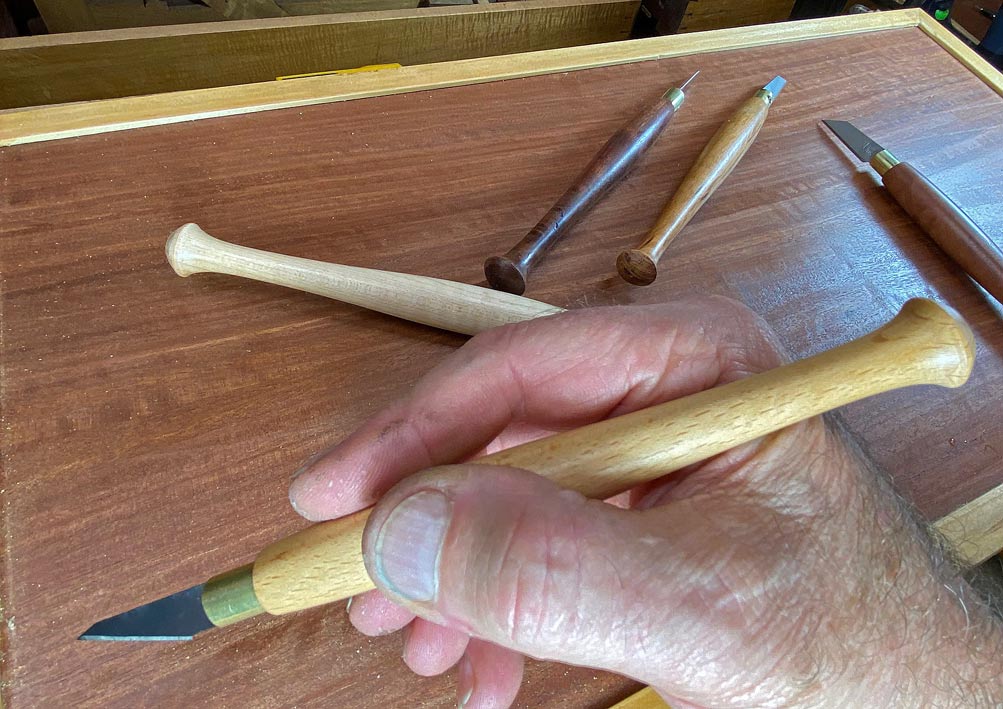
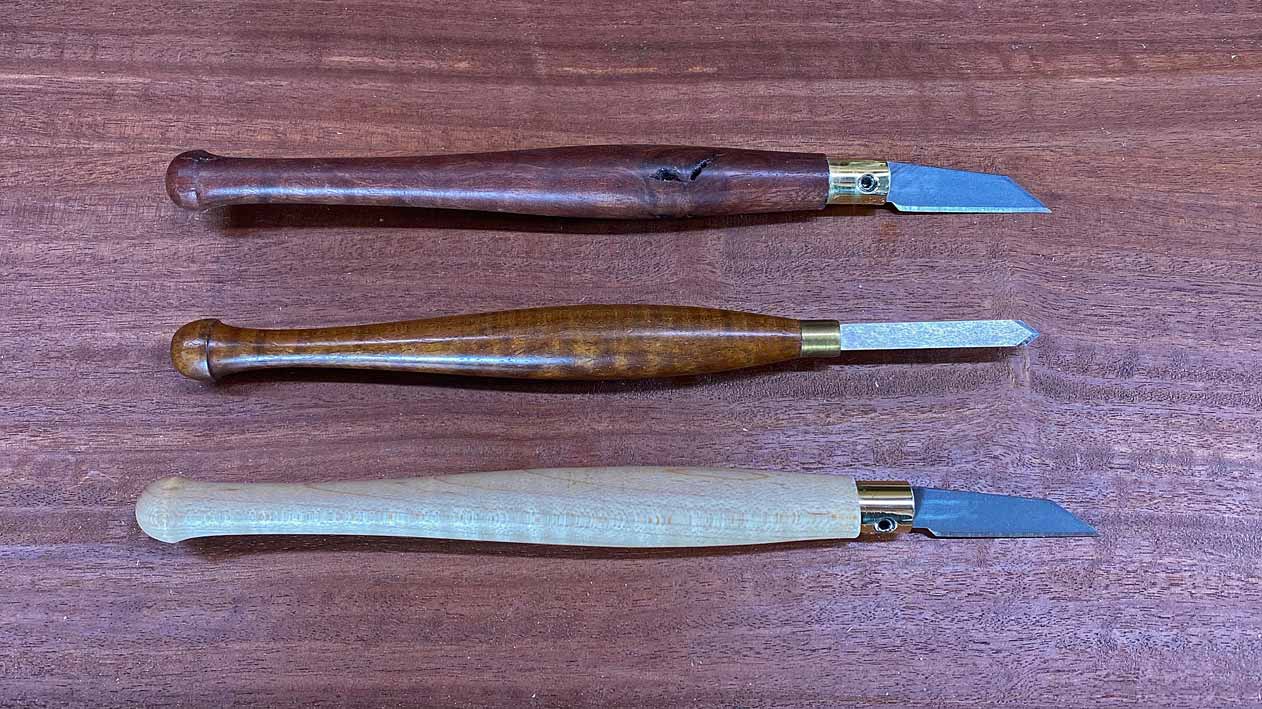
This is a long way around to say that the design of these mrking knife handles, and the choice of the materials, especially the blades, as well as construction, was deliberate and intended for a specific purpose. These are not simply shiny objects. Of course, this is my view, and I really do welcome the views of others, both in critique and in creativity.
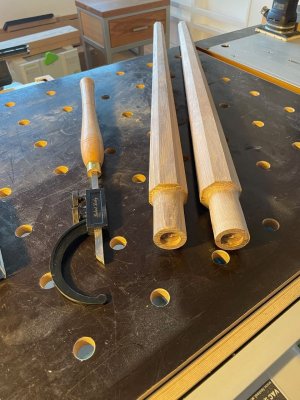
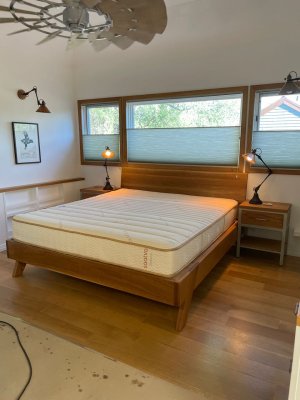
Let's take the purpose first. These knives are general purpose marking knives, as a replacement for the steel case if the Stanley craft knife. You could strike lines against a straight edge. You can do so with a fine and shallow line or a deep line intended for a chisel wall. You can mark dovetails with them - with the limitation that these are not London-style but wide enough to fit the blade thickness. You can trim masking tape off the edge of end grain (this will be explained later). You can sharpen pencils with this knife, even whittle the ends of dowels. They are not intended for heavy duty work, such as cleaving pegs.
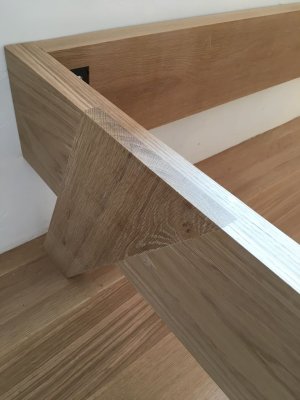
The design. Firstly the ergonomics. The handle is shaped to follow the contours of a palm. My other marking knife design was specifically aimed at fine detail work and dovetails, especially the narrow entry for London dovetails when cutting tails-first. You hold that knife with an overhand grip, like a pencil. The curves of the body are not an accident. There are other similar knives on the market, such as Blue Spruce (which was developed around the same time as mine) and Veritas (which followed later and was intended to be cheap ... but still followed this design element). By contrast, if you look at the knife by Matt Eslea, you see a beautifully made tool, but one without the same direction fir ergonomics. Who is right?
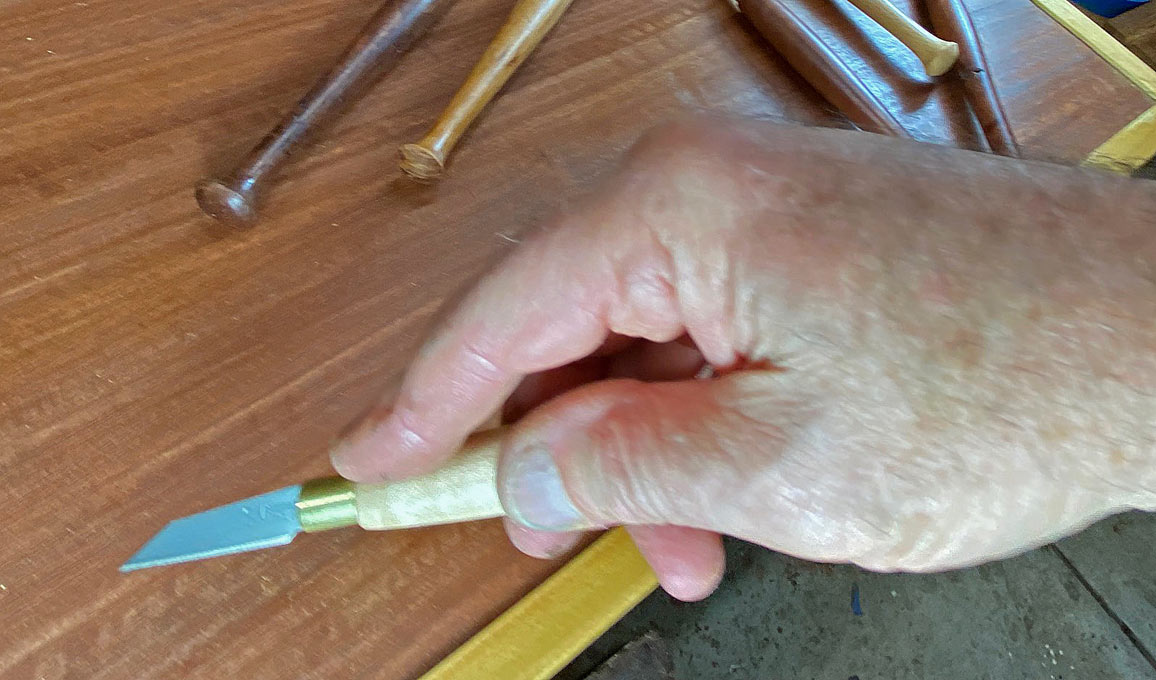
My aim was to create a knife which was comfortable to hold, which would offer control this way. What I discovered after making it was that the SM03 blades (with the horizontal bevel), which I was using in the Stanley craftknife - as supplied, and as others, such as Paul Sellers, uses - these blades are best suited for an
overhand grip. You can use an underhand, palm grip, and this is reasonably comfortable, but this set up encourages a different user style. The SM01 blade changes the user style oreference to an
underhand/palm grip. I am now waiting on an order for SM01 blades.
After seeing these photos, I thinned down the bodies of the knives (they were too bulky) and reshaped the ends (to match the dovetail knife).
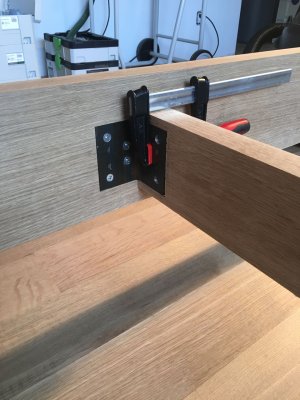
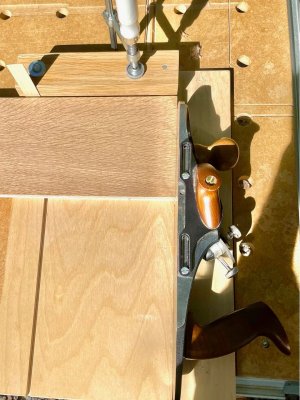
The construction part of design involves the brass "cassette" (as I will call it) to hold the blade. It must be stated again, since you raised this issue, that the aim was to have a knife with replaceable blades. Blades not inly do get chewed up, but (as discussed) change the ergonomics, and so is desirable. I would have preferred to go down the Matt Eslea path with the cassette, that is, to have machined a slim tenon to insert into a thinnish round mortise in the handle. I do not have a metal lathe, and needed to keep the cassette coplanar. Fortunately, the curved handle shape leaves a lot of meat around the 10mm round mortise, and the result is a very strong construction, most unlikely to break with heavy downforce. The downside of this is that there remains a slight "lip" at the junction of the body and cassette.
The SM blades: I have used these over the course of about 10 years. It is good steel and holds an edge a good while. The blades are easy to sharpen. There are two methods, used for different purposes.
Most marking takes place at the tip of the blade, and this needs to be sharpened. Simply run the flat back of the blade on a 600 or 1200 grip diamond stone, or similar. Two or three strokes and you are done. This may be all that is needed. If the bevel is to be sharpened, then do so as you would freehand sharpen any knife - draw the edge over the stone at a low angle. You can remove the blade to do so, if needed.
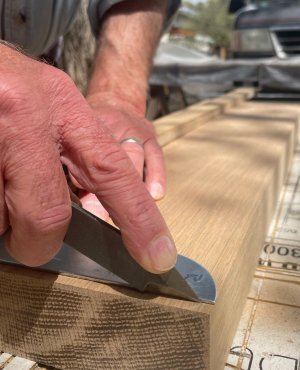
Some will point to the blade being double bevelled and question how accurately this can work against a straight edge ir shoulder. The answer is to simply cant the blade to one side to get a vertical. I cannot for the life of me recall the name of the UK-based woodworker/writer who championed this, but he argued that the proper was to use a single bevel knife was with it canted (so he would use a leftie in his right hand). Among others, I poo-pooed this back then. Now I see that there as sense in this, and I do so without any negatives. There seems to be less likelihood of the bevel digging into the reference side (hence my earlier comment about cutting tape away from an edge).
The SM blades are fairly stiff. They do not bend easily - unlike the blade in my detail/dovetail knife, which makes use of this ability along with the single bevel to follow the sidewall if a slim dovetail socket. But then, you do not want to bear down heavily with the detail knife. You can do do with this SM-bladed marking knife.
Regards from Perth
Derek