Marking knife

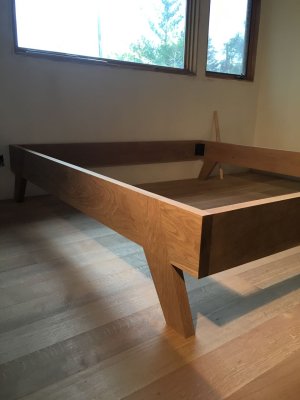
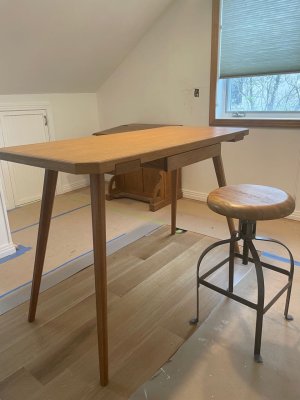
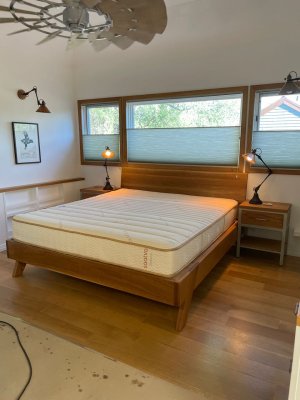
There were two personal projects this year where a marking knife was mandatory. I made a bed and a desk for my wife, both with White Oak. The bed and the desk are very simple designs, but, both required a lot of scoring across and with the grain. Scoring with the grain may just be the true test of a marking knife or marking gauge. I'd like to hear Dereks thoughts on marking with the grain, against a straight edge, what kind of knife, and what knife shape and bevel. Sometimes you can't fit a marking gauge, or the cut gets interrupted, and you have to connect the cuts with a straight edge. Derek, your Kinshiro cutting gauge is a thing of beauty, I will look for a replica.
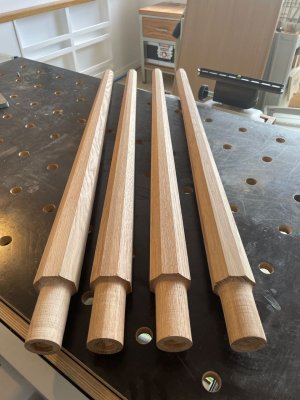
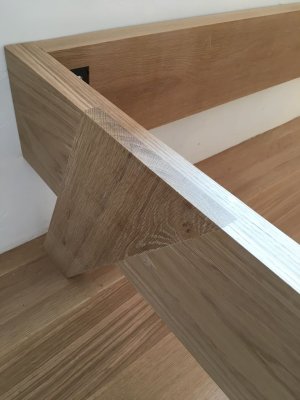
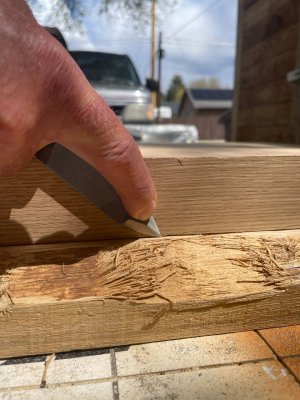
The legs on the bed are a lap joint, cross grain scoring on an angle was important. The tapered legs of the desk had tenon turned on one end, I used a very sharp 1/8" parting knife to start the shoulder, but it required an aggressive cut with a marking knife first. Otherwise, the tear-out was crazy. I also knifed-in the stretchers on the underside of the desk. Hence, the question about knife type against a straight edge.

E.
 

Attachments

  • White Oak Timber Bed.jpg
    White Oak Timber Bed.jpg
    96.7 KB · Views: 12
  • CS Work Table.jpg
    CS Work Table.jpg
    119.6 KB · Views: 10
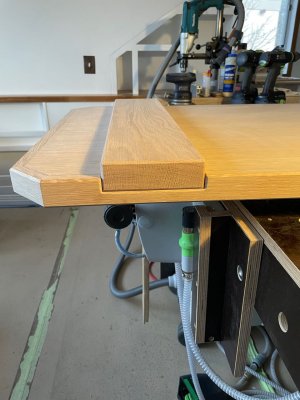
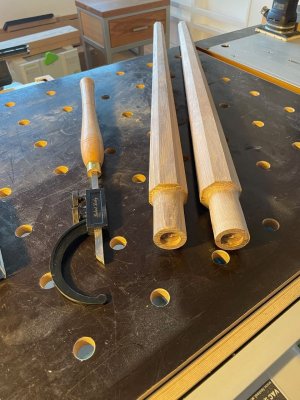
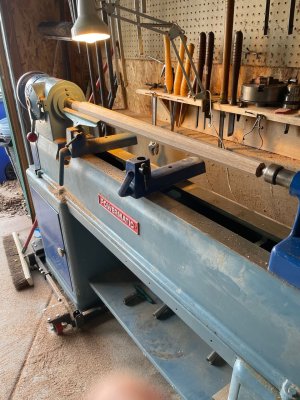
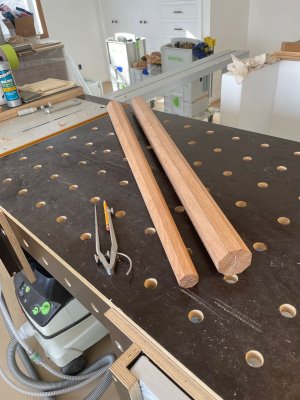
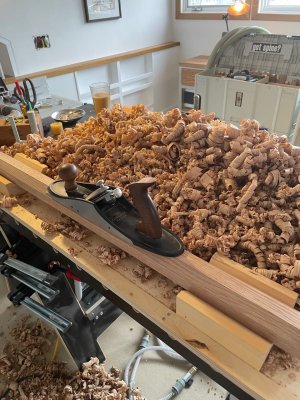
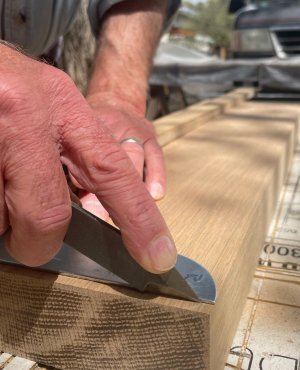
The CS Work Table above, refers to a modified version of Chris Schwarz's staked work table design from the Anarchist's Design Book. An excellent project to improve one's hand tool skills. The legs were shaped and tapered with a bench plane. When it came time to turn the leg tenon's on a lathe, the adventure began. One of the modifications to the design, was height. My wife wanted a desk she could stand at. I don't own a lathe, let alone one big enough to turn a 36" leg. I became acquainted with a neighbor that had a monster of lathe. He has since retired, my rough lathe skills scared him into retirement. Again, the knifed-in line at the start of the shoulder was mandatory. Even then, there was still some tear-out. The next knife task was to knife the stretcher into the bottom of the desk slab. Using the stretcher as a straight edge (before the edges are chamfered) required buying a marking knife that was long enough to trace the stretcher, without the handle getting in the way, and tipping the knife. The knife purchase is a story for another day.
E.
 

Attachments

  • Knifed-in Stretcher.jpg
    Knifed-in Stretcher.jpg
    140.9 KB · Views: 7
  • CS Work Table Legs.jpg
    CS Work Table Legs.jpg
    157.2 KB · Views: 6
  • CS Work. Table Legs 1.jpg
    CS Work. Table Legs 1.jpg
    218.2 KB · Views: 6
  • Tenon on the. Lathe .jpg
    Tenon on the. Lathe .jpg
    235.1 KB · Views: 6
  • CS Work Table Legs Shape.jpg
    CS Work Table Legs Shape.jpg
    178.8 KB · Views: 6
  • CS Work Table Tapering.jpg
    CS Work Table Tapering.jpg
    241.6 KB · Views: 7
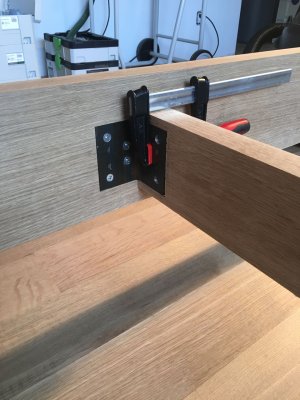
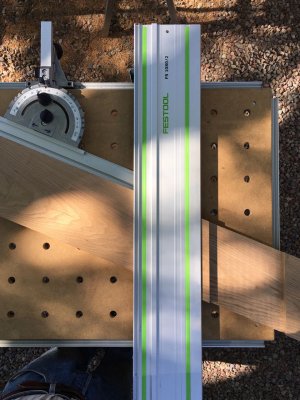
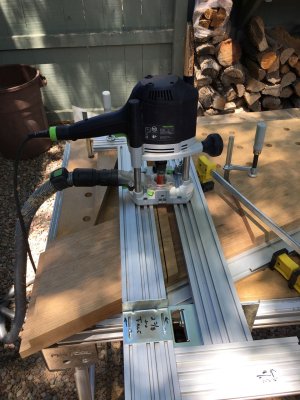
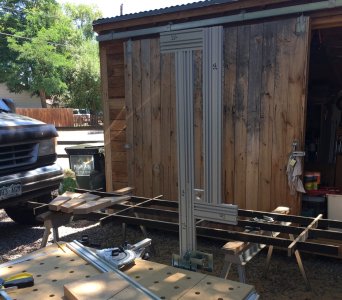
Knife project number two was a white oak timber bed frame. I started by tracing the leg shape onto the frame with a marking knife again, this was mandatory because of the grain orientation. I set up the protractor on the MFT, and cut to the knife line with a track saw, making a kerf that I could route to. Then I swapped out the track for an MFS, attached it to the track hinge on the MFT. This created kind of a giant router plane/slab flattening rig. As long as the MFS was well supported from underneath, and not flexing, the depth of lap cut was perfect. I used a marking gauge on the edges of the frame and legs so there was no tear-out when the router bit left the wood. I reinforced the marking gauge cut with a marking knife and a straight edge. The frame was held together with 3" angle iron in the corners, and mid-span. I knifed-in all the angle iron, and used the MFS to route everything in. Fastened it all with #16 x1 1/4" iron wood screws. Because of the tight fit of the lap joint, I had to be really careful dry fitting the legs to the frame, I didn't want to create a bunch of tear-out taking things apart before it all got glued-up.
E.
 

Attachments

  • White Oak Timber  Bed Frame.jpg
    White Oak Timber Bed Frame.jpg
    130.4 KB · Views: 8
  • Bed Mid-Span.jpg
    Bed Mid-Span.jpg
    157.7 KB · Views: 8
  • White Oak Timber Bed 1.jpg
    White Oak Timber Bed 1.jpg
    117.8 KB · Views: 7
  • MFS and MFT 5.jpg
    MFS and MFT 5.jpg
    186.3 KB · Views: 8
  • MFS and MFT 1.jpg
    MFS and MFT 1.jpg
    226.7 KB · Views: 8
  • Kerf Cut WO Bed .jpg
    Kerf Cut WO Bed .jpg
    192.3 KB · Views: 8
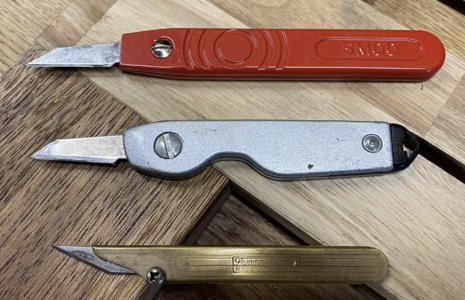
It's amazing to me how some things go by the wayside and then some things continue on. The middle knife shown in one of Dereks posts previous in this conversation appears to be a Stanley. I remember working in the sporting goods department of a retailer just after I graduated hight school in 1979 and selling a model of that Stanley knife, although at the time it came with a polished finish and a slightly different blade lock. Back then it was probably about $4 to $6. Somewhere I still have one that was written off as company use. I always thought that it had been discontinued and the blades would be unobtainable.

Peter
Screenshot 2025-04-26 at 6.03.39 PM.png
 
... I'd like to hear Dereks thoughts on marking with the grain, against a straight edge, what kind of knife, and what knife shape and bevel. Sometimes you can't fit a marking gauge, or the cut gets interrupted, and you have to connect the cuts with a straight edge. ...

E.

E, marking across the grain is best with a thin-bevelled blade. Look at the way a knife gauge or wheel gauge is used to mark dovetail line versus the result from a pin gauge. The latter lkeaves terrible tearout. Thinner blades (with sharp edges) penetrate more easily, and a thick, Japanese knives, with thick blades, had better be really sharp, otherwise it will leave a wider line/depression. I love my kiridashi knives, but not for the finest cross-grain marking.

About marking knife design and, in particularly, the design I have posted ...

There are those who view a tool as an object to get a task done, are likely to grab the first one to hand that can do the job, and as long as it gets them there in the end, that is all that is important. Any sharp object within reach - chisel, sharpened piece of steel offcut, pocket knife ... The thought that some see tools as precious objects seems absurd.

There are those who pay a little more attention to the quality of the tool, purchasing something that was specifically made for the purpose, but without exploring the how form follows function. It is just a knife-looking object (form) which is wanted, and there follows a special attachment to shiny objects and shopmade tools. Pride in ownership comes into the picture. Membership develop of groups based on cost and availability. Do you belong?

Lastly there is the group who spends time wanting to understand how the tool functions and what makes it better. Both form and function are the focus. Form as quality and aesthetics, and function in regards to how well it does in the actual task. It is no longer about 'good enough'. They want the best outcome. This is the group who cause headaches for others with their focus on ergonomics, steel quality, line thickness, and so on.

Clearly the discussion I bring to the table is the latter area. Anyone who lives in the first group will consider this discussion obsessional. Here we come together with opinions, based on experience, hopefully in open discussion, and share our understanding with each other, hoping to learn something that will further our skills and/or enjoyment of woodworking.

This is a long way around to say that the design of these mrking knife handles, and the choice of the materials, especially the blades, as well as construction, was deliberate and intended for a specific purpose. These are not simply shiny objects. Of course, this is my view, and I really do welcome the views of others, both in critique and in creativity.

Let's take the purpose first. These knives are general purpose marking knives, as a replacement for the steel case if the Stanley craft knife. You could strike lines against a straight edge. You can do so with a fine and shallow line or a deep line intended for a chisel wall. You can mark dovetails with them - with the limitation that these are not London-style but wide enough to fit the blade thickness. You can trim masking tape off the edge of end grain (this will be explained later). You can sharpen pencils with this knife, even whittle the ends of dowels. They are not intended for heavy duty work, such as cleaving pegs.

The design. Firstly the ergonomics. The handle is shaped to follow the contours of a palm. My other marking knife design was specifically aimed at fine detail work and dovetails, especially the narrow entry for London dovetails when cutting tails-first. You hold that knife with an overhand grip, like a pencil. The curves of the body are not an accident. There are other similar knives on the market, such as Blue Spruce (which was developed around the same time as mine) and Veritas (which followed later and was intended to be cheap ... but still followed this design element). By contrast, if you look at the knife by Matt Eslea, you see a beautifully made tool, but one without the same direction fir ergonomics. Who is right?

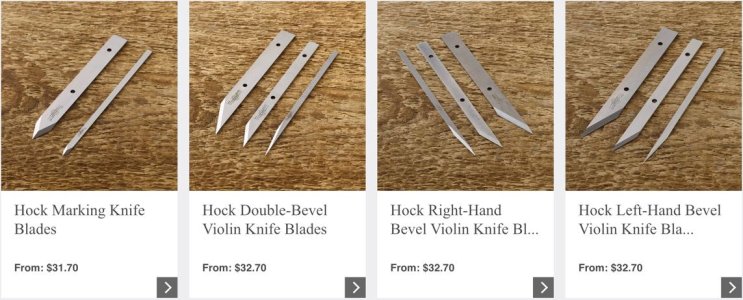
My aim was to create a knife which was comfortable to hold, which would offer control this way. What I discovered after making it was that the SM03 blades (with the horizontal bevel), which I was using in the Stanley craftknife - as supplied, and as others, such as Paul Sellers, uses - these blades are best suited for an overhand grip. You can use an underhand, palm grip, and this is reasonably comfortable, but this set up encourages a different user style. The SM01 blade changes the user style oreference to an underhand/palm grip. I am now waiting on an order for SM01 blades.
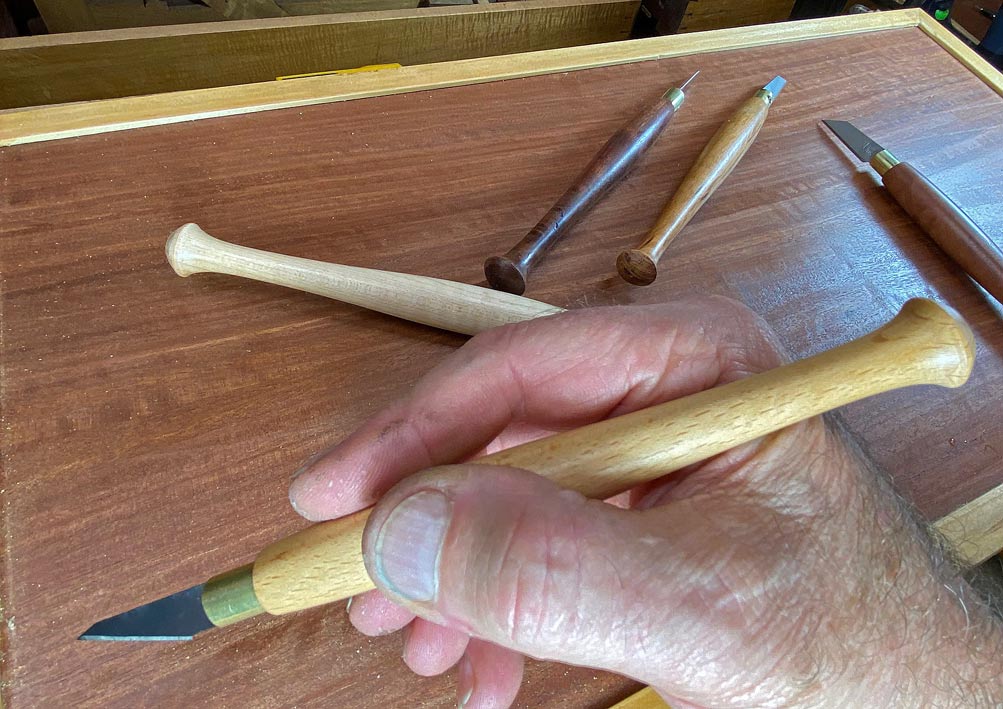


After seeing these photos, I thinned down the bodies of the knives (they were too bulky) and reshaped the ends (to match the dovetail knife).

The construction part of design involves the brass "cassette" (as I will call it) to hold the blade. It must be stated again, since you raised this issue, that the aim was to have a knife with replaceable blades. Blades not inly do get chewed up, but (as discussed) change the ergonomics, and so is desirable. I would have preferred to go down the Matt Eslea path with the cassette, that is, to have machined a slim tenon to insert into a thinnish round mortise in the handle. I do not have a metal lathe, and needed to keep the cassette coplanar. Fortunately, the curved handle shape leaves a lot of meat around the 10mm round mortise, and the result is a very strong construction, most unlikely to break with heavy downforce. The downside of this is that there remains a slight "lip" at the junction of the body and cassette.

The SM blades: I have used these over the course of about 10 years. It is good steel and holds an edge a good while. The blades are easy to sharpen. There are two methods, used for different purposes.

Most marking takes place at the tip of the blade, and this needs to be sharpened. Simply run the flat back of the blade on a 600 or 1200 grip diamond stone, or similar. Two or three strokes and you are done. This may be all that is needed. If the bevel is to be sharpened, then do so as you would freehand sharpen any knife - draw the edge over the stone at a low angle. You can remove the blade to do so, if needed.

Some will point to the blade being double bevelled and question how accurately this can work against a straight edge ir shoulder. The answer is to simply cant the blade to one side to get a vertical. I cannot for the life of me recall the name of the UK-based woodworker/writer who championed this, but he argued that the proper was to use a single bevel knife was with it canted (so he would use a leftie in his right hand). Among others, I poo-pooed this back then. Now I see that there as sense in this, and I do so without any negatives. There seems to be less likelihood of the bevel digging into the reference side (hence my earlier comment about cutting tape away from an edge).

The SM blades are fairly stiff. They do not bend easily - unlike the blade in my detail/dovetail knife, which makes use of this ability along with the single bevel to follow the sidewall if a slim dovetail socket. But then, you do not want to bear down heavily with the detail knife. You can do do with this SM-bladed marking knife.


Regards from Perth

Derek
 
Last edited:
I have a 2” wide wood chisel that I keep as sharp as possible. I use it to trim edge-banding (both width and length), and for some marking situations. If you are trying to mark some stock and the position is awkward, then consider a sharp chisel.

The 2” width makes trimming edge banding (width—after anpplication of the banding) easy once you get the knack of it. Trimming the length is easy right from the get-go.

Tapping the end of the handle with the palm of my hand is all that is required for a good, readable mark.
 
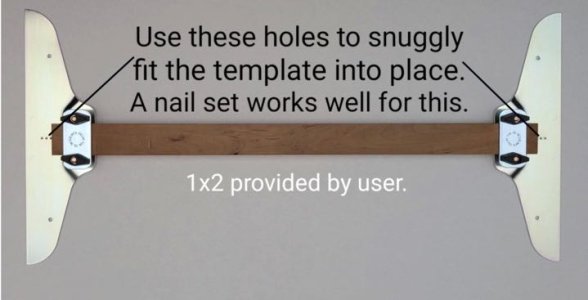
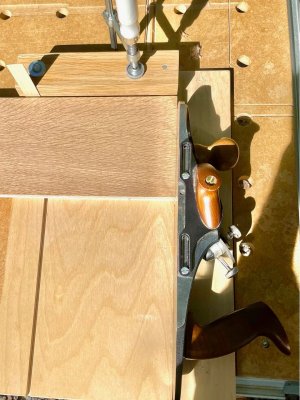
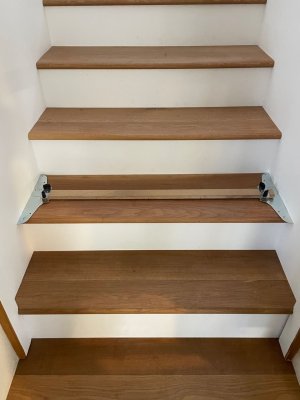
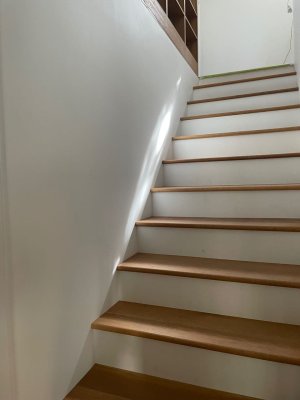
I'd almost forgotten the most knife intensive job of the year. This was a less than ideal stair tread install, in a perfect world, there would be a timber skirt that the treads would butt too. The previous owners of the house furred out the walls and cut sheetrock around each step, hiding the stringers. It was cost prohibitive to go deep enough to install a timber skirt. So, that meant cutting a piece of solid wood nosing, and one piece of engineered oak flooring that made up each tread and butting them against sheetrock. Enter the Collins Stair Tread Template. One of the best tools ever invented, simple and accurate. Cross grain cuts on white oak can be frustrating, as it will tear-out if you just look at it wrong. The flow was to transfer the template to the treads, lightly clamp the template to the tread, trace the template with a marking knife, cut to within 1/32" using a track saw, finish each cut on the shooting board. It sounds complicated, it wasn't, it went fast, and turned out well. Cutting against the metal template left a few dings on my marking knife, nothing a few passes on a diamond plate didn't remove.
E.
 

Attachments

  • Collins Template.jpg
    Collins Template.jpg
    30.1 KB · Views: 5
  • Shooting the Tread.jpg
    Shooting the Tread.jpg
    227.2 KB · Views: 7
  • Collins Stair Tread Template.jpg
    Collins Stair Tread Template.jpg
    93 KB · Views: 6
  • White Oak Stair Treads.jpg
    White Oak Stair Treads.jpg
    68.4 KB · Views: 8
The early exacto knives, did hold the blade nice and firm. Somewhere along the way, they got cheaper and the first thing to notice was the sloppy blade in the knife. I used to make mine from an old warding file. Just need to be careful not to overheat while grinding. They hold a nice edge. I use single bevel and double bevel. For the double bevel, I grind the end away of the old exacto blades from modelling.
I really like what you have done, especially with the very nice handles. Makes the tools more fun to use.
Interesting. I had to look-up "warding file", I'll bet that made a nice blade. I may start there with the next marking knife. Once you get used to the file pattern under your finger, there's no goin back.
E.
 
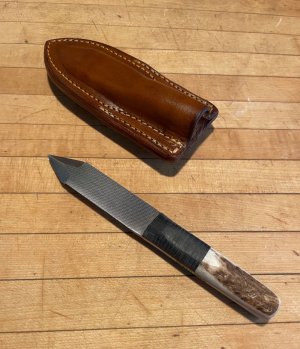
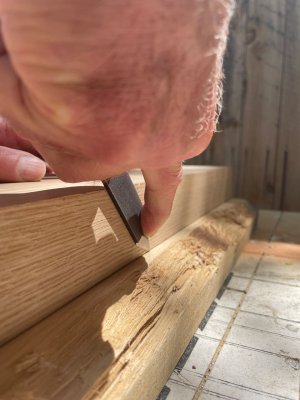
The first pass with a marking knife is super light, but not so light that the grain takes it. I wanted a blade long enough to trace 8/4 material without being tipped, and a wee shelf directly above the edge, so that on the second pass, I could really lean on it with my finger tip. Having a comfortable grip is nice if you're using it all day...

E.
 

Attachments

  • Length of Blade.jpg
    Length of Blade.jpg
    119.7 KB · Views: 3
  • Length of Blade 2.jpg
    Length of Blade 2.jpg
    197.8 KB · Views: 3
  • Choking up on the edge.jpg
    Choking up on the edge.jpg
    157.6 KB · Views: 4
E, marking across the grain is best with a thin-bevelled blade. Look at the way a knife gauge or wheel gauge is used to mark dovetail line versus the result from a pin gauge. The latter lkeaves terrible tearout. Thinner blades (with sharp edges) penetrate more easily, and a thick, Japanese knives, with thick blades, had better be really sharp, otherwise it will leave a wider line/depression. I love my kiridashi knives, but not for the finest cross-grain marking.

About marking knife design and, in particularly, the design I have posted ...

There are those who view a tool as an object to get a task done, are likely to grab the first one to hand that can do the job, and as long as it gets them there in the end, that is all that is important. Any sharp object within reach - chisel, sharpened piece of steel offcut, pocket knife ... The thought that some see tools as precious objects seems absurd.

There are those who pay a little more attention to the quality of the tool, purchasing something that was specifically made for the purpose, but without exploring the how form follows function. It is just a knife-looking object (form) which is wanted, and there follows a special attachment to shiny objects and shopmade tools. Pride in ownership comes into the picture. Membership develop of groups based on cost and availability. Do you belong?

Lastly there is the group who spends time wanting to understand how the tool functions and what makes it better. Both form and function are the focus. Form as quality and aesthetics, and function in regards to how well it does in the actual task. It is no longer about 'good enough'. They want the best outcome. This is the group who cause headaches for others with their focus on ergonomics, steel quality, line thickness, and so on.

Clearly the discussion I bring to the table is the latter area. Anyone who lives in the first group will consider this discussion obsessional. Here we come together with opinions, based on experience, hopefully in open discussion, and share our understanding with each other, hoping to learn something that will further our skills and/or enjoyment of woodworking.

This is a long way around to say that the design of these mrking knife handles, and the choice of the materials, especially the blades, as well as construction, was deliberate and intended for a specific purpose. These are not simply shiny objects. Of course, this is my view, and I really do welcome the views of others, both in critique and in creativity.

Let's take the purpose first. These knives are general purpose marking knives, as a replacement for the steel case if the Stanley craft knife. You could strike lines against a straight edge. You can do so with a fine and shallow line or a deep line intended for a chisel wall. You can mark dovetails with them - with the limitation that these are not London-style but wide enough to fit the blade thickness. You can trim masking tape off the edge of end grain (this will be explained later). You can sharpen pencils with this knife, even whittle the ends of dowels. They are not intended for heavy duty work, such as cleaving pegs.

The design. Firstly the ergonomics. The handle is shaped to follow the contours of a palm. My other marking knife design was specifically aimed at fine detail work and dovetails, especially the narrow entry for London dovetails when cutting tails-first. You hold that knife with an overhand grip, like a pencil. The curves of the body are not an accident. There are other similar knives on the market, such as Blue Spruce (which was developed around the same time as mine) and Veritas (which followed later and was intended to be cheap ... but still followed this design element). By contrast, if you look at the knife by Matt Eslea, you see a beautifully made tool, but one without the same direction fir ergonomics. Who is right?

My aim was to create a knife which was comfortable to hold, which would offer control this way. What I discovered after making it was that the SM03 blades (with the horizontal bevel), which I was using in the Stanley craftknife - as supplied, and as others, such as Paul Sellers, uses - these blades are best suited for an overhand grip. You can use an underhand, palm grip, and this is reasonably comfortable, but this set up encourages a different user style. The SM01 blade changes the user style oreference to an underhand/palm grip. I am now waiting on an order for SM01 blades.
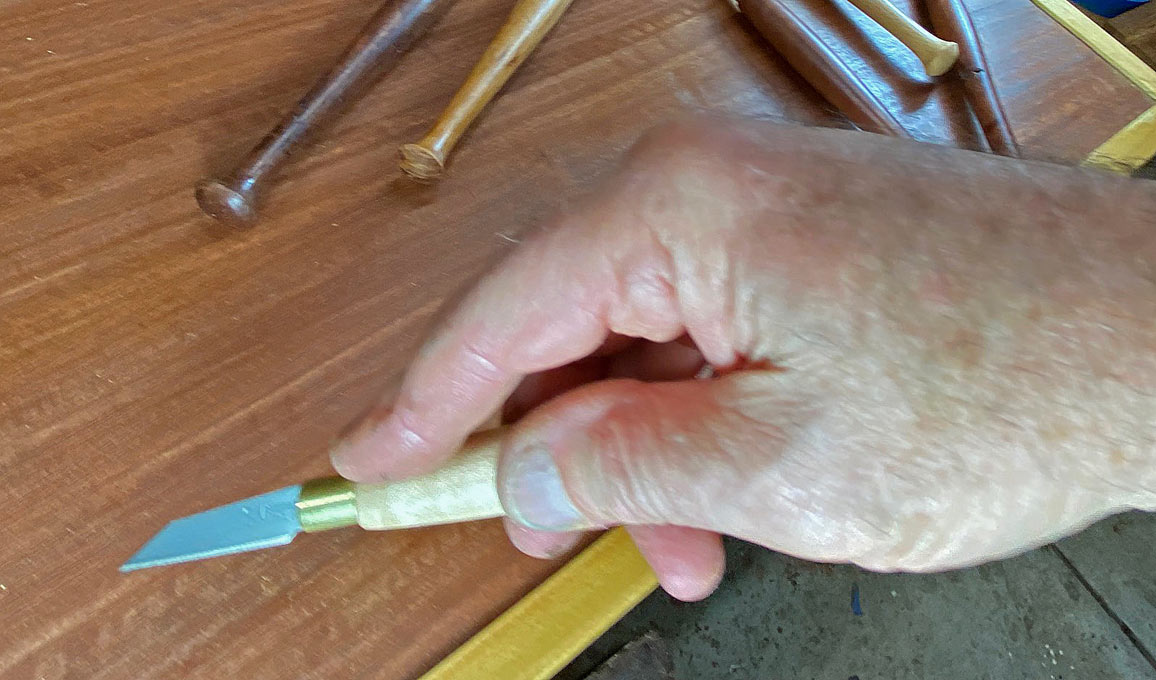


After seeing these photos, I thinned down the bodies of the knives (they were too bulky) and reshaped the ends (to match the dovetail knife).

The construction part of design involves the brass "cassette" (as I will call it) to hold the blade. It must be stated again, since you raised this issue, that the aim was to have a knife with replaceable blades. Blades not inly do get chewed up, but (as discussed) change the ergonomics, and so is desirable. I would have preferred to go down the Matt Eslea path with the cassette, that is, to have machined a slim tenon to insert into a thinnish round mortise in the handle. I do not have a metal lathe, and needed to keep the cassette coplanar. Fortunately, the curved handle shape leaves a lot of meat around the 10mm round mortise, and the result is a very strong construction, most unlikely to break with heavy downforce. The downside of this is that there remains a slight "lip" at the junction of the body and cassette.

The SM blades: I have used these over the course of about 10 years. It is good steel and holds an edge a good while. The blades are easy to sharpen. There are two methods, used for different purposes.

Most marking takes place at the tip of the blade, and this needs to be sharpened. Simply run the flat back of the blade on a 600 or 1200 grip diamond stone, or similar. Two or three strokes and you are done. This may be all that is needed. If the bevel is to be sharpened, then do so as you would freehand sharpen any knife - draw the edge over the stone at a low angle. You can remove the blade to do so, if needed.

Some will point to the blade being double bevelled and question how accurately this can work against a straight edge ir shoulder. The answer is to simply cant the blade to one side to get a vertical. I cannot for the life of me recall the name of the UK-based woodworker/writer who championed this, but he argued that the proper was to use a single bevel knife was with it canted (so he would use a leftie in his right hand). Among others, I poo-pooed this back then. Now I see that there as sense in this, and I do so without any negatives. There seems to be less likelihood of the bevel digging into the reference side (hence my earlier comment about cutting tape away from an edge).

The SM blades are fairly stiff. They do not bend easily - unlike the blade in my detail/dovetail knife, which makes use of this ability along with the single bevel to follow the sidewall if a slim dovetail socket. But then, you do not want to bear down heavily with the detail knife. You can do do with this SM-bladed marking knife.


Regards from Perth

Derek
Derek, thank you for the detailed reply, this is a great thread. I tried one of the Blue Spruce marking knives, it did nothing I wanted it to. The ergonomics of the grip was the only plus. The Matt Estlea knives are intriguing, with the exception of the grip, as you mentioned. The blade offerings are great, but there is no spearpoint blade. I have a Rob Cosman marking knife that I really like, it has interchangeable blades as well. A toothed blade is available in the same thickness as his dovetail saw. I am going search out one spearpoint knife, one knife with interchangeable blades, and call it good.
E.
 
E, try one of the SM01 (tapered) blades in your knife. The difference it makes from the SM03 (straight) blade is dramatic and a huge improvement when using a pencil grip ir to mark dovetails.

SM01 on the left ...


Regards from Perth

Derek
 
The first pass with a marking knife is super light, but not so light that the grain takes it. I wanted a blade long enough to trace 8/4 material without being tipped, and a wee shelf directly above the edge, so that on the second pass, I could really lean on it with my finger tip. Having a comfortable grip is nice if you're using it all day...

E.

I have a kiridashi knife like yours, and find it helpful for exactly what you are doing. However, it was also awkward to pull back as there was little blade to grip when it was flush with the side of a board. What is easier is to ride the bevel against the board and angle the blade/knife outwards.

Regards from Perth

Derek
 
Back
Top