Woodwork Wizard
Member
- Joined
- Oct 25, 2013
- Messages
- 431
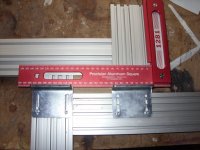
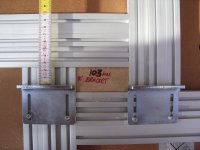
Sparktrician said:It occurs to me that now that you have the blocks made for various hinges, you might also add to those blocks another piece from the bottom to help align the two flange pieces to the underside of the MFS to help align the MFS to the door being routed. Just a thought...
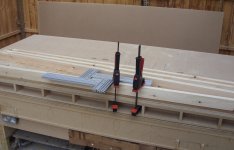
Woodwork Wizard said:How do you mount this to the edge of a door? Just curious