MFT 3 folding up

Beacon1705

Member
Joined
Apr 27, 2017
Messages
14
Hello FOG,

New to the forum, festool and relatively new to woodworking.

I am just in the process of setting up a new workshop in my new garage, however my wife insists that a garage is for cars (happy wife happy life), so the garage is where the car will live.

With that said I am looking at the MFT 3 as a workbench I can fold away. Due to my location I cannot go and visit a showroom to play with one. Can someone tell me if you need to remove the cross braces (if installed) and the guide rail attachments etc when folding the table back up.

Do you guys recommend the cross braces? It will be used a lot for cutting down full sheets of ply.

Cheers
 
The cross braces detach on one end then fold along the legs for storage.  So no need to completely remove them from the assembly.

Depending on how you store it, the rail may or may not need to be removed.  I've seen some people leave them on, most people take the rail off.

Hope this helps.

Ken
 
IMO, if you are going to be cutting up full sheet of plywood, then you probably need two.  If you have enough systainers, you can get a stack the same height as the MFT (or use some folding roller stands or the like). 
 
If you could mount it to a wall with some type of hinges to fold it out of the way you wouldn't need the cross braces.
 
For initial breaking down of ply sheets, I find it more useful to do the long rips and initial cross cuts on some folding saw horses I have topped with sacrificial scrap. I then use the MFT for final dimensioning. It's fine to keep the rail brackets and rail on MFT when folded up as long as you have enough room to maneuver around it and there's not much risk of knocking it arpund. It is a good idea however to recheck for square any time you set it up again.
 
Breaking down sheet goods if I don't use the tablesaw I'll use a pair
of folding horses with a sheet of 2" foam to support the plywood.

To get a second MFT just to support a full sheet of ply seems excessive
plus you have to store the second MFT. The horses and whatever your
cutting grid or sheet foam will cost way less freeing cash for other more
useful tools.

I have seen many YT videos and web pages of various designs of folding
horses and cutting grids. If you expect to be breaking down sheet goods
regularly it might pay to investigate one of those options.

My MFT is setup for stationary use, but yes I would suggest getting the
braces as they do contribute to stability of the MFT. I was curious too so
when I first set up my MFT I left the braces off for a couple days use so
I could better judge how much they helped and I did notice a difference,
enough that I am glad I made the investment in them. They can be folded
up with the MFT and do not have to be removed completely for storage or
transport.
 
I store my MFT-3 in the garage, in a folded position, vertically, in a narrow area between a wall and a cabinet. I can make a picture for you some time around this coming Thursday. I am working on a little project, so my MFT-3 is unfolded and in use, but I hope to get it back into its storage space by Thursday.

I do not use leg braces. The table is sufficiently stable without them. That small amount of wobble that it is there is not a concern.

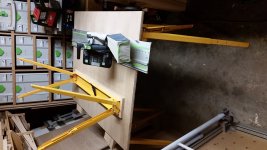
I always remove all attachments before putting table back to storage. They take too much space (protrude over the boundaries of the table) and are easy to damage.  I put them back into the box in which they arrive. The box goes into space between legs, it all fits nicely.

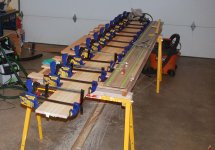
It is impossible to cut full sheets of plywood on this table. As it was correctly written by one of the FOG members in his answer, you either need two of these tables or a home-made assembly table. Without attachments, you can cut a sheet of about half of the standard plywood sheet - i.e., if the store where you bought it cuts it for you with their panel saw to two pieces 4 ft by 4ft in size, you can cut these pieces as you need on top of MFT-3, provided none of the attachments is installed. With attachments (fence and rail) in place, the maximum workable width of a piece which you can cut decreases to roughly 2 ft wide, if not less. It is a nice work table, but only for small pieces. It is too small even for building kitchen cabinets, if you ever thought about it.

Festool, apparently, bases its design not on criteria of usability in a shop, but on ease of transport. The idea is that a professional can put it in his van and then grab with one hand and carry to the job site. It makes it perfect to store in a small space in the garage, too, but the downside is that it is too small for about half of the tasks that you can think of.

Another downside is that the parts which you called "attachments" are designed for working with plywood with thickness of 12 mm or more. 12 mm is the thickness of what I call "fence", the aluminum rail that runs along the back of the table, which forms 90 degree angle with the guide rail. The consequence is that if your material is thinner (for instance, 15/32" plywood which we call "half inch" and which in reality is around 11 mm thick) is not held in place firmly by the rail and can slide during routing or cutting. There are simple workarounds for it (like putting a layer of thin sacrificial plywood underneath your work piece), but it is still an inconvenience. This will not be an issue if you are in Europe and all you have is 12 mm, but here in the US it can be an issue. 

Don't hesitate to ask if you want me to post a couple of pictures - it is a convenient opportunity to make them. 
 
When I'm breaking down sheet goods I use the large Centipede support system with a sheet of 2" rigid foam as sacrificial base. I recently picked up the non-skip accessory caps to help the material from moving on the supports. After I get my rips then I move to the MFT for cross cuts using my Kapex extensions to support my drops if needed. Using both left and right extensions I can set the required width of my rip. Narrow rips only require on extension.
 
FYI.

The centipede, as someone mentioned, is also a good solution. I'm partial to my folding saw horses since they store on the wall between the studs and don't require me to keep an extra sheet of foam or ply around as a cutting board.  When the sacrificial piece gets cut up, I just replace it with a fresh one.
 

Attachments

  • 20170508_195755.jpg
    20170508_195755.jpg
    1.5 MB · Views: 750
How funny, you are using the same sawhorses that I have!

(http://www.homedepot.com/p/34-in-Adjustable-Folding-Sawhorse-SH3801/206261852)

When I was working on my remodeling project, I built an assembly table from 4 standard 2x4s and about half a sheet of plywood sliced into approximately 4" wide pieces glued on top of 2x4s.


Attachments

  • assembly table.jpg
    assembly table.jpg
    215 KB · Views: 640
Thank you very much FOG members,

I will be purchasing two as I noticed one would be small for full sheets. The plan is to stand them vertically in a cupboard similar to you AIPDX, so a photo would be fantastic.

There is no shop where I am that have the ability to cut the sheets down, so I would have to transport them somewhere else just to get them cut in half, which is a royal pain.

Thats good to know about 12mm minimum thickness, as where I am we have both metric and imperial, so will have to make sure I stick with the metric.

Getting two would not be just for cutting the full sheets but to give me the flexibility of have two stand alone tables when I need them, or connecting them up as an outfield table to my contractor saw, or jointer (when it arrives) which I will put on a rolling cart raising it up to the 900mm height.

Been trying to get into woodworking for years, but family and time have been an issue so looking forward to getting my teeth stuck in.
 
Beacon1705 said:
...
Getting two would not be just for cutting the full sheets but to give me the flexibility of have two stand alone tables when I need them, or connecting them up as an outfield table to my contractor saw, or jointer (when it arrives) which I will put on a rolling cart raising it up to the 900mm height.
...

1)  If you will be removing and reinstalling the guide rail brackets often, then you may wish to change the position of the stops to engage the opposite side of the brackets as it comes from the factory. Easy to do, just install brackets up to the stops at their factory settings, tighten in place, then remove the stops and reinstall them on the other side of the brackets. This way, when you slide the brackets on and off, it is much easier as you don't have to slide them as far.

2)  It's nice to leave your rail(s) mounted to the rear hinged guide rail bracket, and just install/remove these as a unit. The typical setup is to use the 1080 rail that came with the MFT to spans across the width of the MFT. Yet, you can also use the 1400 rail (that comes with the TS55 saw) to span the length of the MFT. And with a second MFT, you can also use a 1900 rail (that comes with the TS75) to span the two MFTs joined along their long edges -- this setup has been my favorite.
 
Edward A Reno III said:
For initial breaking down of ply sheets, I find it more useful to do the long rips and initial cross cuts on some folding saw horses I have topped with sacrificial scrap.
...

I use a folding table like the venerable ladies at church sell cookies on.
The top is now sacrificial, and the table was ~10$.

Cross cuts in the MFT do fine if the panels are small enough. But the MFT is better for sticks of wood than for panels, although they are good for sanding and glueing/clamping if the parts are small enough to fit.
 
I didn't buy an MF3 because i consider it to be too expensive for what you get.

To be 100% light weigt, portable and multi-functional I bought a ROCKWELL JAWHORSE and i'll be making a top similar to the one that MFT comes with using extrusions. With over a ton of clamping pressure and 3 feet, that setup will be more stable, cheaper, and i can use the jawhorse in other ways. Removing the top would just take a second.
 
I just throw a sheet of 2" Styrofoam down on the floor to act as a backer and rip plywood sheets down with a track saw. No need for anything fancier than that IMO.
 
on the subject of insulating foam sheets:
we found cutting a standard 4x8 ft sheet of foam into quarters makes this much easier to handle and store them. Use it on the floor or a other work surface with some additional support - not necessarily a solid sheet of material.

Hans
 
TSO Products said:
on the subject of insulating foam sheets:
we found cutting a standard 4x8 ft sheet of foam into quarters makes this much easier to handle and store them. Use it on the floor or a other work surface with some additional support - not necessarily a solid sheet of material.

Hans
Yep, I have done that too. Cutting them up can be kinda messy without a hot wire foam cutter though.
 
Festool has a foam cutting knife blade (Festool 493656 S155/W Foam-Cutting Jigsaw Blades, 6 Inch, 3-Pack $19.00) for the Carvex (or any jigsaw that accepts the bayonet style blades) and they work great with minimal mess.
 
rst said:
Festool has a foam cutting knife blade (Festool 493656 S155/W Foam-Cutting Jigsaw Blades, 6 Inch, 3-Pack $19.00) for the Carvex (or any jigsaw that accepts the bayonet style blades) and they work great with minimal mess.
Ha! I did not know that. Just ordered a pack to use with my Trion. Thanks!
 
A word of caution regarding the foam blades:  they are LONG.  And scary sharp.  Maybe I am the only one who normally uses blades that will barely cut 1 1/2" material and has become jaded and accustomed to only worrying about what is underneath the workpiece to that need - the Festool long blades require common sense and pre-planning on supports.

Like I said - maybe I am the only one on the planet who has had an oops with a longer than usual blade but I thought I would mention this for those who will try the blades for the first time.

Peter
 
Back
Top