Hi Folks,
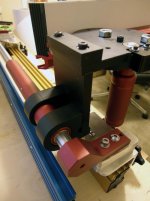
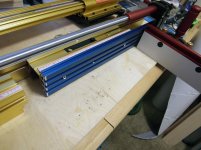
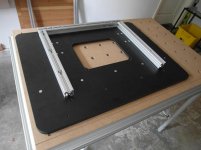
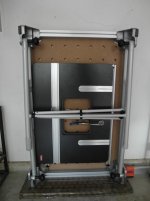
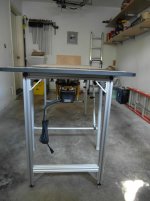
This being my first post after several months of perusing several sites related to woodworking and the MFT/3 table in particular as it applies to my very small garage work space. I wanted to thank all for the ideas I used and expanded upon. I was looking at the CMS addition as well the standalone version, after reading both the pros and cons on the unit as well as the costs related including the purchase of a Festool router. In this forum was a post "More fun with 8020" that inspired me with a attached router table that could easily be stored. I used the Woodpeckers phenolic router table as the top for my table, a Incra router lift, a PC 7518 router motor and 8020 legs
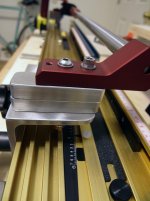
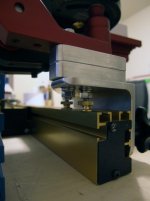
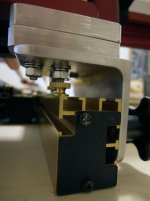
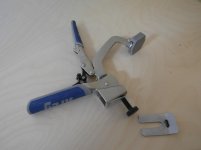
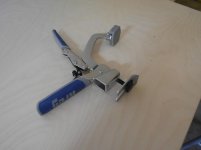
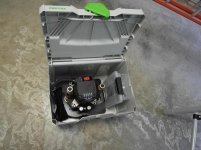
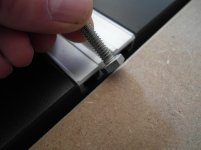
set. The attach pics show my progress in making this work as well as using the MFT/3 for storage. I am using parts and pieces of a Incra Wonder Fence system as well as a Jessem Mite R slide on the router side and will be using the Incra positioner along with a Festool TS75. After reading a post by Phil in San Diego on using the Kreg Automaxx clamps with a McMaster Carr knobs, I purchased a set but found the knobs to leave slight imprint in the MFT/3 table top underside. I corrected for that by making a aluminum clip to spread the load with a magnet to retain it to the knob, it works well and is fast and easy to deploy. The router and lift stores easily in a systainer along with a accessory box for wrenches and what not's for the router table. I hope you enjoy the results.
Cheers,
Vanko[attachimg=1][attachimg=2][attachimg=3][attachimg=4][attachimg=5][attachimg=6][attachimg=7][attachimg=8][attachimg=9][attachimg=10][attachimg=11][attachimg=12][attachimg=13]
This being my first post after several months of perusing several sites related to woodworking and the MFT/3 table in particular as it applies to my very small garage work space. I wanted to thank all for the ideas I used and expanded upon. I was looking at the CMS addition as well the standalone version, after reading both the pros and cons on the unit as well as the costs related including the purchase of a Festool router. In this forum was a post "More fun with 8020" that inspired me with a attached router table that could easily be stored. I used the Woodpeckers phenolic router table as the top for my table, a Incra router lift, a PC 7518 router motor and 8020 legs
set. The attach pics show my progress in making this work as well as using the MFT/3 for storage. I am using parts and pieces of a Incra Wonder Fence system as well as a Jessem Mite R slide on the router side and will be using the Incra positioner along with a Festool TS75. After reading a post by Phil in San Diego on using the Kreg Automaxx clamps with a McMaster Carr knobs, I purchased a set but found the knobs to leave slight imprint in the MFT/3 table top underside. I corrected for that by making a aluminum clip to spread the load with a magnet to retain it to the knob, it works well and is fast and easy to deploy. The router and lift stores easily in a systainer along with a accessory box for wrenches and what not's for the router table. I hope you enjoy the results.
Cheers,
Vanko[attachimg=1][attachimg=2][attachimg=3][attachimg=4][attachimg=5][attachimg=6][attachimg=7][attachimg=8][attachimg=9][attachimg=10][attachimg=11][attachimg=12][attachimg=13]
Attachments
-
 Router Table No 1.JPG84.8 KB · Views: 10,466
 -
 Router Table No 18 .JPG48.9 KB · Views: 6,611
 -
 Router Table No 17.JPG45.8 KB · Views: 6,581
 -
 Router Table No 23.JPG69.5 KB · Views: 6,683
 -
 Router Table No 22.JPG100.7 KB · Views: 6,482
 -
 Router Table No 21.jpg89.4 KB · Views: 6,736
 -
 Router Table No 11.JPG105.6 KB · Views: 6,694
 -
 Router Table No 10.JPG69.2 KB · Views: 6,579
 -
 Router Table No 9.JPG79.6 KB · Views: 7,468
 -
 Router Table No 5.JPG69.8 KB · Views: 27,493
 -
 Router Table No 4.JPG74.3 KB · Views: 7,122
 -
 Router Table No 3.JPG89.3 KB · Views: 6,667
 -
 Router Table No 2.JPG62.8 KB · Views: 6,891