mft with router table, incra ls, and precision plate

hayaku

Member
Joined
Jan 5, 2012
Messages
20
hi all,

long time lurker here, first time poster. nothing revolutionary here, and quite a few others have already done this setup many times, but i haven't seen many pictures of this setup since precision dog's released their precision plate for the incra ls positioner so i figure i would post pics of my setup for anyone who is researching how to add the incra ls to their mft. 

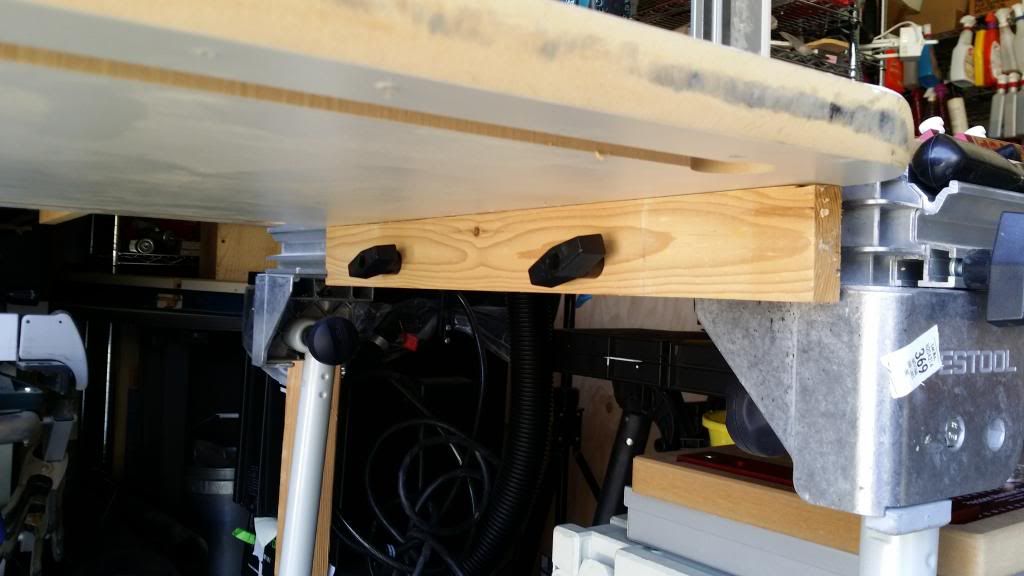
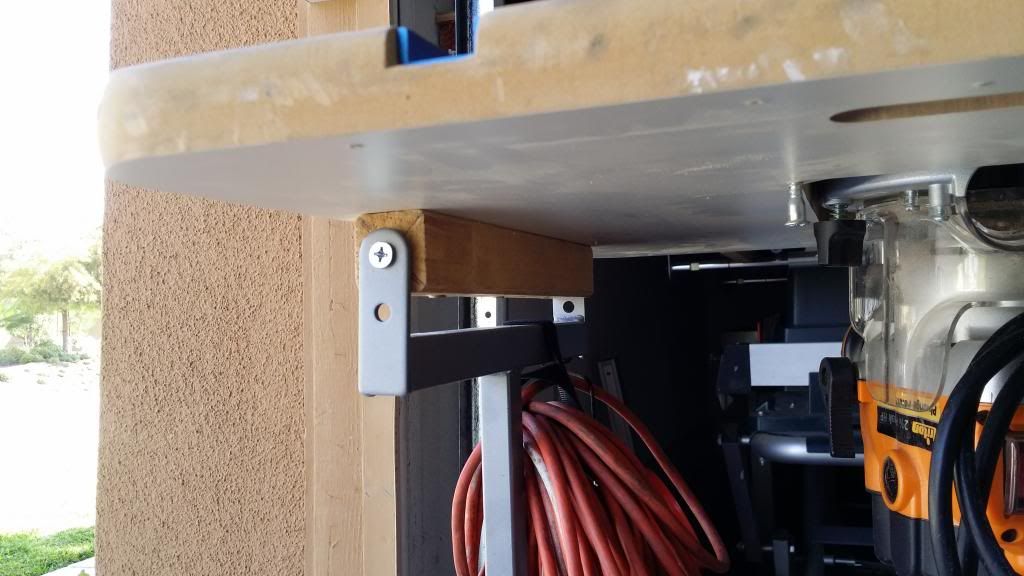
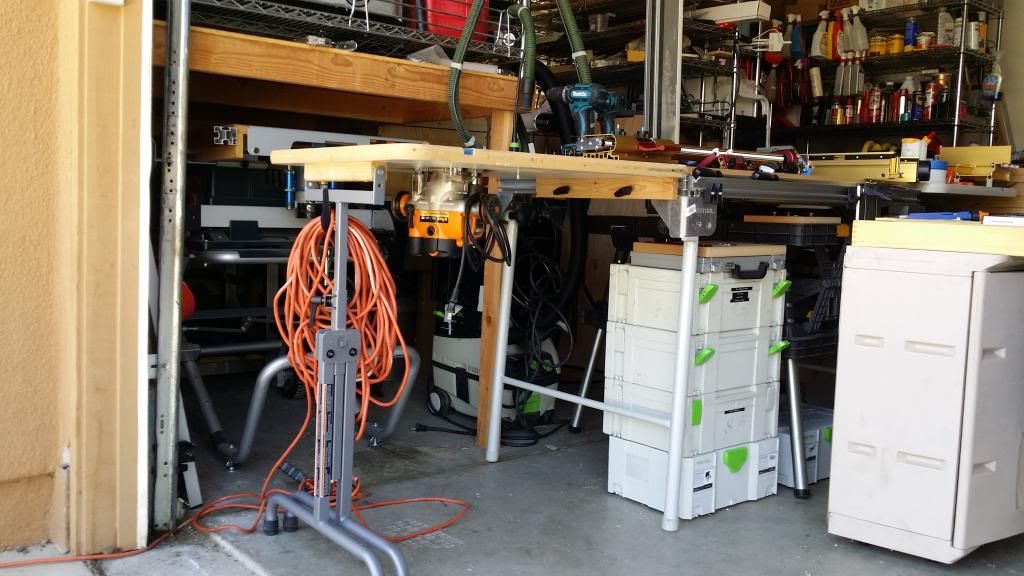
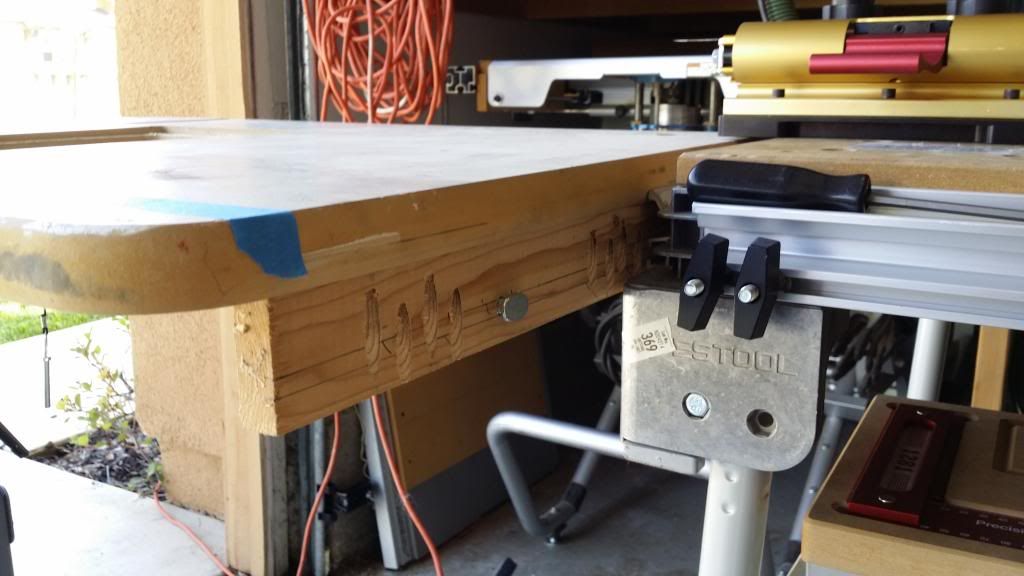
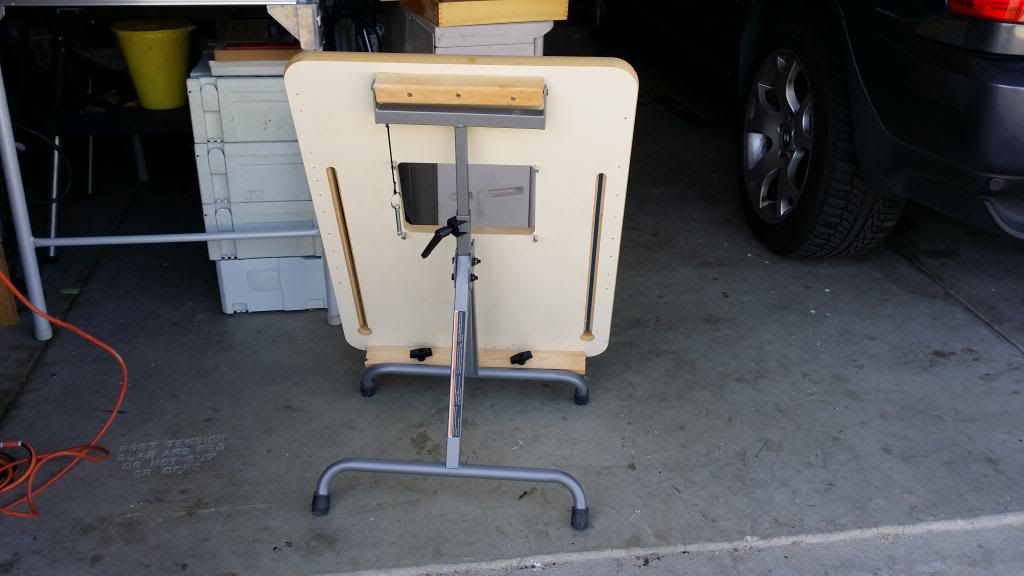
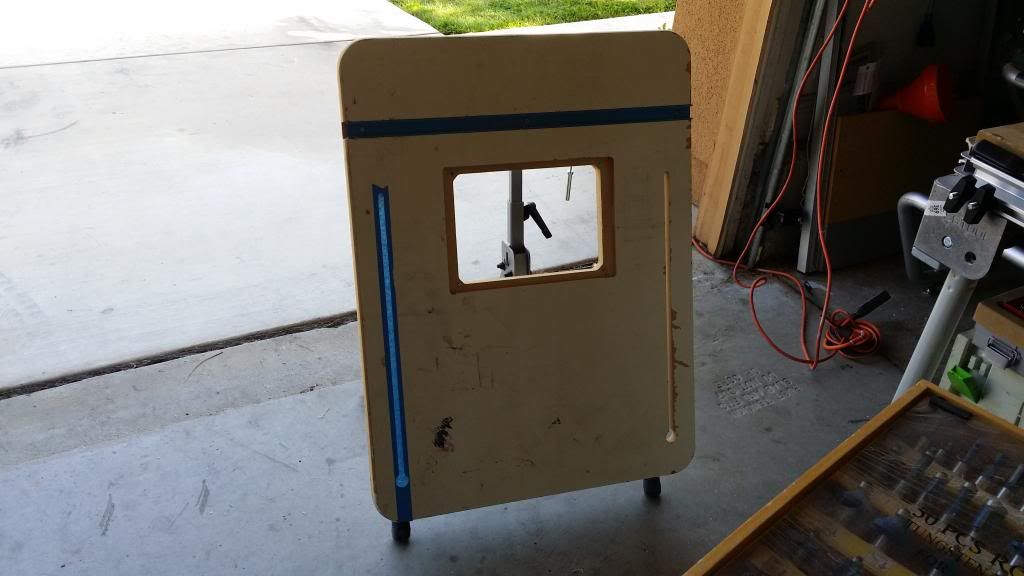
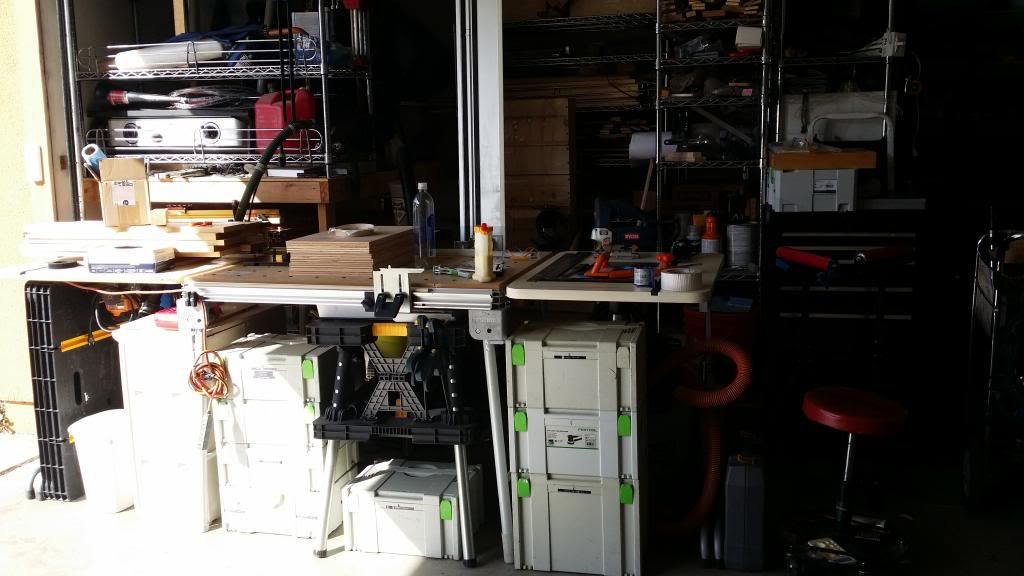
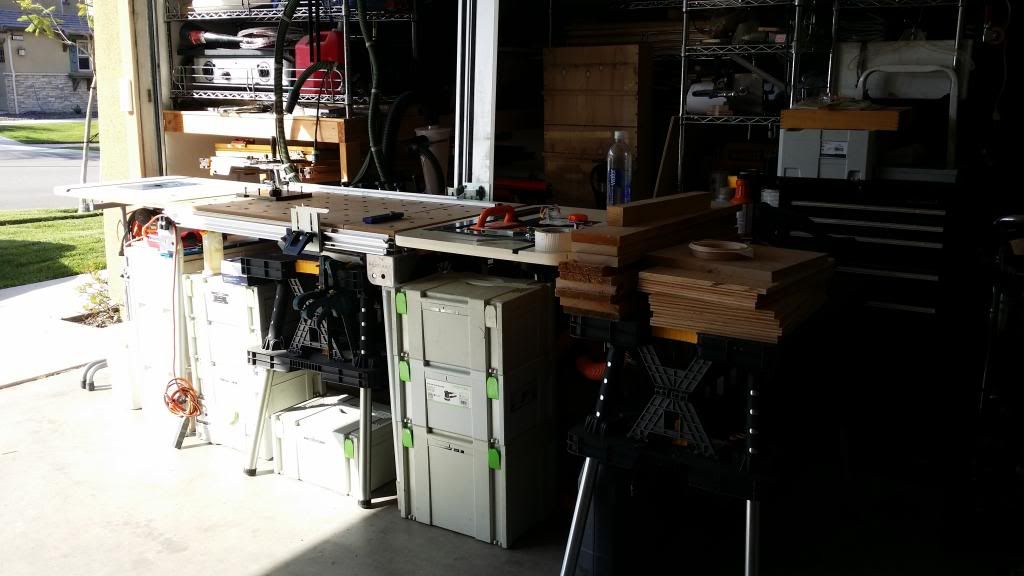
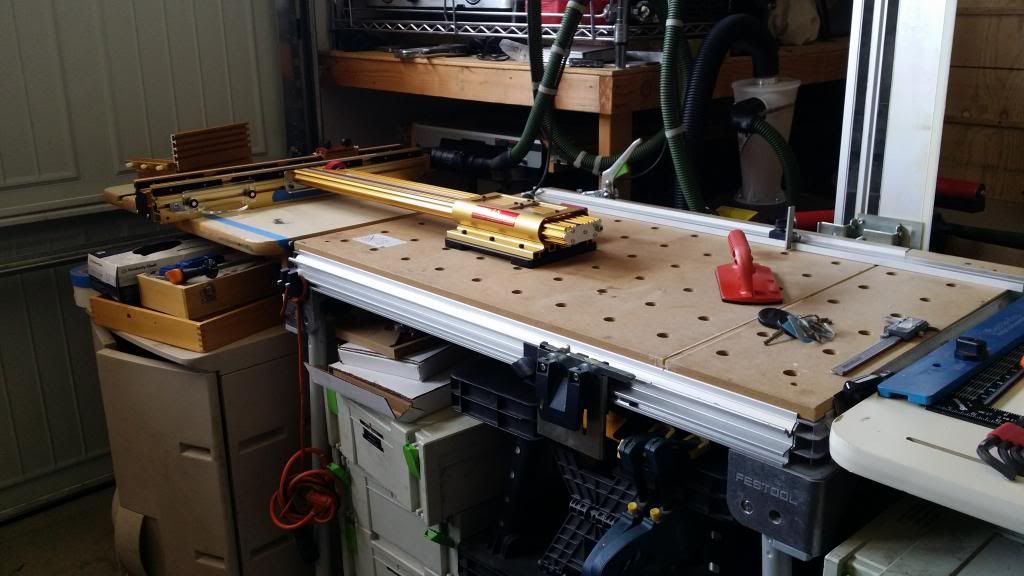
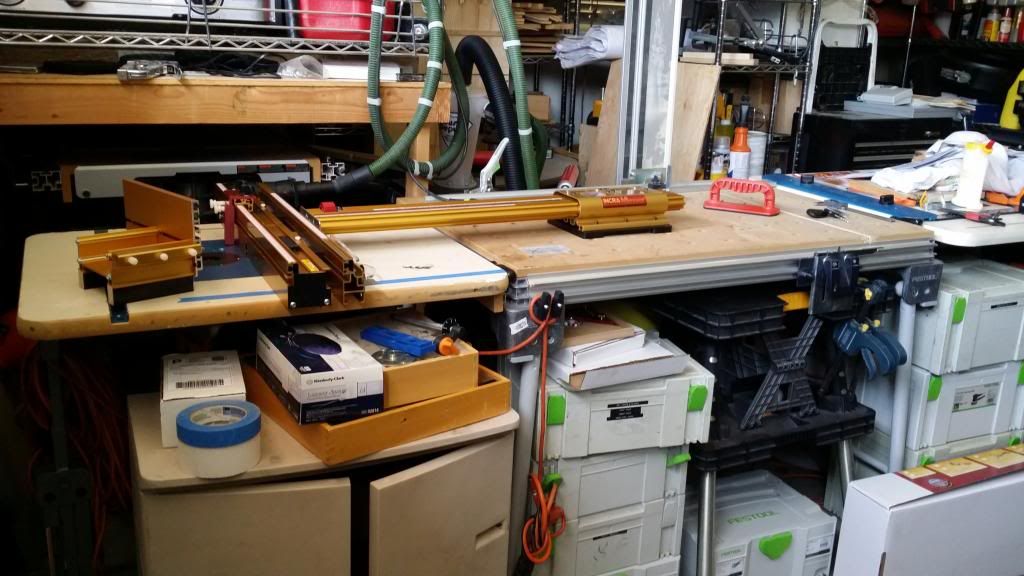
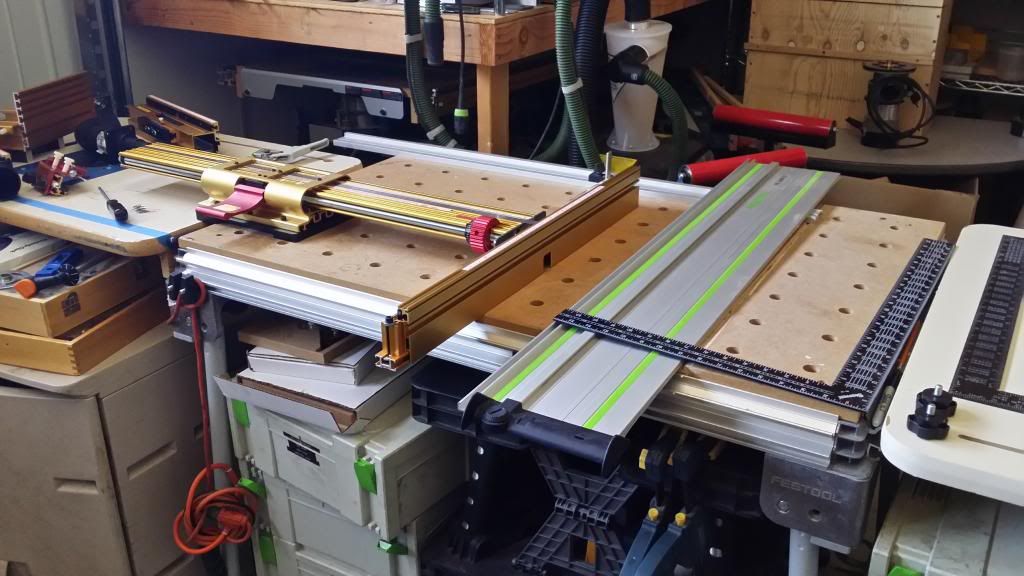
i just used simple t-bolts to add 2 rockler router tables to the mft (one on each side).  other side of the router table have the adjustable leg system from the rigid flip top stand to level out the router table to the mft top.  the v grooves are still exposed and i use them as pencil trays.  this keeps everything still mobile if i need to move it anywhere.

20140607_170814_zpsb6786e48.jpg

20140607_171613_zps36974a50.jpg

20140607_171620_zps6508523b.jpg


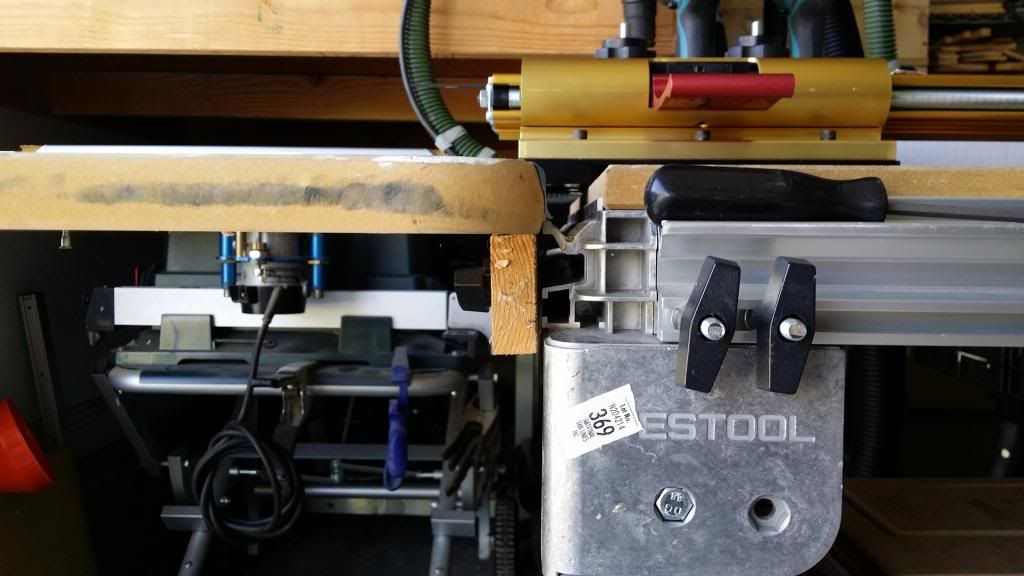
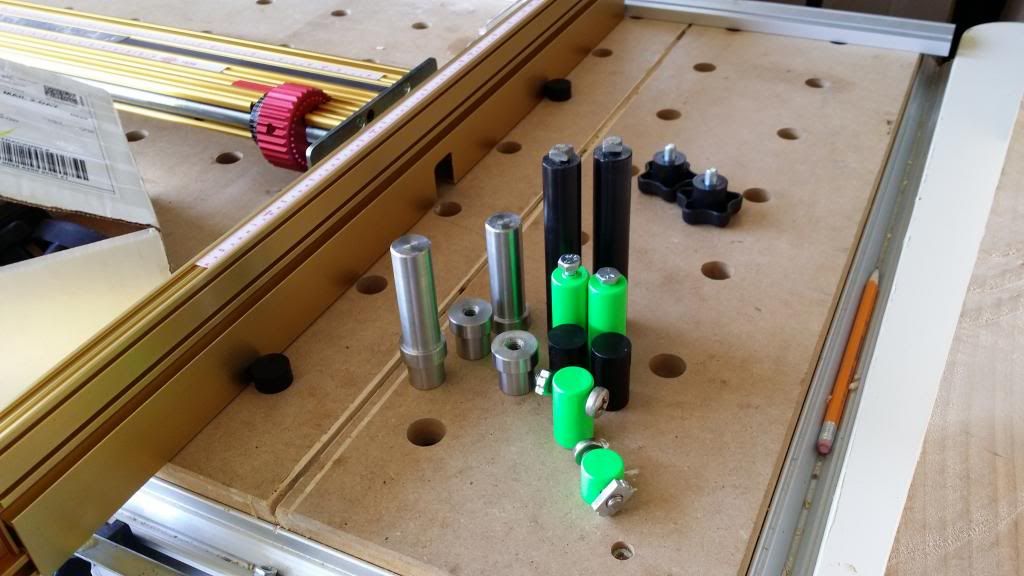
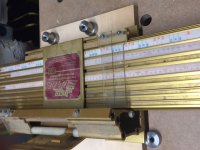
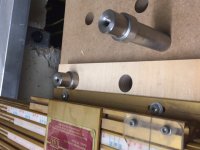
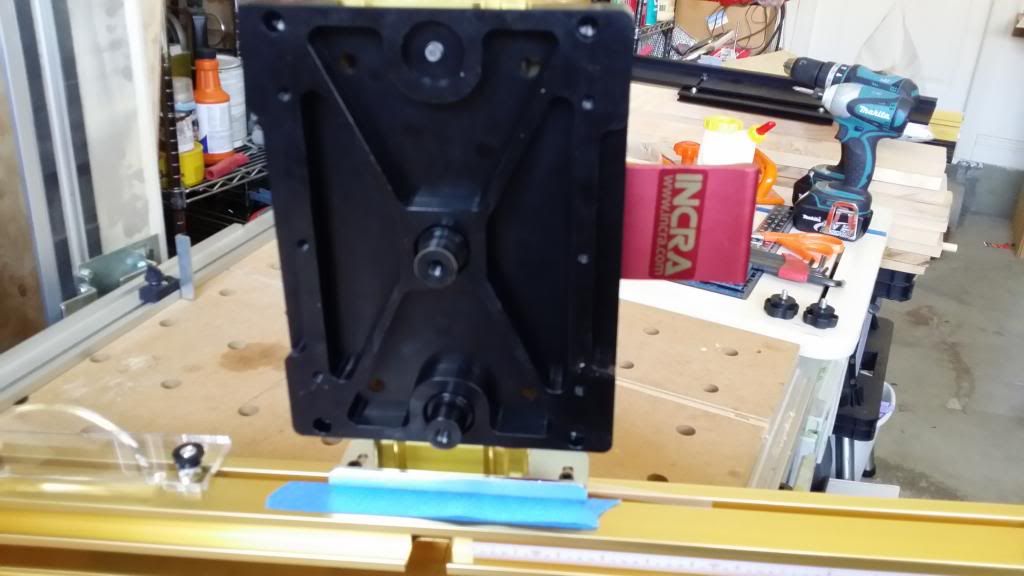
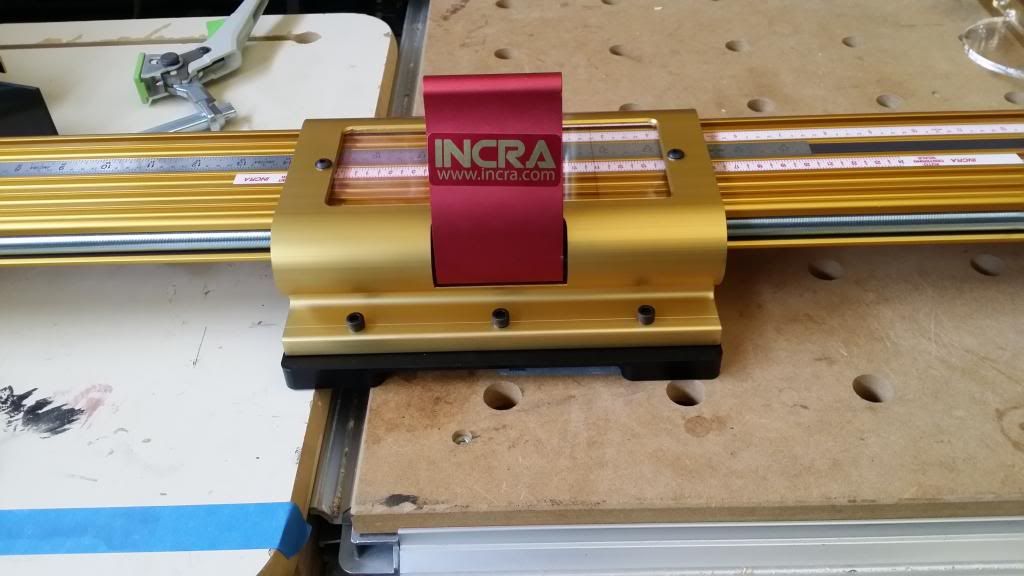
the incra ls positioner base is mounted to the precision plate.  i used 2 adjacent positions for the mounting dogs instead of the 2 far ones.  reason being is when i flip the ls position to face the cutting rail, i can place it as far to the edge of the table as i can to get the maximum rip distance.  then i can add a spacer block under the cutting rail to cut thin strips with incra's accruracy and repeatability with the thin strip under the cutting rail where it can't move at all.

20140610_155700_zps443d8183.jpg

20140610_155710_zpsa8146db0.jpg

20140610_155744_zpsf7515c8d.jpg


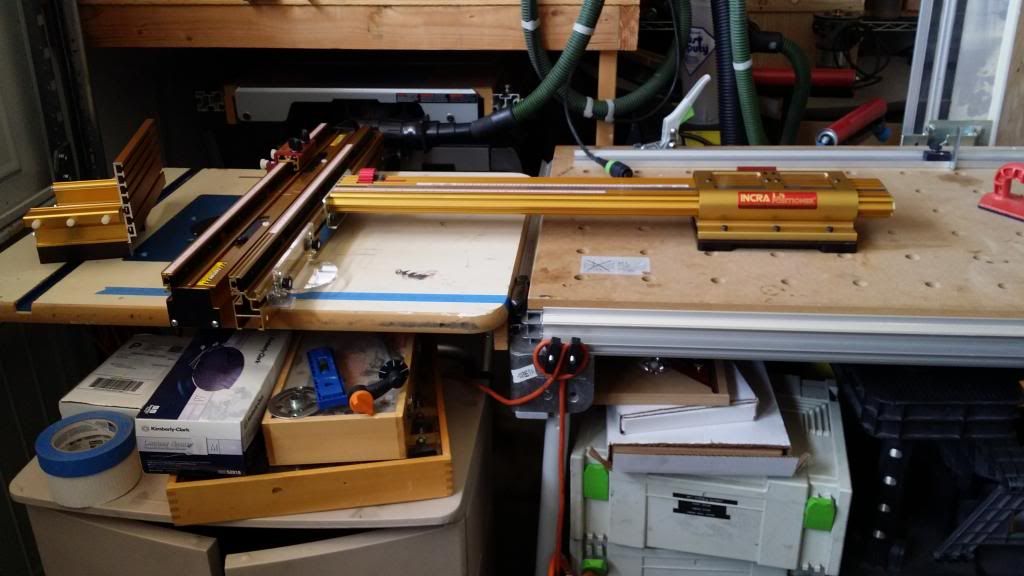
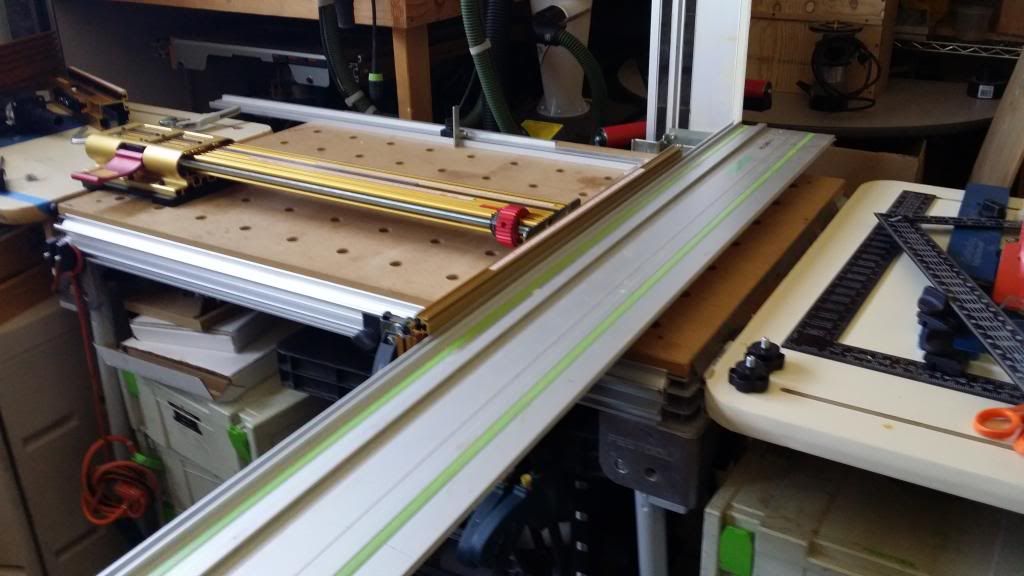
i just need to move the mounting dog under the rail to the other side to use it for the ts55.

20140611_112043_zps568dfca2.jpg

20140611_113307_zps96b5d473.jpg


quick measurements were:
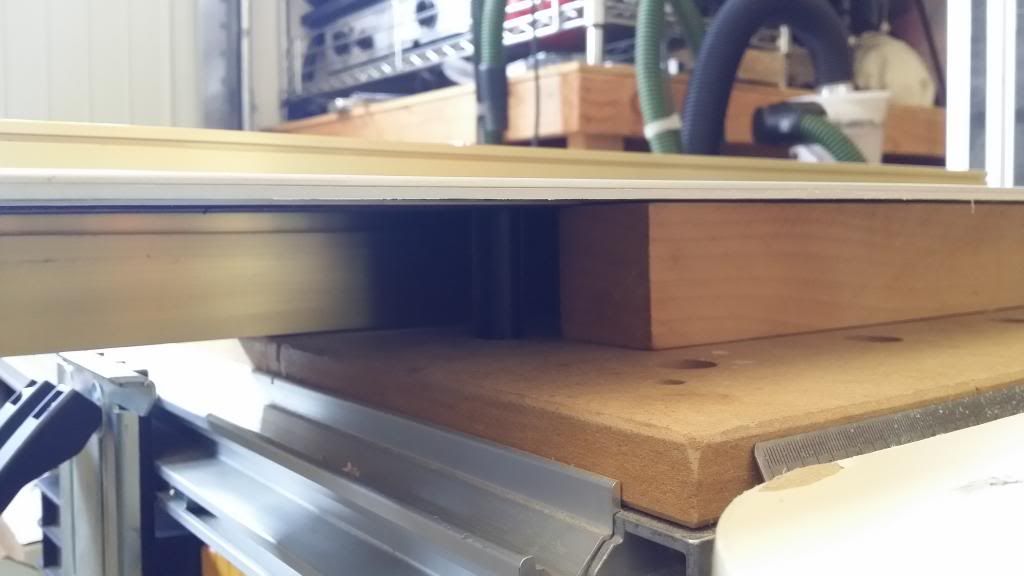
using the factory rail location, i get ~23 1/2" cutting capacity and the convenience of just flipping the rail up out of the way.

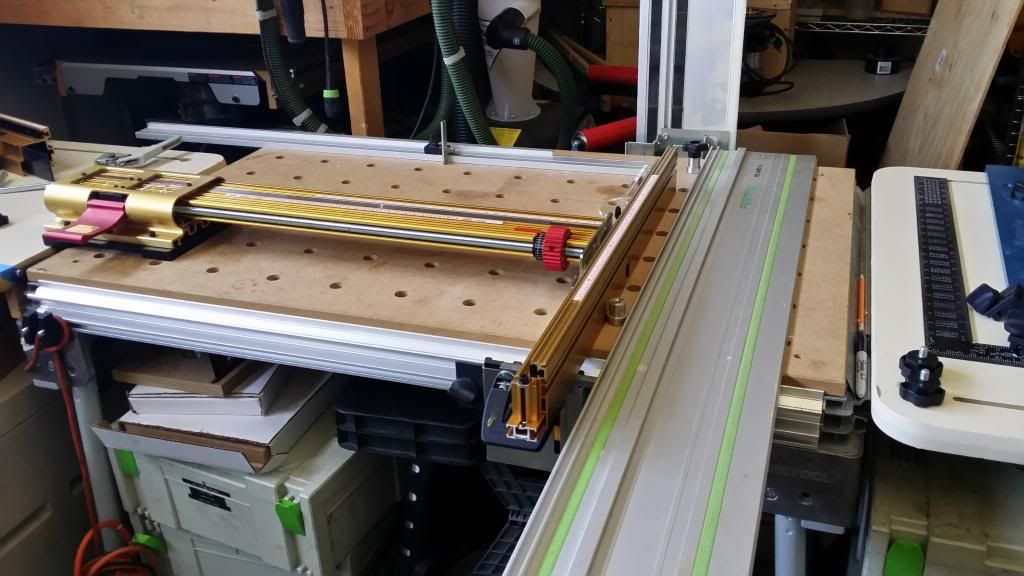
using my parf dogs to set the rail, i get ~28 13/16" cutting capacity but the dogs are in the way.

using my rail dogs to set the rail, i get ~29 13/16" cutting capacity. i could move the factory rail location to here to match since i have my other router table mounted level and useable as extra table for cutoffs.

all measurements were re-zeroed to include the width of the rail (7 1/4")

20140611_112359_zpsa7928faa.jpg

20140611_112616_zps18125f38.jpg

20140611_113101_zps90a1d9df.jpg

20140611_113124_zps1577ecb4.jpg


extremely happy with this setup!
 
It is good to see others that are happy with the precision plate. Jerry built a winner!

I really like the flexibility I have with a similar setup. Ideally I would like to have another CMS-VL on the other end with a TS insert so I could flip my work for cutting there as well, but alas...  I don't yet. I also thought about getting a decent TS to buy up against to do something similar, but I haven't yet
I like what you did with the track saw, I love that repeatability!

Thanks for sharing

Cheers. Bryan.
 
i just got all my components in and had to rearrange quite a bit of stuff in the shop so now i'm ready to get it all set up and dialed in for the projects i bought it for.  bryan was extremely helpful not only with the initial idea but he answered a number of questions for me before i went to buy.
 
i am actually doing much the same thing.  i've got my parts and am in thee middle of assembly( i have to keep disassembling everyday so i can take my mft to work in the morning) how exactly did you mount the router tables?  i was thinking of rabbeting so it would rest flush up against the mft top and attaching a "cleat" under the table to use F clamps to pull it tight to the table.  any ideas on how that's gonna work out?
can you explain to me what exactly is the track set up that you have?  it appears that you've slid it into the incra fence?  i see it's raised with a piece under it. what's that accomplishing? this isn't a criticism, i'm interested to see what genius is at work here since it's lost on me
 
roblg3 said:
i am actually doing much the same thing.  i've got my parts and am in thee middle of assembly( i have to keep disassembling everyday so i can take my mft to work in the morning) how exactly did you mount the router tables?  i was thinking of rabbeting so it would rest flush up against the mft top and attaching a "cleat" under the table to use F clamps to pull it tight to the table.  any ideas on how that's gonna work out?
can you explain to me what exactly is the track set up that you have?  it appears that you've slid it into the incra fence?  i see it's raised with a piece under it. what's that accomplishing? this isn't a criticism, i'm interested to see what genius is at work here since it's lost on me

the router tables have a cleat on it.  the cleat is attached to the router table by pocket holes.  in the cleat are 2 holes that the t-bolts fit through and slide into the t-track on the mft table.  i placed the holes so the router table sits level with the mft top.  just unscrew the t-bolt knobs to loosen and slide the entire table out.  the other side has the adjustable leg from the rigid flip top stand.  i attached it directly, but you don't have to and can use the flip top stand in it's original form if you wanted to...

the track is not connected to the fence in any way.  there are 3 setup pics of where the track can be: 1. in the factory location but with the least cutting capacity. 2. with qwas/parf dogs at the end but the fence cannot come closer to the rail because the dogs are in the way. and 3 using rail dogs under the rail (pic with the wood under the rail.. the black cylinders are the qwas rail dogs).

i think i am going to move the factory rail holder to the position where the rail dogs would place the rail.  that way no dogs are in the way of the wood.

i still need to make a spacer piece of wood to go under the rail so i can do thin strips.  i'll make it so it can attach to the fence and be able to have high accuracy and perfect repeatability with cuts under 7.25".

i'm out for a few days but will take better pics on monday for you so everything is clear...
 
With that adapter plates ,does it throw the alignment off when you attach the LS positioner to the fence .I was going to attach the dogs to the positioner and either drill 4 new 20mm holes or use 2 of the current holes and drill 2 new one .Do you see any problem that I might have doing it this way .The first picture show where I plan on putting the 4 new holes and the second show where I plan on drilling just 2 new holes.


hayaku said:
hi all,

long time lurker here, first time poster.

First,  [welcome] to the FOG!

I see quite a few systainers for a first-time poster? You've obviously been infected for some time.

I also spy some of the Keter work tables. How do you like them? I love mine!
 
ishmerc, if you wanted a mounting option that doesn't require any drilling that might risk misalignment, there is a mount made by "precision dogs" called the precision plate. cost is around $100. but i just got one and it seems very sturdy, fit's very snugly.  the only issue i have with it is it should have "gibs" already installed to accept the positioner base.  either that or be milled so it could just slide in.  it took me some time using calipers to get "perfect", which it isn't, alignment. so, really if you feel you have the capacity to drill, it would be a cost savings.
 
Thx for sharing the pics. Got me thinking again if, after just having bought the INCRA LS Standard system, I really should get a CMS at all based on the fact that you would not really use the CMS fence setup and if I ultimately decide for the CMS if the VL version would be better in connecting it to the MFT/3 than the stand alone GE version. Decisions, decisions..... I always like having multiple options but there is always the money aspect..... Anyone care to chime in....
 
[welcome]  As you can see, you're gonna get a ton of answers. Welcome!

But.... why are you in such a hurry? ("Hayaku") [big grin]

Irashai massei,

Frank
 
SittingElf said:
[welcome]  As you can see, you're gonna get a ton of answers. Welcome!

But.... why are you in such a hurry? ("Hayaku") [big grin]

Irashai massei,

Frank

lol... old nickname from my racing days when my coach was yelling over the radio to "hurry up" and then decided to say that in japanese.. so the name stuck after that...
 
wow said:
hayaku said:
hi all,

long time lurker here, first time poster.

First,  [welcome] to the FOG!

I see quite a few systainers for a first-time poster? You've obviously been infected for some time.

I also spy some of the Keter work tables. How do you like them? I love mine!

lol, yes i've been infected for quite some time and there's no cure. in fact, it just gets worst.  i pretty have everything i need to get my projects done, but the WANT is soooo bad...

those keter tables are awesome!  i mainly use them to drop a foam board down to use as a cutting table, but they get used for just about everything.  i love them too!
 
roblg3 said:
i am actually doing much the same thing.  i've got my parts and am in thee middle of assembly( i have to keep disassembling everyday so i can take my mft to work in the morning) how exactly did you mount the router tables?  i was thinking of rabbeting so it would rest flush up against the mft top and attaching a "cleat" under the table to use F clamps to pull it tight to the table.  any ideas on how that's gonna work out?
can you explain to me what exactly is the track set up that you have?  it appears that you've slid it into the incra fence?  i see it's raised with a piece under it. what's that accomplishing? this isn't a criticism, i'm interested to see what genius is at work here since it's lost on me

Rob,

here's some more pics of how my rockler router tables get attached.  super simple really...

20140613_091404_zps136c73d7.jpg

20140613_091409_zps26a4e874.jpg

20140613_091420_zpsa8725934.jpg

20140613_091429_zps243bcad9.jpg

20140613_091524_zpsc4507f03.jpg

20140613_091552_zpsda249599.jpg

20140613_091602_zps35f3f4fc.jpg

20140613_091610_zps00a3df24.jpg


tables fold up pretty flat for travel or storage when not needed.  i can always remove the legs by unscrewing the bracket and restore the plastic flip top and use them as originally designed too.

as for the rails, here's a pic of my qwas dogs and rail dogs (black) and qwas mini rail dogs and fence dogs (green) and parf dogs (silver ones).  there's tons of posts here on them and how to use them as well as videos on youtube that would explain it way better than i can in a post.  in that one pic with the wood, the rail is connected to the taller black rail dogs and dropped into the 2nd row of holes from the right on the table for alignment. i just butted the fence to it show that the fence remains square along the entire travel of the table because the precision plate base is extremely precise and well engineered.

20140613_094536_zps75f73fa7.jpg


hope that helps!
 
roblg3 said:
ishmerc, if you wanted a mounting option that doesn't require any drilling that might risk misalignment, there is a mount made by "precision dogs" called the precision plate. cost is around $100. but i just got one and it seems very sturdy, fit's very snugly.  the only issue i have with it is it should have "gibs" already installed to accept the positioner base.  either that or be milled so it could just slide in.  it took me some time using calipers to get "perfect", which it isn't, alignment. so, really if you feel you have the capacity to drill, it would be a cost savings.

It took me 5 minutes to get my plate all setup. Loosely put the 6 positioner bolts trough the positioner and finger tighten them. Put two dogs in the table and slide the fence against them and lock down the LS. When it is firm against the dogs, tighten the 6 bolts. Done.

I don't think gibs would really work as well as you expect. If you drop your LS plate and the corner crushes, then what do you do?

The plate is excellent. It makes this setup and others like it far easier to setup consistently.
 
It took me 5 minutes to get my plate all setup. Loosely put the 6 positioner bolts trough the positioner and finger tighten them. Put two dogs in the table and slide the fence against them and lock down the LS. When it is firm against the dogs, tighten the 6 bolts. Done.

[/quote]
Brilliant!! i'm a little slow up the uptake.  My mounting screws were quite long. i'll do your way and just cut them after i suppose?
Hayaku; thank you so much for the details!  i was thinking of using some 80/20 1515 profile because it "hangs" perfectly on the rail, but maybe that's not important?  it would mean more mods to the RT to make it happen though.  The FOG is fantastic for ideas!  T
Thanks you guys for the inspirations
 
Your stuff looks like a lot of stuff in MY house.....Still have the moving stickers on them! (Your MFT table picture) [big grin]
 
Here is my simple solution to the precision plate.  I made a base out of 3/4" plywood, drilled 2 20mm holes, and mounted the Incra.  I insert 2 long Veritas dogs through the holes to position the base.  I put an additional dog in front to guarantee square.  Simple, cheap and all parts can be used for other tasks.
 

Attachments

  • IMG_0859.JPG
    IMG_0859.JPG
    113.5 KB · Views: 772
  • IMG_0860.JPG
    IMG_0860.JPG
    96.2 KB · Views: 627
Great job, look nice.

I own CMS base and both TS 75 and OF 2200 modules.

I am planning something similar and made an adaptation plate with a piece of plywood, only one dog under the plate so I can fine tune the fence to be parallel to the saw blade then clamp down by  hod down clamp to secure the LS.

The MFT is only my wishlist as an extension to the CMS, question is, can I connect the CMS and MFT?  Is there any available connector in the market, preferably from Festool, if not,  where?
 
Back
Top