Modding the Workbench with MFT/3 Side Rail

onocoffee

Member
Joined
Sep 23, 2024
Messages
1,475
Location
Baltimore, Maryland, USA
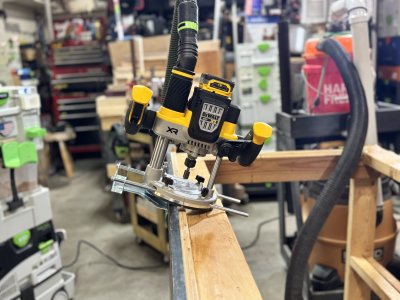
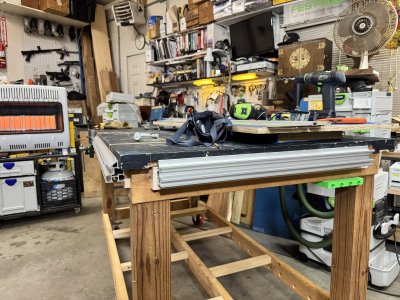
My workbench has a 1.5" thick top made of two sheets of 3/4" plywood sitting atop a 2x4 lumber frame. It has worked very well for my needs since 1998. I have modified it with 20mmx96 dogholes and some t-track. It's 3'x6' and sits 36" (920mm) from the floor. Along one of the 6' sides I added a dovetail grid 2x4" (that accepts both MicroJig and Festool dovetail clamps) in lieu of a vise. To this grid panel, I can also add accessories like the DashBoard Track Stars and a 3D printed rail support.

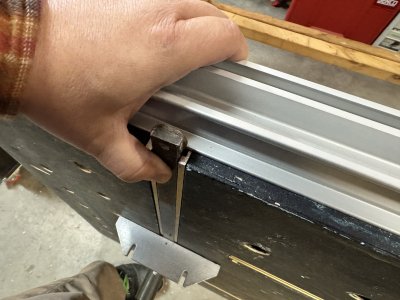
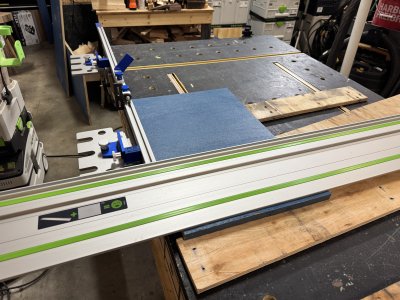
Recently, I purchased the MFT/3 side rail to mount to the opposing side of the workbench so that I can add the rail hinge and any other MFT/3 accessories. I stopped by my local dealer today to see the spacing of the rail to the top of the worksurface and it seems that the MFT top is 19mm MDF that is 7mm proud of the top edge of the side rail.

How critical to the use of the MFT/3 accessories is this 7mm? If it is critical then I'm thinking of (somehow) routing off the lower 3/4 ply layer to fit the rail.

Thoughts?

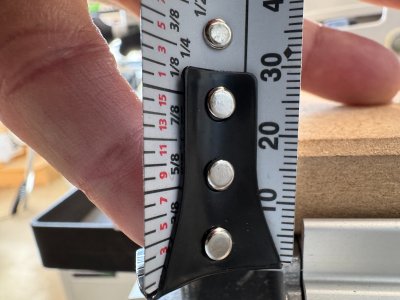
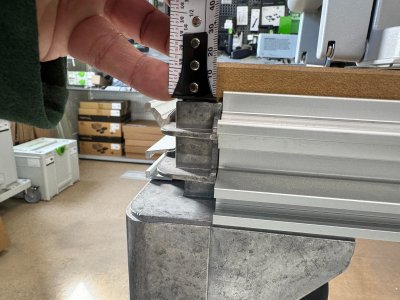
I took some pics - but in one, it looks like the MDF the 19mm thickness I mentioned with 7mm above the rail - however the other looks like the MDF is 15mm?

Thanks!
 

Attachments

  • IMG_1207.JPG
    IMG_1207.JPG
    1.1 MB · Views: 85
  • IMG_1209.JPG
    IMG_1209.JPG
    1.7 MB · Views: 68
Well if you are going to use like the adj. miter bar(s) or say in my case the TSO extentions (the sm. Router table as well) the height has to be right to flush out with the top….second pic is a crown stop for example…I don’t cut angles with the MFT stuff anymore but I think many do
 

Attachments

  • IMG_2448.jpeg
    IMG_2448.jpeg
    1.5 MB · Views: 58
  • IMG_2449.jpeg
    IMG_2449.jpeg
    1.5 MB · Views: 64
Made a little progress using the router to cut out a groove in the bottom of the top to match the MFT rail. The DeWalt DCW620 has a separate edge guide but I found out that the guide from my Skil 10A fits well enough to cut the grooves. And since the overhang of the top to the support stretcher is deeper, cut up a slice of pine to fit and the MFT rail should seat like in the MFT/3.
 

Attachments

  • IMG_1301.jpeg
    IMG_1301.jpeg
    2.7 MB · Views: 40
  • IMG_1338.jpeg
    IMG_1338.jpeg
    2.3 MB · Views: 39
  • IMG_1331.jpeg
    IMG_1331.jpeg
    1.8 MB · Views: 50
The workbench mod has gone deeper, which is to be expected. I've been exploring every mod idea I've had over the past year or so and, of course, it's taking a bit longer than I would have liked (two days would have been ideal, two weeks would be 'normal').

Part of those mods are to build a pseudo-cabinet for the systainers under the workbench. I say "pseudo" because they won't have tops or bottoms, per se. They'll just be screwed into the lower stretchers. Today, I was cutting the plywood when I thought - why not install those MFT/3 rails you modded the bench for and see if it makes it easier?

While I'm not using the 20x96 grid I installed and am using the edges, it seems that they are pretty parallel. Because the 1400 rail on the Festool Hinge and paired with the DashBoard F2 fence, I was pretty surprised (and stoked) that they resulted in 90 degree cuts.
 

Attachments

  • IMG_1667.jpeg
    IMG_1667.jpeg
    4.5 MB · Views: 30
  • IMG_1674.jpeg
    IMG_1674.jpeg
    4.6 MB · Views: 28
The workbench mod has gone deeper, which is to be expected. I've been exploring every mod idea I've had over the past year or so and, of course, it's taking a bit longer than I would have liked (two days would have been ideal, two weeks would be 'normal').

There’s a meme going around in the maker community on social media

“The first two hours of a 10 minute job are always the hardest”

Ron
 
Back
Top