New Kapex Zero Clearance Insert

Dave Askew said:
There is no need to buy 3 separate inserts ! The width of the kerf cut does not drastically change after performing bevel cuts ! The phenolic holds up incredibly well !!

I would just run one, and replace when you deem necessary, but you will be surprised on how well they hold up !!

Dave

If you make a bevel cut 45º left then 45º right your zero clearance is now 5/16". That is only 1/16" less than the factory throat plate on the Kapex I use.

Tom
 

Attachments

  • IMG_2671.jpg
    IMG_2671.jpg
    943.4 KB · Views: 848
  • IMG_2672.jpg
    IMG_2672.jpg
    931.1 KB · Views: 699
I agree.

Having made a couple of my own, a bevel cut will ruin the zero clearance.

Best to remove it when doing bevel cuts.....er.....if you remember.

Don't ask me how I know that.

::)
 
tjbnwi said:
Dave Askew said:
There is no need to buy 3 separate inserts ! The width of the kerf cut does not drastically change after performing bevel cuts ! The phenolic holds up incredibly well !!

I would just run one, and replace when you deem necessary, but you will be surprised on how well they hold up !!

Dave

If you make a bevel cut 45º left then 45º right your zero clearance is now 5/16". That is only 1/16" less than the factory throat plate on the Kapex I use.

Tom

I Tom,

I just measured both of my prototypes, and after beveling 45 degrees both ways, my kerf is still only 3/16, with a slight bevel on both sides....I'm on the job site yet, and I can't post pics from my i phone, but I will later.

Now granted....do you lose true zero clearance after performing multiple bevel cuts...yes, but I cut so many different bevels in a day that it would make no sense for me to constantly change out my inserts. However, the kerf cut at a strong 3/16 is still a lot better than the factory insert IMHO.

I'm cutting base shoe returns as we speak with zero issues with the widened kerf  !

Dave
 
The photos I posted are a single cut with the stock 60 tooth Kapex blade. The distance from edge to edge is 5/16".

This is not meant in anyway to be a knock on the product. Just pointing out that once you do a bevel cut your zero cleance insert is no longer zero clearance.

I cut the self returns for shoe or base with the stock throat plate, never had an issue.

Tom
 
tjbnwi said:
The photos I posted are a single cut with the stock 60 tooth Kapex blade. The distance from edge to edge is 5/16".

This is not meant in anyway to be a knock on the product. Just pointing out that once you do a bevel cut your zero cleance insert is no longer zero clearance.

I cut the self returns for shoe or base with the stock throat plate, never had an issue.

Tom

I completely agree Tom....you do lose a true zero clearance insert once you cut some bevels !!

I know you weren't knocking anything...I'm just really interested in your input as I always intended to just make my own inserts until I got together with Betterleys.

I will post the pictures of the kerf width, and let me know what you think  !!

Oh, and for me, the only complaint I've ever had with my Kapex is that it likes to spit out small moldings !! I've had base shoe explode in my hand !! Now with a auxiliary fence and insert, it cuts like butter for me !!!

Thanks
Dave
 
I never had an issue with the saw spitting out pieces. Comes from the habit of powering down the blade as it just before it breaks through the piece. Old habit from long ago.

Tom

 
I hear you Tom. I was just going to to make my own zero clearance inserts for a big job, coming up next week, where all the cuts are 90 degrees, using red oak.  I'm also putting on a new blade for this build.  When it's done, I'm putting the Festool inserts back on...and, also putting back the,Festool blade, too.
 
James Biddle said:
How long does it take to swap out if you did want separate ZCI's for bevels?

Too bad there is not a quick change insert for the Zero clearance insert. Then you could have three quick change inserts, one 90 and both direction 45s.
 
Just a few pictures of what to expect after making some 45 degree bevel cuts.

Dave
 

Attachments

  • IMG_8716.jpg
    IMG_8716.jpg
    1.6 MB · Views: 1,132
  • IMG_9510.jpg
    IMG_9510.jpg
    1.8 MB · Views: 652
  • IMG_2757.jpg
    IMG_2757.jpg
    1.8 MB · Views: 722
in fact, you only need 2 ZCI one for 90degre cuts and another one for the 45degre you just need to flip it when you need the other side...
 
Cellule said:
in fact, you only need 2 ZCI one for 90degre cuts and another one for the 45degre you just need to flip it when you need the other side...

Won't work, the face side of the screw holes are countersunk.

Tom

 
Thanks for sharing.....any deflextion between the each side of the freshly cut insert?
 
unityroad said:
Thanks for sharing.....any deflextion between the each side of the freshly cut insert?

It remains really rigid after its cut. Being a pretty thick piece of phenolic, its really stable.

It will sing for quite some time whist cutting until it gets broken in, so it must keep tight tolerances.

Dave
 
Thanks for sharing.

It looks pretty nice but I don't see myself buying one.

Maybe it's because I'm just a hobbyist so my Kapex doesn't make money for me...or maybe I'm just a cheap bastard (again)  [big grin]

It takes absolutely no time to find a piece of scrap wood or MDF and make your own.

Less than half an hour at the table saw and router table and you have produced a bunch like these.
[attachimg=#]

And it takes no time to change them so you can make one for straight cuts and one for each of your most used angled bevel cuts.

Kind regards
Henrik
 

Attachments

  • _MG_3562a.JPG
    _MG_3562a.JPG
    58.3 KB · Views: 3,761
+1, Henrik.  In the past I set 30 minutes aside and make a batch of 5 or 6.  I spray some black lacquer on them and I'm good to go for the next six months or so.
 
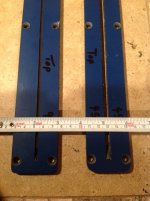
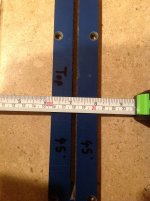
I'm intrigued by the number of woodworkers in this discussion that are frequently replacing their inserts after making bevel cuts. I too made a new insert right after getting my Kapex, and it's even shown in the Supplemental Manual with dimensions for making one. While the factory inserts were a little too wide for my tastes, the need for a truly Zero-Clearance insert on a miter saw is not nearly as important as it is on something like a tablesaw.

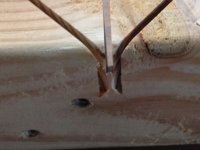
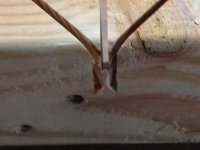
On a tablesaw, the teeth are exiting the workpiece on the bottom. So a zero clearance insert will tend to reduce bottom-side tearout. However, on a miter saw, the teeth are entering the workpiece from below. So a zero clearance insert will not impact tearout in the cut. Where zero-clearance is truly needed is at the fence. This is where tearout is most severe with a miter saw.

The primary benefit of having a narrow insert is to reduce the likelihood of thin offcuts from slipping into the gap between the blade and the edge of the insert. However, even after making bevel cuts, this gap is still relatively narrow, and the size of the offcut that can slip past is pretty small.

There is certainly nothing wrong with replacing an insert frequently, but I'm curious how often this is being done under the premise that it would be reducing tearout in the cut. Tearout is occurring at the fence, not the insert.
 
Tearout is occurring at the fence, not the insert.

And the next Betterly Kapex add on will be.........  ;)
 
Back
Top