OF2200 or OF1400 Sub-bases

cpw

Member
Joined
Jan 6, 2017
Messages
488
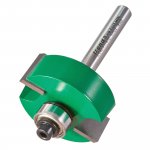
I am building a door, and want to route a 3/4" groove for panels in the rails and stiles that I've built.  The ideal thing would be to buy the plexiglass "routing aid", but close to $400 for just one door is not justifiable.  I could use a single edge guide, but I would much prefer to capture the part to avoid any creep.  There is always the double edge guide solution for around $100, but I would still prefer to avoid that.

I have a suitable piece of acrylic to mount a few guide blocks to; but then need to mount the router.  My other routers have had holes that go through the base that make mounting accessories pretty easy.  Neither of the festool routers have anything obvious.

Anyone have examples of jigs attached to your Festool routers or ideas on how to go about it?
 
I build a large number of doors. The easiest and most accurate way to cut panel grooves into the narrow edges of rails and stiles is to use the router sitting flat on the wide surface of each piece of stock, and cut the slots with a bearing-guided rebate cutter. 100% accurate, zero creep - and no jigs required. Many such cutters are available with multiple guide bearing sizes to accommodate different depths of groove.

If you can’t source a suitable cutter or you’re not comfortable trying to take out 3/4” of material in one pass, use a smaller cutter, make the groove, then readjust the plunge depth to take out the rest of the material to your overall required groove width. If you don’t have enough cutter shank left to do this safely, flip the piece over and make the second cut from the opposite face.

I very often (especially on doors with multiple panels) do this all in one hit, assembling the door as a dry-fit, clamping it all together and cutting all the grooves in one go. This gives you the added advantage of having a lot of flat surface area to sit your router on.  You’ll obviously end up with a rounded groove where the cutter turns through 90 degrees in each corner - you can either square the grooves off using a chisel, or cut small 45-degree corners on your panels. Don’t forget to reduce your panel size by a few mm in every direction to accommodate expansion - infill panels aren’t supposed to be a super-tight fit in the grooves.

Hope that helps.

View attachment 1
 

Attachments

  • 309E3082-4860-410A-8543-36DA0D995FBB.jpeg
    309E3082-4860-410A-8543-36DA0D995FBB.jpeg
    202.5 KB · Views: 153
If you look at the LR-32, it just uses threaded clamps to hold the router in place.  You could piece something together with just bolts and scraps that would do the same thing.

If you want repeatability, clamp the router in place and then glue in some small blocks around the perimeter of the router base.
 
I don't know if it could help in this particular situation, but I have made an auxiliary sub-base for a flattening jig, by screwing the copy-ring adaptor to it. The one that is designed to use the Porter-Cable type bushings, is flat on the outer surface, and snaps onto the base of the OF1400. This gives you a simple way to attach anything to the base of the OF1400 and pop it right off too. No holes to match up, no slipping like the clamped-on bases.
 
Trick - use two edge guides on either side of the door. Basically does what the plexiglass jig does but for less money and it's more adjustable.
 
I took wood butcher bower's advice.  I used a 1/2" rabetting bit to cut the slots, one pass 3/8" deep adjusted to the proper reveal, then flip the door over to get the proper thickness.  It went nice and easy, the 2200 is a beast of a machine but just feels refined.  Dust collection was pretty much non existent for this cut, but that's what the wand is for.

I did mess around a bit, and there are two holes in the bottom of the bases that snap into the machine.  I was able to use a #8 x 5/8 screw to get the base attached to a scrap piece of wood; and then click the router in.  If I do need a sub base for the next thing, I think that is probably the easiest way to attach it.
 
Glad you got fixed up [member=63643]cpw[/member]. FYI the accessory set for the OF 2200 contains (amongst other goodies) an extra-wide baseplate ideal for this kind of stuff, plus an additional baseplate which accepts the kit's undermount dust extraction nozzle. It collects 99% of everything whilst doing rabbeting and edge-moulding work.

Best wishes from over the pond.
 
I did all the routing while I had the rails and stiles dry fit.  The dust catcher wouldn't fit inside the corners, so I just let the chips fly and wore an RZ-mask.  I did use the extended baseplate.  It would be nice if they had an extra side handle on it, but the extra bearing surface definitely helps even without that.
 
Back
Top