Painting shaker doors and construction

DynaGlide

Member
Joined
May 16, 2017
Messages
1,697
I wasn't sure where to put this, but it seems appropriate here.

I've made a total of 6 shaker doors in my short time as a hobbyist. I use this tongue and groove bit set to make them: https://www.amazon.com/gp/product/B00006XMTT/ref=ppx_yo_dt_b_search_asin_title?ie=UTF8&th=1

i-cXJ7mFc-XL.jpg


The center panels I use MDF and backcut with a straight bit so they're flush to the frame on the inside of the door:

i-hd4GThk-XL.jpg


Finally I pre-prime around the edges of the panels before assembly:

i-7p7dbgR-XL.jpg


The one step that bothers me is I have to go manually sand inside the grooves to break the edges otherwise it'll show up after finish and there won't be anything I can do about it. I recall seeing mention on a forum somewhere of a router bit set that performs this operation while doing the grooves, sort of like a back bevel.

If such a router bit set exists it would solve two problems I have:

1) Not having to sand the grooves which is a PITA

2) It would prevent finish from 'sticking' between the panel and the frame:

i-cLZBtJP-X2.jpg


Any ideas? [member=4105]tjbnwi[/member] Sorry to keep tagging you but you're like the painting guru around here.

Matt
 
[member=65062]DynaGlide[/member],

I do not know of a router bit set that relives the grooves panel edge. The shaper heads we use do relive the edge for the reason you mentioned. Doors that we have to do on the router table we end up sanding to relive the groove edge.

Tom
 
tjbnwi said:
[member=65062]DynaGlide[/member],

I do not know of a router bit set that relives the grooves panel edge. The shaper heads we use do relive the edge for the reason you mentioned. Doors that we have to do on the router table we end up sanding to relive the groove edge.

Tom

[member=4105]tjbnwi[/member] Thanks Tom. I'll keep looking. Maybe someone else knows.
 
I have built many paint grade doors just like this...router bit set with soft maple and a glued in MDF panel.

I have dealt with edge relieving issue a few ways.

The first will stir up some people but it works...I have done it on over a hundred doors and have never had an issue.
I break the edge with sandpaper before assembly...just so it is not a sharp corner.
Prime.
After the first primer coat, sand and then apply a slightly thinned bead of timbermate wood filler into that space using a glue syringe.
Wait for it to fully dry then scrape/sand it flush.
Prime again (which will cover the filled gap) and continue with finish schedule.

Second way I recently tried and really liked was that I set up a 1/16" non bearing roundover bit into my router table.
I then ran each piece through, groove down, riding the brass end of the bit. Had to run each piece twice...once for each edge.
Could also set your fence which could help with keeping things square. It was very fast and consistent.

This method creates a large enough roundover that you can successfully spray and not have the finish bridging issue.

Of course you could also just fill that roundover with timbermate and move on! [eek]
 
Alan G said:
I have built many paint grade doors just like this...router bit set with soft maple and a glued in MDF panel.

I have dealt with edge relieving issue a few ways.

The first will stir up some people but it works...I have done it on over a hundred doors and have never had an issue.
I break the edge with sandpaper before assembly...just so it is not a sharp corner.
Prime.
After the first primer coat, sand and then apply a slightly thinned bead of timbermate wood filler into that space using a glue syringe.
Wait for it to fully dry then scrape/sand it flush.
Prime again (which will cover the filled gap) and continue with finish schedule.

Second way I recently tried and really liked was that I set up a 1/16" non bearing roundover bit into my router table.
I then ran each piece through, groove down, riding the brass end of the bit. Had to run each piece twice...once for each edge.
Could also set your fence which could help with keeping things square. It was very fast and consistent.

This method creates a large enough roundover that you can successfully spray and have the finish bridging issue.

Of course you could also just fill that roundover with timbermate and move on! [eek]

Hey [member=65868]Alan G[/member] I like that second idea. I'll play around with it next time I have a project with doors.
 
I don't recall having that problem with my doors, but I make rails and stiles on the table saw.  I make the slot to have an interference fit with the panel.  So it all looks like it is "sticking".  Does your slotting bit allow for adjusting the width of the slot?

My Freud set does.  But I'm too lazy to figure it out so I use the table saw.
https://www.freudtools.com/index.php/products/99-036

Freud's patented Adjustable Tongue and Groove Set is the ideal set for building Shaker-style cabinet doors, or any project requiring precise tongue & groove joints with perfect finished surfaces. The exclusive design features cutters with opposing shear angles to eliminate chipping on both the top and bottom surfaces of your work. And the spacer system allows adjustment at .002" increments to produce joints in 1/2" to 1-1/4" thick material with grooves from 7/32" to 3/8" deep. Bits are 1/2" shank and should be used in table-mounted routers.

I would imagine that wrapping a half-inch diameter dowel with sandpaper and running it up and down the groove would soften the edges quickly. 
 
Packard said:
I would imagine that wrapping a half-inch diameter dowel with sandpaper and running it up and down the groove would soften the edges quickly.

Another good idea. I might just try that as well. In the past I've used my block sander and it's cumbersome. I could do both edges at once with the dowel.
 
By adjusting the groove to fit the panel, you eliminate any rattle, and the need for "space balls". 

An alternative you might consider is to upgrade your center pane to 1/2" thickness. 

You cut your groove as you would normally with a 1/4" dimension.

Note:  I use plywood. 

For the center panel, I thin down board around the edges to fit the groove.  I use a dado head on the table saw, but a router would work too. 

Approximately 9/16" of the perimeter is thinned out.  That goes on the inside of the door, so the appearance of the door remains unchanged. 

The advantages of this are several. 

1.  If "feels" like a more substantial door.
2.  No rattle, and instead of an occasional spot where the paint fills in, the entire slot and panel are seamless.
3.  You can drive screws (short ones) into the door. 

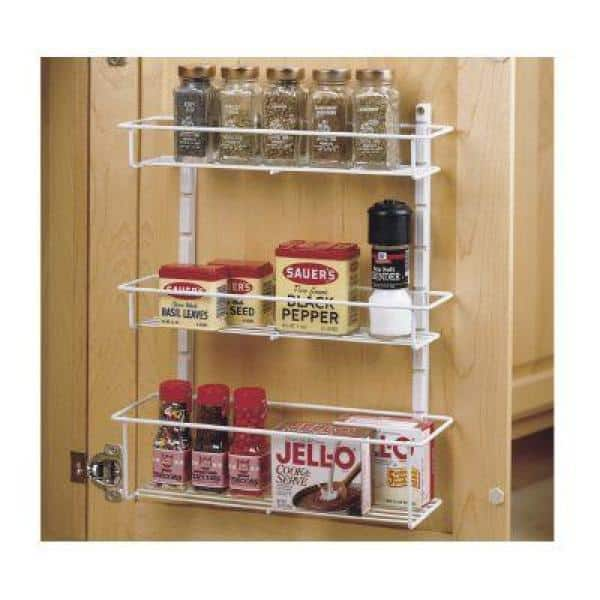
That final note (#3) is useful when you are making shaker drawer fronts and  you want to screw in from behind.  And for doors when you want to screw in a spice rack or similar item.

Normally you want to screw into the rails or stiles, but sometimes the size does not work out.  On this door, I guarantee that if it were a shaker door you would see screws sticking out (it is a raised panel door).

closetmaid-cabinet-door-organizers-73996-c3_600.jpg

 
[member=74278]Packard[/member] Perhaps you missed it but I do exactly what you've described. I start with a 1/2" center panel and back cut it around the perimeter to fit the groove. Sometimes it ends up really tight, sometimes a hair loose.
 
What paint are you using?  How are you applying it?

I've been spraying with Advance (HVLP). 

My fit is always a slight interference fit.  If I put the rail or stile on the center board and lift the center panel the rail or stile will generally stay put.
 
I thought I might have been deceiving myself about the painting.  So when I got home I walked into the guest bathroom which I am remodeling at this time and looked at the most recent cabinet door I had produced.  It is as I said.  The snug fit allows the Benjamin Moore Advance to act as a fillet for the junction of the rails and stiles and the center panel.

Ignore the dust--that is from the tile work. And I don't know why the image shows up on its side.  The original us rotated 90 degrees from what is shown.  But the junction shows up fine.

0PQTD1A.jpg
 
I see what you're saying. I'm using SW KA+ and it doesn't fill that gap. Which I'm fine with and I like the look. I think I just need to do a more thorough job sanding the grooves either with a dowel as you suggested or that specialty brass pilot 1/16" roundover bit next time.

Matt
 
I have that round-over bit from Whiteside.  Purchased from Amazon.com for about $25.00. 

I don't think that is brass.  I think it is a very hard bronze. Or perhaps yellow tungsten carbide.  Whiteside does not specify the material.  But yellow tungsten carbide is at the 85+ on the Rockwell C scale and almost as hard as a file.  Bronze can also be quite hard, but I suspect it would wear too fast.  Brass would give out after the first usage.

This is a very handy bit to have.  I used to relieve the edges on my doors with sandpaper.  This bit is faster and gives a more uniform result. 

Unlike you, I don't like the look of the gap between the panel and the rails and stiles.  Advance does not require a primer.  And if you use a shellac based you will have to sand off the finish and start over. 

I do paint the perimeter so that if there is any seasonal movement the exposed areas will be the right color. 
https://www.amazon.com/gp/product/B000K2AEGI/ref=ppx_yo_dt_b_search_asin_title?ie=UTF8&psc=1
 
DynaGlide said:
[member=74278]Packard[/member] Perhaps you missed it but I do exactly what you've described. I start with a 1/2" center panel and back cut it around the perimeter to fit the groove. Sometimes it ends up really tight, sometimes a hair loose.

Gotta watch out for those loose hairs...  [scared]
 
I use the dado head on my table saw to thin the perimeter. I cut all the rails and stiles first and then make a test sample to fit. Then I thin the perimeter.

Regardless of how you do this, test to make certain of the fit. The method you use should be sufficiently repeatable that all the edges fit the same.

I see no reason that the fit would not be the same each time. No measuring tools are involved. Just test fit and slowly increase the cut depth until the fit is perfect.

How are you performing this operation?

OK, I see you are doing this with a router.  It is probably easier on a router table, but if you support the outboard side, you should get repeatable results.

Speaking of the router, how do you plan to support the stock if you try to round over the slots?  That is not an operation that I would look forward to.
 
Back
Top