After spending some time this past weekend painting some of the downstairs rooms, my wife is chomping at the bit to get the moldings replaced. She brought home some samples, and I think they are going to look great.
I've replaced simple baseboards that were pre-finished, but have never worked with anything like this before. I want to make sure they look as clean as possible after installation. My wife really loves bright, clean lines, so we are planning to paint these white to lighten up the whole look of the downstairs.
So my question is where do I start? I assume they will need to be sanded, primed, then painted. And maybe some sanding between finishes? We have about 250 linear feet of baseboards to install. I haven't measured the door casings yet.
The baseboards are pretty flat, with some minor detail on the top edge. The casings have a few more details, and I assume will take a bit more work to get ready. I appreciate any advice on how I can setup my workflow.
Here are a couple pics of 2 of the rooms we're working on, and the molding samples.
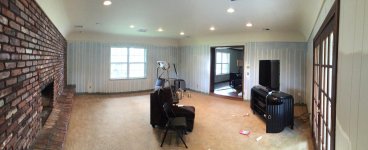
This is the bonus room, which has a huge brick fireplace on the east wall. Interesting tidbit: The original ceiling in this room is vaulted, and the brick goes all the way up. The previous owners put in this new ceiling with HVAC units above so this room could have a separate thermostat.
[attachthumb=1]
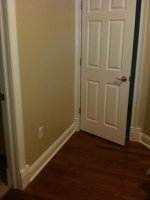
Formal Dining room
[attachthumb=2]
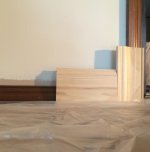
These are the poplar moldings samples we picked up from a local shop.
[attachthumb=3]
Thanks!
EJ
I've replaced simple baseboards that were pre-finished, but have never worked with anything like this before. I want to make sure they look as clean as possible after installation. My wife really loves bright, clean lines, so we are planning to paint these white to lighten up the whole look of the downstairs.
So my question is where do I start? I assume they will need to be sanded, primed, then painted. And maybe some sanding between finishes? We have about 250 linear feet of baseboards to install. I haven't measured the door casings yet.
The baseboards are pretty flat, with some minor detail on the top edge. The casings have a few more details, and I assume will take a bit more work to get ready. I appreciate any advice on how I can setup my workflow.
Here are a couple pics of 2 of the rooms we're working on, and the molding samples.
This is the bonus room, which has a huge brick fireplace on the east wall. Interesting tidbit: The original ceiling in this room is vaulted, and the brick goes all the way up. The previous owners put in this new ceiling with HVAC units above so this room could have a separate thermostat.
[attachthumb=1]
Formal Dining room
[attachthumb=2]
These are the poplar moldings samples we picked up from a local shop.
[attachthumb=3]
Thanks!
EJ