This topic came up on another forum so I thought I would elaborate on a new thread. I have dispensed with the miter head on my MFT and use a sine bar for setting angles.
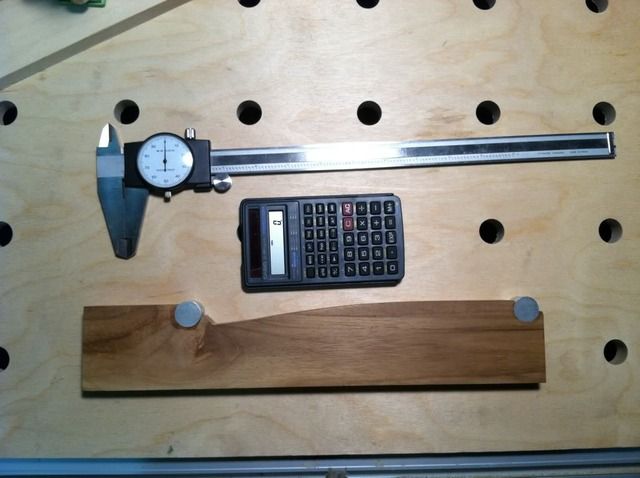
A 12" caliper is needed as is a scientific calculator. I made my own sine bar using the calipers and it came out nicely. Not perfect, it is .001 off on length but that is of little consequence in wood working if you calculate the error. I can explain it's construction if needed. The reality is it doesnt matter what the length is as long as it is known. 10" is a good size, the math is easy ( you just move a decimal) all the gauge blocks can be made within the limits of the calipers and it doesn't take up a lot of room on the table or storage.
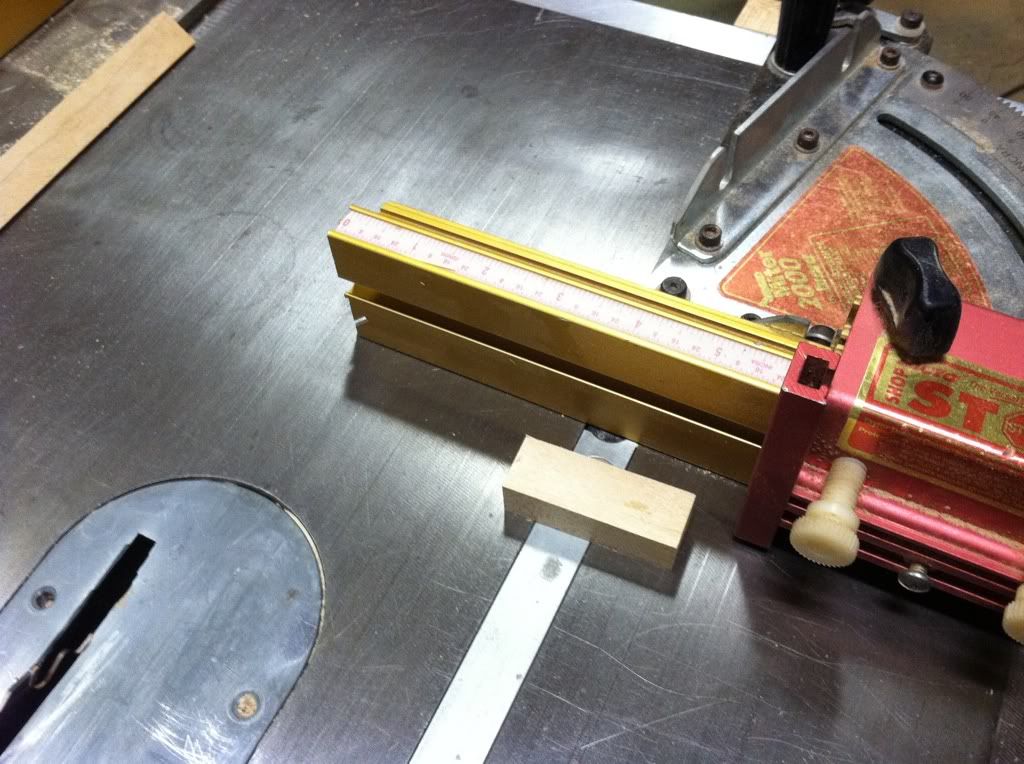
The other thing I did was to make a dog to use as a pivot for the fence, and set up my MFT with a near permanent fence set far back ( thanks Paul ).
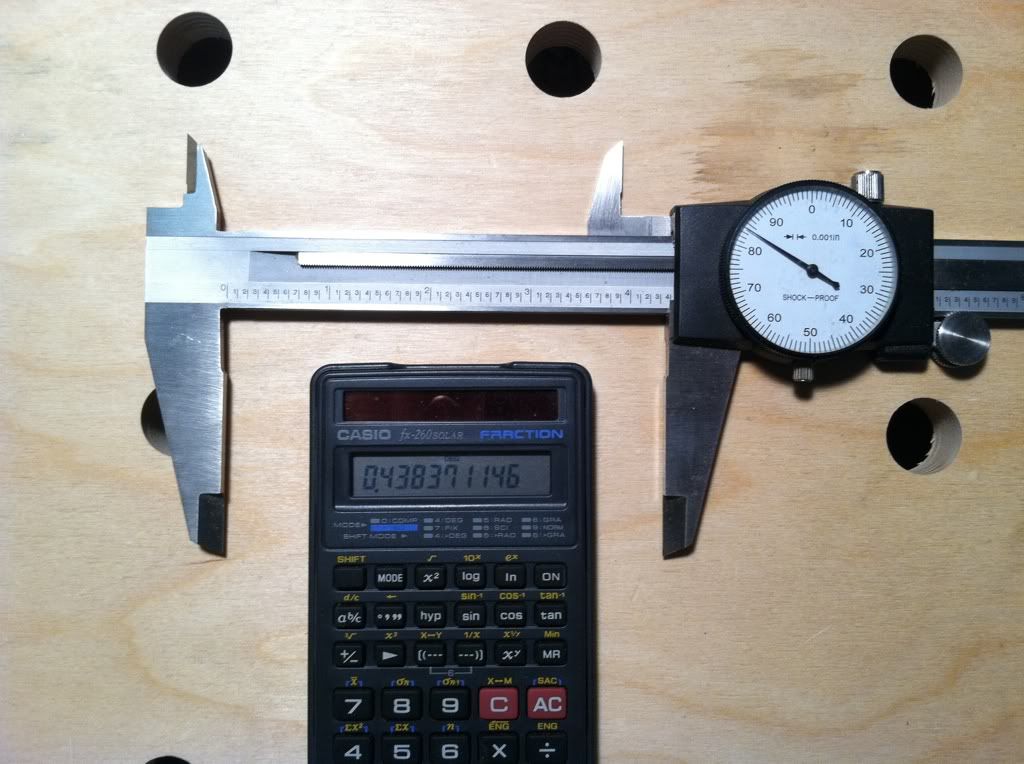
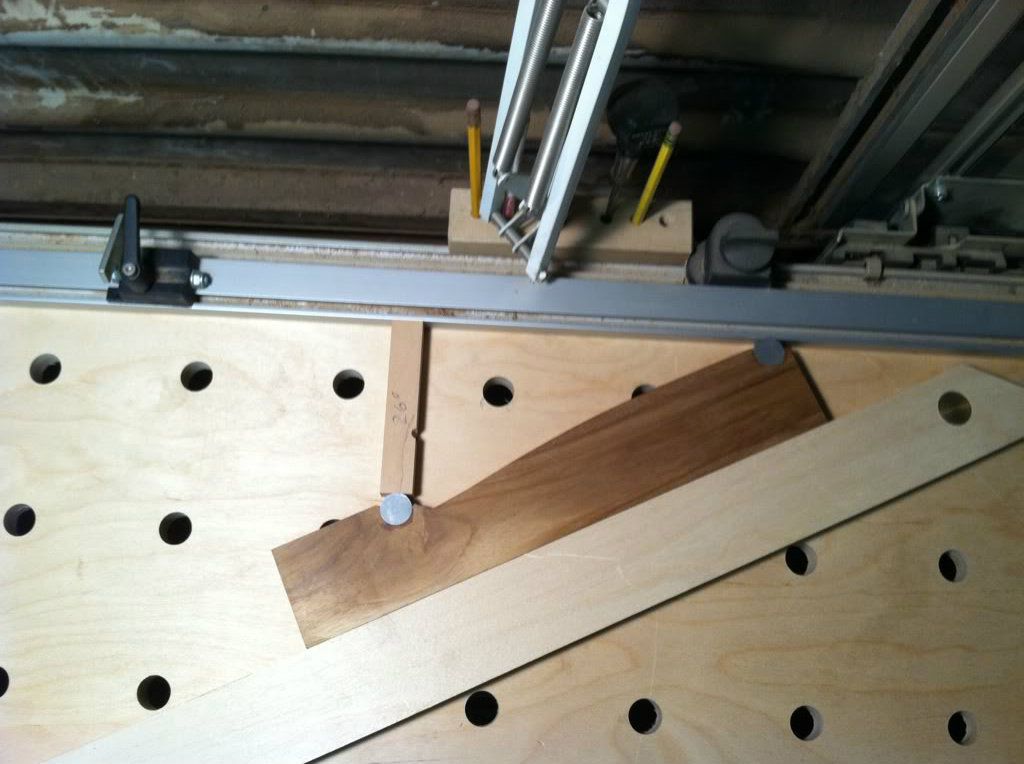
So to set an angle, for this example I used 26 degrees. The dog is installed and the fence is dropped over the pivot. 26 is entered into the calculator and the sine function is entered and the result is .43837 etc. Move the decimal one place to the right and you get 4.3837 now dial that into the calipers. If it is a one time angle cut you can use the inside jaws of the caliper to angle the sine bar slide the works over to the fence till everything is snug and lock the fence down. You are now ready to cut 26 degees.

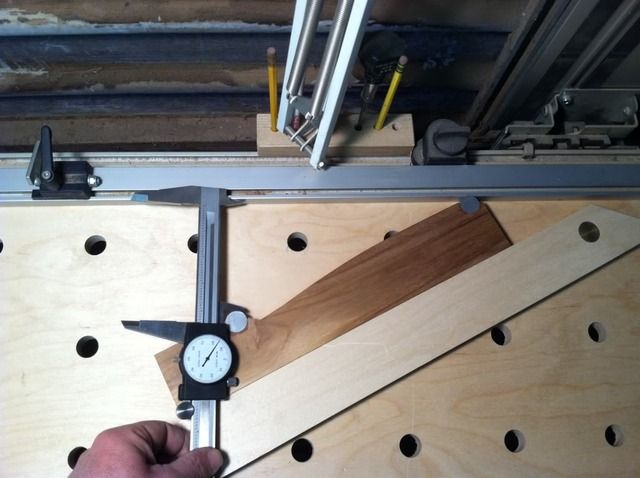
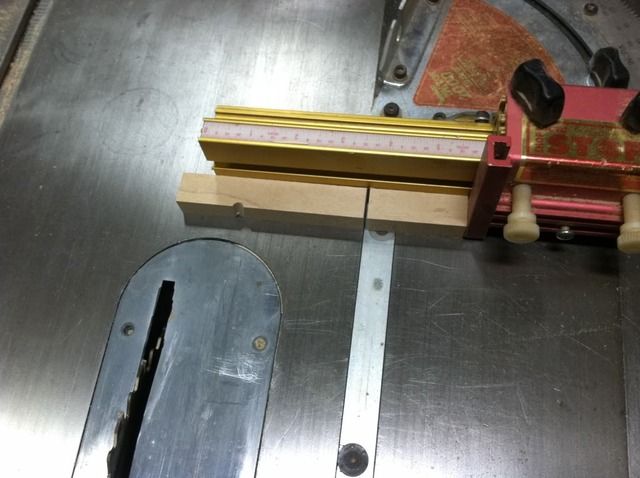
If this will be an angle you will use again or want to start a library of blocks for the future it is real easy to cut them to length with the calipers. Set the stop on the miter bar larger than the piece needs to be. Use the inside jaws of the caliper to space off a scrap piece to be cut.
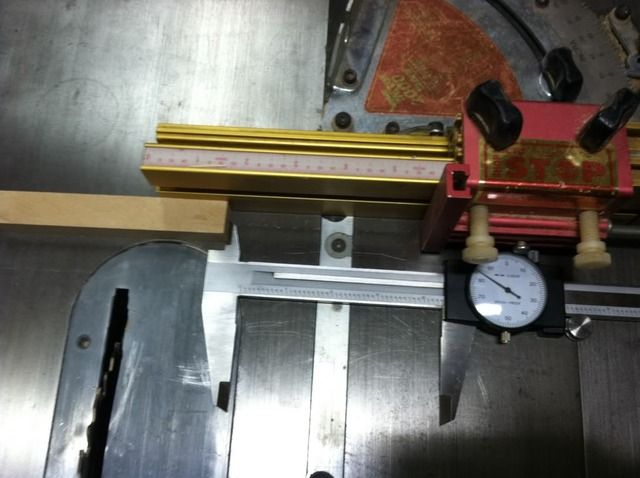
Use that freshly cut piece as a new spacer and slide it next to the stop.
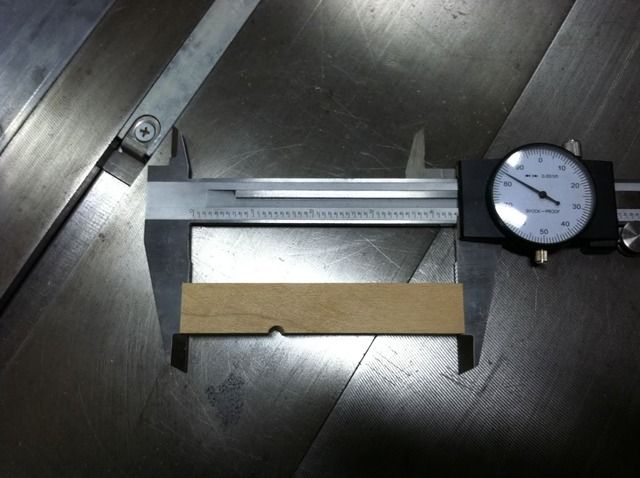
One last cut and if you miter bar has minimal slop you will have a piece of wood that is 4.384". Label it for 26 degrees and you will have a permanent, repeatable reference.
Hope this makes sense. Let me know if you need more info.
Jim
A 12" caliper is needed as is a scientific calculator. I made my own sine bar using the calipers and it came out nicely. Not perfect, it is .001 off on length but that is of little consequence in wood working if you calculate the error. I can explain it's construction if needed. The reality is it doesnt matter what the length is as long as it is known. 10" is a good size, the math is easy ( you just move a decimal) all the gauge blocks can be made within the limits of the calipers and it doesn't take up a lot of room on the table or storage.
The other thing I did was to make a dog to use as a pivot for the fence, and set up my MFT with a near permanent fence set far back ( thanks Paul ).
So to set an angle, for this example I used 26 degrees. The dog is installed and the fence is dropped over the pivot. 26 is entered into the calculator and the sine function is entered and the result is .43837 etc. Move the decimal one place to the right and you get 4.3837 now dial that into the calipers. If it is a one time angle cut you can use the inside jaws of the caliper to angle the sine bar slide the works over to the fence till everything is snug and lock the fence down. You are now ready to cut 26 degees.


If this will be an angle you will use again or want to start a library of blocks for the future it is real easy to cut them to length with the calipers. Set the stop on the miter bar larger than the piece needs to be. Use the inside jaws of the caliper to space off a scrap piece to be cut.

Use that freshly cut piece as a new spacer and slide it next to the stop.

One last cut and if you miter bar has minimal slop you will have a piece of wood that is 4.384". Label it for 26 degrees and you will have a permanent, repeatable reference.


Hope this makes sense. Let me know if you need more info.
Jim