Ram Promaster Van Racking Project

Wing79

Member
Joined
Mar 28, 2011
Messages
47
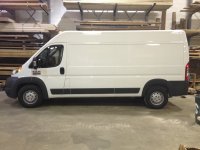
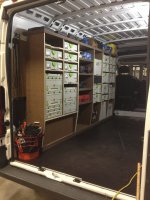
Here are some photos of the racking I built for my Ram Promaster.  She's pretty ugly, but a great work van with tons of room.  I have to finish the other side but heres what Ive got so far.

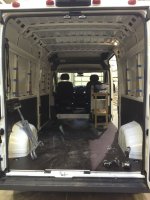
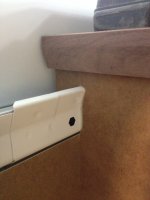
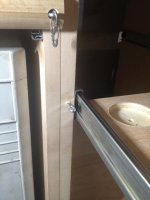
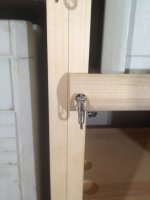
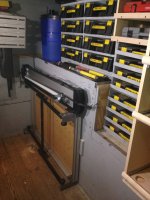
I started by installing wedged pieces to mount the flat panels.

[attachimg=#]

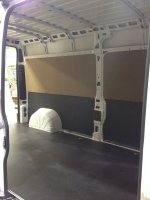
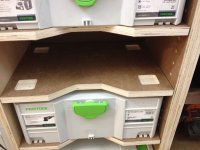
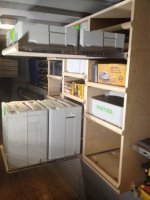
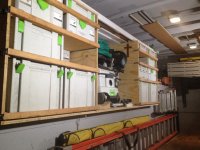
Flat panels installed

[attachimg=#]

[attachimg=#]

[attachimg=#]

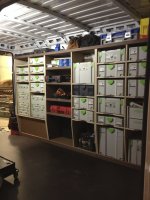
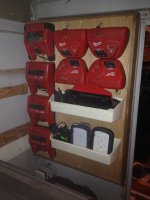
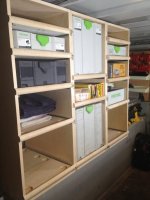
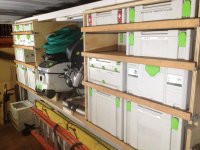
One side finished  [big grin]

[attachimg=#]


Attachments

  • IMG_1451.jpg
    IMG_1451.jpg
    269.6 KB · Views: 14,554
  • IMG_1437.jpg
    IMG_1437.jpg
    314.9 KB · Views: 12,509
  • IMG_1442.jpg
    IMG_1442.jpg
    325 KB · Views: 11,024
  • IMG_1447.jpg
    IMG_1447.jpg
    330.8 KB · Views: 35,761
  • IMG_1445.jpg
    IMG_1445.jpg
    323.7 KB · Views: 16,742
You just made my day!  I'm so excited!  I have 1 month to wait for my promaster and seeing that has brightened my gloom of the next 30 days!!!

It looks excellent and will be such a great solution for me versus what I'm working with now!

Thanks for sharing!
 
I wouldn't say its a ugly van.  Okay not the best looking but it's how a van should look!   Your   " normal " American looking vans are  ugly !  They make your van look sexy!!
 
I test drove one yesterday and love it
A friend of mine is thinking about getting one sometime next year
I am also interested and if I do get one I want to look into the Sortimo system.
 
Bob and I have certainly talked about the Ram and the other offerings based on Euro vans that will be coming in the next year.  I am waiting to see the full size Transit before thinking more. 

Peter
 
jmbfestool said:
I wouldn't say its a ugly van.  Okay not the best looking but it's how a van should look!  Your  " normal " American looking vans are  ugly !  They make your van look sexy!!

I too think it's sexy in an ugly/sexy way!
 
mastercabman said:
I test drove one yesterday and love it
A friend of mine is thinking about getting one sometime next year
I am also interested and if I do get one I want to look into the Sortimo system.

I inquired about the sortimo-globelyst system. It rang in around $5500 installed!  I'll get a partition in and build the rest from there!  I'll put the savings into something else!  It's a nice system but it's pricey!
 
I looked at the first photo and that your having a laugh, how on earth are you going to get that racking in your van - its not big enough ;D ;D ;D

I really like the festool racking, it looks good
 
Really nice work.  Are the shelves adjustable or fixed?  Assume you are using dominos or dowels to hold the sustainers in place and not fly out.

Thanks for sharing!  I'm sure you'll get a lot of productive use out of being organized and it can't help but impress any clients who happen to look in the van!

neil
 
The sortimo system would have been awesome, but at well over $5000 that's a lot of Festools!  One of the thing I like most about how these turned out, is that the side that is pictured is made up of three separate sections.  Each one is held in by a groove cut to fit over a ledge near the top rear of the uprights. Each sections has only four screws that hold them in place, and can all be removed in less than ten minutes (not including the removal of Festools) [wink] I am planning on scanning all of my templates and making cad files in order to cnc cut all these parts.  The van is a pretty easy setup but in my experiences with building racks in vans is most the time is spent in making templates.  All the shelves are adjustable and held in place by 4 pockets cut for the t-loc feet to sit in.  The shelves were all cut and pocketed with my cnc machine.  The uprights are all the exact same size for both left and right sides.  I cut a template and flush routed each piece so they are all identical.

This is the groove cut to fit over the ledge which holds the upper portion of the rack sections snug to the wall of the van.

[attachimg=#]

Thanks for all the positive feedback!

Much appreciated,
Jim


Attachments

  • image.jpg
    image.jpg
    996.2 KB · Views: 10,323
Momma always said " ugly is just on the outside,  beautiful  is what's on the inside." Your van is a perfect example of this. Really nice job on rack. Thanks for sharing
 
Guilliaume woodworks said:
Momma always said " ugly is just on the outside,  beautiful  is what's on the inside."

Reminds me of the crack, "Beauty is only skin-deep, but ugly goes to the bone." 

[big grin]

 
While those vans look like icecream trucks from space, they are the most practical and thereby perfect for what we do. Whats ugly to me is cabinetmakers in giant 4x4 pick-up trucks who only drive in the city. I can't tell you how many people have tried to talk me into one of those. "But my tools are exposed", "put a cap on it", " then its just a less practical van that sucks gas"......"oh ya..."
 
Thanks for sharing! Just can't get over the looks if it. It's ashaim the looks don't match the capability  [blink]

Well done! Love these van threads
 
Here is what the shelves look like with the four pockets under the systainers. 
These are what holds the systainers from falling out while driving.

[attachimg=#]
 

Attachments

  • image.jpg
    image.jpg
    2.4 MB · Views: 12,949
Very nice pockets, I assume you just lift the front of the systainer and then pull it forward from the shelf?
But how about the rear pockets, you have to lift the hole systainer and not just the front?
If they are heavy there are not so many parts to grab the systainer?

Do I also see a LR32 system for variable shelving?
 
Nice rig!!  I just did a few modifications to my truck…….
The original  drawer systems hold 4 sustainers each drawer, 4,3,2,1 X's 2, I separated them and added the kapex and ct 26 in the middle. I fabricated the new drawer systems (3) to be single wide and 2 systainers deep  I was having a hard time figuring a way to lock the drawers and finally came up with a solution that works great!
Also made a charging station that hangs on a french cleat for my Milwaukee cordless stuff. And finally added a few blocks of wood and a bungee to hold an mft and the ug extensions  Doesn't look like much but from what it was to these few mods it makes a world of difference!
 

Attachments

  • IMG_3761.jpg
    IMG_3761.jpg
    1.9 MB · Views: 2,296
  • IMG_3764.jpg
    IMG_3764.jpg
    2.2 MB · Views: 4,071
  • IMG_3762.jpg
    IMG_3762.jpg
    2.3 MB · Views: 13,596
  • IMG_3760.jpg
    IMG_3760.jpg
    2.1 MB · Views: 2,964
  • IMG_3759.jpg
    IMG_3759.jpg
    2.3 MB · Views: 18,993
  • IMG_3758.JPG
    IMG_3758.JPG
    2.9 MB · Views: 16,681
  • IMG_3757.JPG
    IMG_3757.JPG
    2.6 MB · Views: 19,509
  • IMG_3766.jpg
    IMG_3766.jpg
    2.5 MB · Views: 13,653
neeleman said:
Very nice pockets, I assume you just lift the front of the systainer and then pull it forward from the shelf?
But how about the rear pockets, you have to lift the hole systainer and not just the front?
If they are heavy there are not so many parts to grab the systainer?

Do I also see a LR32 system for variable shelving?

Yeah, once you lift the front of the systainer you just pull it right out.  The heavier ones go in and out with the same ease. 

Also no LR32  [sad].  Yet.......
 
Back
Top