Cheese
Member
I needed a side entrance door for a garage that will be demoed in the spring. I checked at Menards and any cheap slab door was a $100 and with a jamb was around $120+. Obviously HD and Lowe's are more. [crying]
I decided to visit the local recycle center and just purchase anything in the $20-$30 range and make it work. I spotted a full view exterior door in pretty good condition. On further examination, it appeared to be constructed of Doug fir with thermo-pane glass.
GOOD ENOUGH I paid the $30 and took my new door home.
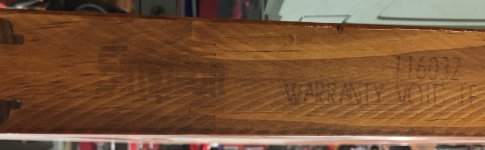
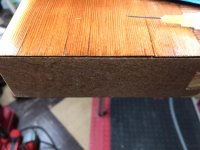
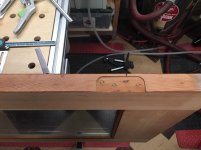
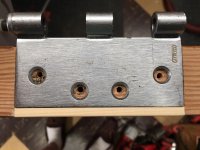
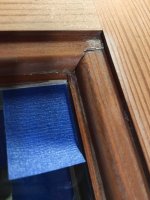
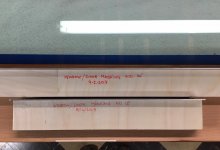
After some sanding and dismantling I came across this stamped into the top edge of the door.
[attachimg=1]
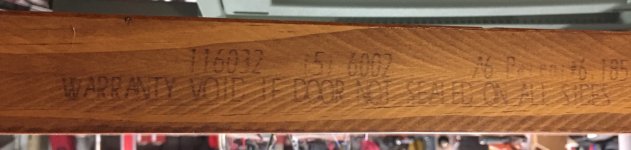
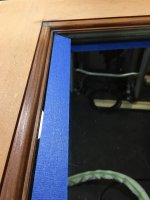
[attachimg=2]
While the name may be difficult to make out, the style number 6002 immediately registered with me as I've already installed 3 Simpson full view exterior doors on the house. All were marked style 6002. [cool]
So then it kicked in, I had just purchased a $700 Low E door for $30.
https://www.simpsondoor.com/find-a-door/
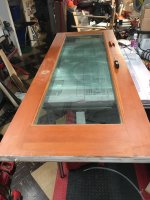
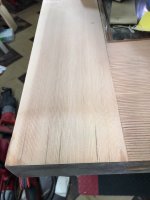
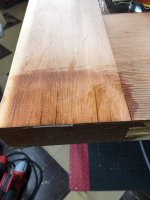
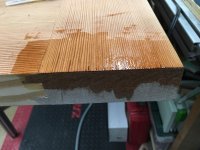
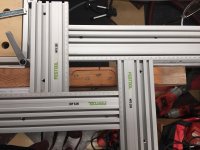
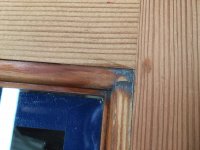
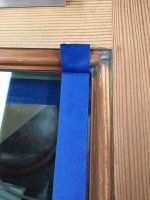
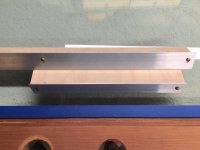
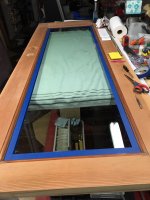
Here's a shot of it in the shop.
[attachimg=3]
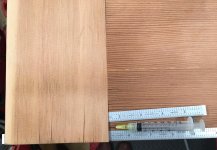
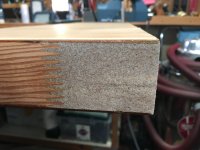
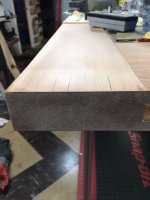
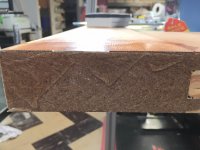
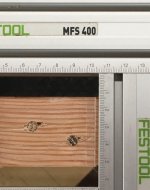
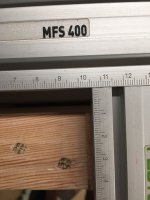
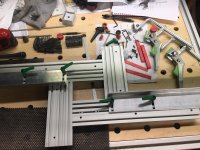
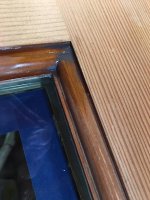
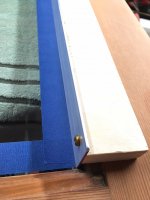
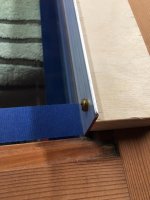
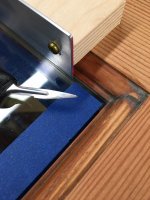
After some sanding, I noticed that some of the Doug fir was delaminating from the lower portion of the door. Notice that in image 5 the machinists scale can be pushed to the outside edge of the stile. Complete delamination of the bottom of the stile.
[attachimg=4]
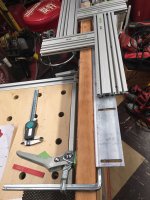
[attachimg=5]
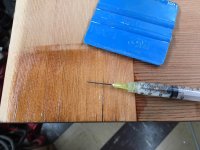
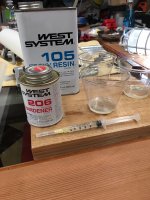
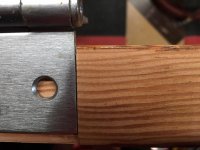
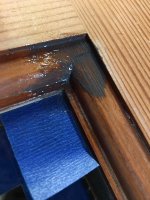
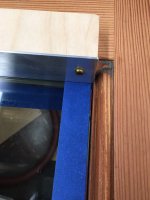
The lower portion of Simpson doors are interesting because they use a composite material in the bottom of the door to prevent rot from forming. So the real issue I faced is how to re-adhere the veneer to the composite material because the composite was going no where in a hurry.
[attachimg=6]
I decided to visit the local recycle center and just purchase anything in the $20-$30 range and make it work. I spotted a full view exterior door in pretty good condition. On further examination, it appeared to be constructed of Doug fir with thermo-pane glass.
GOOD ENOUGH I paid the $30 and took my new door home.
After some sanding and dismantling I came across this stamped into the top edge of the door.
[attachimg=1]
[attachimg=2]
While the name may be difficult to make out, the style number 6002 immediately registered with me as I've already installed 3 Simpson full view exterior doors on the house. All were marked style 6002. [cool]
So then it kicked in, I had just purchased a $700 Low E door for $30.
https://www.simpsondoor.com/find-a-door/
Here's a shot of it in the shop.
[attachimg=3]
After some sanding, I noticed that some of the Doug fir was delaminating from the lower portion of the door. Notice that in image 5 the machinists scale can be pushed to the outside edge of the stile. Complete delamination of the bottom of the stile.
[attachimg=4]
[attachimg=5]
The lower portion of Simpson doors are interesting because they use a composite material in the bottom of the door to prevent rot from forming. So the real issue I faced is how to re-adhere the veneer to the composite material because the composite was going no where in a hurry.
[attachimg=6]