Sparktrician
Member
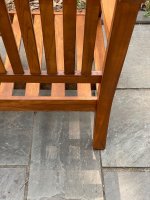
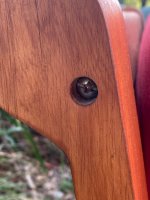
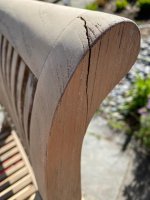
[member=44099]Cheese[/member], that little table really looks spectacular after the work you did on it. [smile]
Sparktrician said:[member=44099]Cheese[/member], that little table really looks spectacular after the work you did on it. [smile]
FestitaMakool said:Following this thread, I’m impressed by your commitment by doing this “light” restoration.
Having persuaded teak on boats, and later outdoor furniture I haven’t touched my deck chair (which is the last of the furniture I have in teak) for maybe 10 years, apart from pressure washing it in the spring. I still have deck details on one of my smaller boats - that’s the only one I’ll persue this year. And I’ll use an oil that you can apply wet on wet until you end up with a highly flexible top coat which resembles flat clear lacquer, but it won’t flake.
I’ve given up on the saturated but still exposed wood fibre surface.
A very nice job Cheese [smile]
Cheese said:FestitaMakool said:Following this thread, I’m impressed by your commitment by doing this “light” restoration.
Having persuaded teak on boats, and later outdoor furniture I haven’t touched my deck chair (which is the last of the furniture I have in teak) for maybe 10 years, apart from pressure washing it in the spring. I still have deck details on one of my smaller boats - that’s the only one I’ll persue this year. And I’ll use an oil that you can apply wet on wet until you end up with a highly flexible top coat which resembles flat clear lacquer, but it won’t flake.
I’ve given up on the saturated but still exposed wood fibre surface.
A very nice job Cheese [smile]
That's interesting [member=71478]FestitaMakool[/member] ...because my very FIRST major refinishing project was helping a friend of mine refinish the complete exterior of a 24' wooden Norwegian sailboat about 40 years ago. Everything on the boat was either painted wood or oiled wood except for the mast which had spar varnish applied. An interesting and very pretty little boat, the perfect size for a 1-3 man crew. It was supposed to be quite rare as there were only a dozen or so imported into the US.
I first got involved because the boat had a 2 cylinder diesel engine and the owner was having issues with electricity and wiring. So...I showed up for the mechanical issues but stayed around for the wood finishing issues. [big grin]


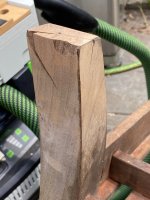

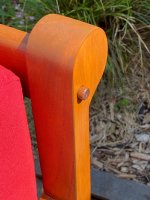
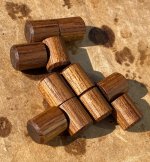
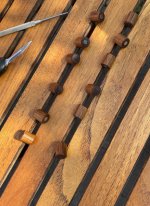
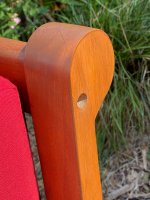
Dr. P. Venkman said:Love the dowel solution!
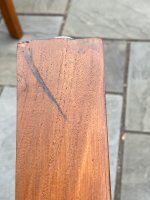
The whole project is looking terrific. You mentioned 180/220 grit - did you go to 220 on all of the furniture?
I have a single teak bench I want to refinish, and I'm definitely stealing some ideas from your project.
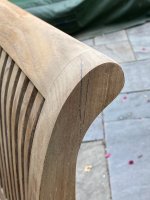
Michael Kellough said:About the Cubitron, do you feel the abrasive ratings are comparable to other abrasives? Seems to me the Cubitron is cutting coarser than the rating, compared to other brands/compositions.
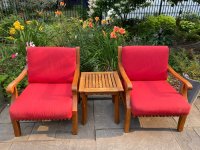
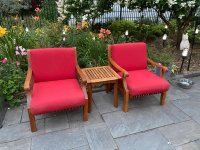
Michael Kellough said:Agree with Venkman, amazed at the amount of improvement you’ve produced. Almost looks like new furniture.
About the Cubitron, do you feel the abrasive ratings are comparable to other abrasives? Seems to me the Cubitron is cutting coarser than the rating, compared to other brands/composition