RO90 polishing lacquer HOW TO??

Joined
Feb 10, 2012
Messages
36
I have bought into the Festool product line as support I am told is phenomenal.  My dealer up here sadly doesn't know their product so I am turning to here in hopes of getting the answer.

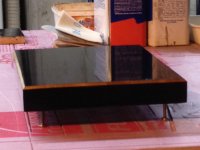
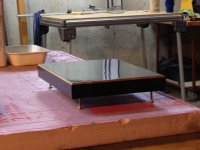
I want to get that mirror finish on a wooden table I just made.  I haven't found any youtube video on using the polishing side of my RO90 I just bought.  The table is a small hallway table about 11" wide x 26" long with 1 1/4" legs.

IMG_0144.jpg


I have an Earlex HVLP for applying some Target2000 lacquer onto my table.  I know that I will need to sand/polish between coats to get the glass mirror finish, but as I have never done this before, I am at a loss as to the steps that I need to do.  The table is made out of maple, and is currently sanded down to 400grit and is silky smooth.  (using my ETS150/5

I am fine in spraying with the Earlex to put my lacquer on.  Between coats, how is best to sand?  At what point do I start to polish?

I have the StickFix Polishing Pad, but have not bought any of the sponges or felt pads.  What do I need?  And what about polishing paste?

HELP  I don't know where to start.

Matt.
 
Matt, polishing isn't an area of expertise for me but I'll get the ball rolling here.  First, get the table top as flat as you can.  Any imperfection will jump out with the mirrored finish.  Sanding between coats is the same as any finishing job, scuff and remove any nibs, I use the 320 Granat hand sanding pads.  Build up the finish with numerous coats.  I'm not familiar with the Target product you're suing so I can't say finishing schedule you'll need to use.  Let the lacquer cure for as long as possible.  The harder it is the better before you start polishing.

To start you'll sand, what grit you start with depends on how level your finish is.  If you have any orange peel you'll need to remove that first then work your way through the fine grits removing all dust between grits.  I've used Platin pads with good results.  As for the actual polishing, you can make that as complicated or as simple as you want.  For your first project go the simple rout.  Get the polishing pad for the RO90, I'd try a hard felt pad, although the orange medium sponge would probably work too.  Then the soft felt or fine sponge, finish with sheepskin.  Polishing compounds, there's no end to complication there can add to your project.  Go simple, I'd try the new Festool polishes and see how that works.


I don't know if I would want a mirror finish on plain sawn oak. The medullary rays will cause a refraction of the light being returned from the surface. That alone will affect the reflective properties of the surface.

The 2000 series Target finishes are water bourne alkyd varnish. They are not lacquers. The 6000 and 7000 series Target finishes are water bourne lacquers. Varnish does not polish well.

I don't have an Earlex HVLP, so some of the numbers apply to my Q4. I change needles, orifices as need be. I also mix air caps to fit my needs.

I suggest prepping a test piece(s) with the exact same finish schedule as your table will have. Place them next to each other during the finish process, what you do to the table you do to your test piece(s).

With the above in mind (I would);

Squeegee on a water based wood filler for oak floors, sand when dry, repeat until rays are level and all pores are filled.

Brush treat all end grain with a 10% cut finish or 1000 series (best choice) sanding sealer (I would use Zinsser Seal Coat, but it is alcohol based, you need a safe place to spray it.) . May take 3 or 4 coats. On a table this size it is easier to brush than spray the edges.

Spray on the entire table 2 or 3 coats of 10% cut or 1000 series sanding sealer. If your sprayer came with a Ford 4 cup, 20-22 seconds. Allow to dry a few hours, sand the final coat with 400 grit.

Target does not make a retarder for their 2000 series products. I would test spray some with a 10% add of Floetrol. The finish should be at 28-30 seconds on the Ford 4. You can do this will your waiting for the sealer to cure. Spray on a vertical surface, no sags, good grip and no orange peel your good to go. Remember to spray with your shoulder, not your wrist. You MUST keep the gun parallel to the surface at all times. Any change in film thickness shows in the finish.

Assuming you are using gloss finish. You should not have to polish the varnish.

If you really want to try to polish, here are the steps I use for lacquer;

All of the above (with change in coats noted in the next line).

Spray 4 coats of finish sanding with the grain at number 2 and 4. Tack between each sanding with a damp micro fiber cloth. Spray on coat 5.

Let cure a few days.  

You are using an RO sander, while the piece is curing, order Griots polish (order their sealer also) and wait for delivery. Their polish is designed for RO polishers. I believe the Festool polish is designed for the Shinex, a rotary polisher. There is a big difference in the way the polish breaks down.

If you have no orange peel try just polishing the surface. If all is good, seal and wax. Do not use a cleaner wax. It will scratch the surface.

If there is orange peel, I would make a judgement call on which grit to start with. I'll have you start with 800. Do not sand with just your hand on the paper, it is not flat. You must us a block or special sanding sponge. I'd also suggest if this is your first attempt, wet sand. It is more forgiving than dry sanding. Move on to 1200, 1800, finish with 2400. Make sure you clean very well between each grit change, any remnants of the previous grit will mess up the surface. (I have cloths to 12000)

This being your first attempt, use the medium sponge to start. Just safer than the felt for someone just starting.

Spray the top with a light mist of water (with experience you will not have to spray the surface).

With the RO off apply a small amount of polish to the pad, spread this around on a small area of the top. No pressure, but in contact with the surface, speed setting on 2 or 3, start the RO. You can increase the speed once the polish is "on" the surface. You don't want to broadcast the polish all over starting at to high of a speed.

Gently, yet firmly work a small area of the surface. Add polish to the pad as need be. Be very careful not to "burn" the edges and corners.

Dry buff the surface with the sheepskin pad. See how it looks.

The felt pad is best for removing swirl marks. I also use it to dry buff.

Seal and wax.

Once you're done you will be tempted to run a rag or your hand across the surface. This is the first step to wrecking your finish. Very fine micro fiber, or cheese cloth to wipe. (Sanitary napkins are one of the best products to wipe with)

I don't own a 90, but this is how I use the 125.

Also the finish will be no where near the look of a solid color cleared and polished finish for the reasons given above. Don't expect a "piano" finish.

Tom

 
You are correct.. it is Target 6000.  My memory in old age must be failing me.

I also realise that the cut of the wood is not that fantastic that it will broadcast colour and grain that will make the piece look fantastic.  But in my way of thinking, I'd rather practice on several pieces to get the technique down then move onto more exotic woods that will show better.  I wanted to get the know how to get started.

Thanks tjbnwi, it is most helpful and have given me a great starting point to begin with.  I am sure that I will mess up several times and will likely be coming back to ask for more advice.  But I have to start at some point and hopefully with perseverance I'll get better.
 
As usual, IMHO Tom (tjbnmi) has given some great advice.
Depending on what type of polished look you want, you may want to also check out the Target Fourm for advice. Specifically the 101 - Buffing and Rubbing EM6000 goes over using EM6000. They suggest using Menzerna compounds.
EM6000 can sometimes give light colored wood a bluish haze or look, so a good base of dewaxed shellac will give it a nice warm tone more in line with a traditional solvent based finish.
EM6000 dries very quickly when spraying with a Turbine HVLP so I would definitely add up to 10% Floetrol, distilled water or Benjamin Moore extender (K51800). Thinning it helps keep the surface wet longer so any over spray that dries and falls back on to the work sinks below the surface before it dries. I also like to have a fan set up to suck any of the over spray away. Keep your gun 6-8 inches from the surface and get a nice wet coat. Unless the EM6000 is over 18 months old it shouldn't fish eye.
Target also makes a grain filler. I have never used it but it might be worth a look.
Good luck.
Tim
 
The change in grain depth will drastically affect the surface reflection.

The line that appeared in this finish is 1.5 to 2 thousandths of an inch below the a joining surfaces.

I have the pictures out of order, you can see the distortion better in the second photo.It barely shows up in the lower center of the first. I had to sand the finish and recoat the center section, resand, then final polish.

Tom
 

Attachments

  • IMG_0437.jpg
    IMG_0437.jpg
    179.4 KB · Views: 796
  • IMG_0436.jpg
    IMG_0436.jpg
    220.5 KB · Views: 760
Back
Top